Your cart is currently empty!
Year: 2021
-
Component approach for chatbot
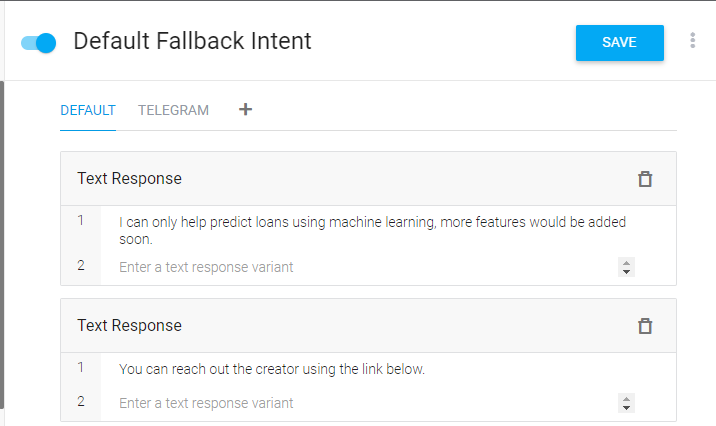
It is rare that business doesn’t want to provide a 24×7 personalized services. But they rarely do. Why? It is easy to personalize content in graphical user interface (GUI), but it is generally impossible to personalize arbitrary services as user interaction design and implementation can get out of hand quickly. Hiring live agents is not option, as it is not scalable to operate. Chatbot has the potential to be the solution, but it is too expensive to build today.
There are many reasons why it is expensive to build usable conversational user interface (CUI) to your services. Today let’s focus on a major one of these: the lack of component based framework. I will talk about what is the component driven development and why it is a good idea to adopt this methodology. And then we will cover the main considerations for building a component based framework specific to conversational user experiences. It should shed some light on why such framework is more involved thus hard to come by. At same time, it should also be clear that nothing is really insurmountable, chatbot will be built in far greater number than any other types of application when we overcome this and other blocking issues.
Component driven development
Component-Driven Development (CDD) is a development methodology that advocate build things based on prefabricated components. This methodology is popular because it exploit the following observation: it is generally much more involved in building something than using it. You can light a match, but can you produce a box of matches? Way harder. Using off-the-shelf component is a key way to reduce cost in building things. It is no surprise that CDD is widely adopted in real world, we can see its application everywhere, in construction, in computer manufacturing, and of course in software development.
But what is a component? Per Cambridge dictionary, A component is a part that combines with other parts to form something bigger. In software development, there are three aspects about component:
- Self contained. The component should provide the claimed functionality without external help. For example, any date picker will encapsulate the details like leap years, variance in months of the year and interaction between day of week and day of month, etc. The caller of the component does not need to know anything about it.
- Reusability. The same component can be wired into different context for different larger purpose. Like, the same date picker can be used in any context where we need to get a date from user, and it is typically possible to wire the result of this component to outer context declaratively.
- Configurability. Ideally, builder can customize its behavior via configuration (think low bandwidth control so caller does not have to say much). It is very easy to setup the initial state of date picker to for better user experience, and sometime, it is also easy to configure the look and feel via well defined control.
Trending Bot Articles:
2. Automated vs Live Chats: What will the Future of Customer Service Look Like?
4. Chatbot Vs. Intelligent Virtual Assistant — What’s the difference & Why Care?
In user facing front end development, CDD is even more prevalent. Almost all modern frontend framework at their core are component based, Reactjs, SwiftUI, Vue, you name it. But why this is the case?
Benefit of the component based approach
There are many possible angles that component based approach can be advantageous.
- Since the same component can be used multiple times in the different context, the average cost of get same functionality via component is lower, some time much lower comparing to build it from scratch (can be close to zero).
- Simply update the component to new version can fix the issues of component without much of builder’s involvement, some time before builder even realized there is a problem.
- Using component can greatly reduce the time to market. As component can be prefabricated or developed in parallel.
- Using component allow builder try different things quickly. As builder can focus on what they want instead of how to build it.
Conversational user interaction (CUI) component
For conversational user interface, the component based approach can be more appealing. As half of the user interaction is dictated by end users, it is very likely that we will converge to smaller set of CUI components thus introduce huge cost savings in building conversational user experiences. But what are the basic considerations of highly reusable conversational user interaction component?
Schema
The center of the any CUI component is what information, or set of slots, can be collected from user through conversation so that chatbot can use such information to invoke services user wants. Obviously schema for the same vertical can be fairly stable, which makes conversational user interaction a profitable target for componentization.
Interaction logic
Given the set of slots that chatbot need to collect through conversation, one can define the interaction logic, imperatively or declaratively, which dictates how these slot will be filled. This is the part of the CUI component that need to be encapsulated. One of the key requirements on the conversational interaction logic is order insensitivity. Assume user knows what they want, the collected information should not change regardless in what order user choose to provide the information. In another word, CUI component should behave deterministically with respect to the order of user input. While the state machine is enough to model the graphical user interaction (GUI), one typically needs to use statechart (Harel statechart) to efficiently model the conversational user interaction even at the single frame level, because we can not control what user might do.
Language hooks
It should be easy to port the same interaction logic into different languages. To this end, there should be simple configuration on these CUI components that one can customize its dialog understanding and text generation behavior. Ideally, such configuration should requires no background in the natural language understanding or machine learning so that everyone can contribute to language aspects without going though steep learning curve.
Runtime considerations
For graphical user interface component, the runtime can be fairly simple because the wiring of components are static after being determined at configuration time. Since we can not control what user might say or do, the runtime for CUI component need to be a lot more involved. For example, to support user seamlessly switching between different topics, chatbot runtime need to dynamically figure out the pronoun antecedent from context, automatically switch between different topics accordingly, so that chatbot and user are always on the same page.
Integration with service
For task oriented conversation, the goal is always connecting user with desired services. So it should be possible for the CUI component to pair up with different service providers for maximal reuse. Furthermore, when CUI component used together with the compatible backend component, builder can simply deliver services directly by populate the table hosted in the backend components, without need to understanding how component works at CUI level.
Conclusion
The advent of high level component based frameworks greatly reduced the cost of building the GUI application, and there is little question that these frameworks contribute to the ubiquitous availability for web and mobile apps. However, the conversational user experience are still mainly built from scratch. It is excruciating slow and expensive and only the team with extreme deep pocket can do it well. Lacking of well designed component based CUI framework has plagued the chatbot development for so long as there are many aspects need to be taken care of. But the wait is over: check framely.io to see how you can build chatbot in a component approach today.
Reference:
State Machine: State Explosion
Don’t forget to give us your 👏 !
Component approach for chatbot was originally published in Chatbots Life on Medium, where people are continuing the conversation by highlighting and responding to this story.
-
A free chatbot to download
A simple fun chatbot for Windows to download (Checked for viruses, some adult content)
https://www.virtual-girlfriend.co.uk/annie%201.14s%20release.zip
submitted by /u/AIchatbotss
[link] [comments] -
APPS FOR HEALTHCARE PROFESSIONALS: AMAZING CONCEPTS FOR 2021
https://yugasa.com/mobile-apps/apps-for-healthcare-professionals-amazing-concepts-for-2021/
But it’s the same source that people criticize these days for damaging the health that reminds us of its importance: smartphones. As a result, healthcare software becomes ingrained in your everyday routine.
We’ve compiled a list of some of the top healthcare app ideas that you may employ.
- App for Making Appointments
Appointment scheduling applications are incredibly efficient and are typically created for the benefit of doctors. Various doctors and health specialists created their own doctor appointment scheduling app.
Patients can use this app to verify the doctor’s availability and schedule an appointment.
Creating a social platform for both doctors and patients is another excellent idea. Patients can contact doctors here and request a consultation, make a phone call, or book a home visit, depending on their health concerns.
- Women’s Health and Wellness App
If you’re worried about women’s health, all you need for your startup is an app that focuses solely on keeping women’s health at its finest. You can create a healthcare app to help women track their menstrual cycle, treat a medical problem, or discover inner peace.
In the medical field, there are many creative concepts for women’s health. Consider an app that performs the functions of a digital clinic, but solely for women.
Your app might include a comprehensive list of dietitians, therapists, gynecologists, and other professionals. It could be the finest place for women to ask professional doctors questions and obtain treatment. You may also integrate text and video chat, where ladies can seek advice on any health concern.
- App for Lifestyle Diseases in Healthcare
One of the top healthcare app ideas is Chronic Disease Management, often known as Lifestyle Disease Management.
Chronic disorders, such as high blood pressure, kidney disease, obesity, and others, necessitate ongoing medical care and regular exams. As a result, any startup should consider developing lifestyle disease management software.
You can allow users to track their health at regular intervals and provide a list of medical specialists for a specific ailment with this type of software.
You may also create a database by collaborating with local service providers like clinics and doctors. The patient will be able to respond immediately as a result of this.
Finally, you can integrate IoT into your healthcare app to take your app to the next level. Doctors will be able to keep in touch with their patients as well as perform remote monitoring and virtual meetings as a result of this.
submitted by /u/YugasaSoftwareLabs
[link] [comments] -
How to Output Audio File in Telegram using Dialogflow
Hi all, new to reddit so I will appreciate if I can get some help and advice.
I am try to output an audio file in telegram using dialogflow.
Under ‘Custom Payload’ in Telegram, I used this code.
{
“telegram”: {
“attachment”: {
“type”: “audio”,
“url”: “*the google drive link with the desired audiofile*”
}
}
}
Can anyone give me some advice to enable an online audio file to be sent in Telegram using Dialogflow?
submitted by /u/kwlearning
[link] [comments] -
Building a Bot that Sends Dog Pictures in 20 Minutes
Includes instructions and a link to use it!
This nasty virus has taken something from everyone. For myself and my partner, it was fawning over strangers’ dogs. To help fill that void, I made a bot in ~20 minutes with Zapier that sends dog pictures with a custom message every morning.
The text that she gets at 6am daily, with a new dog. Although I use it for sending dog pics, you can use it to send any files from Google Drive through text, as often as you want. You can use the bot yourself with this link.
What is Zapier?
Zapier is a Software as a Service (SaaS) company that allows anyone to connect software and websites to automate workflows. It has thousands of templates that you can customize, from lead management to automating your calendar. They have a free plan that includes up to 5 Zaps (automations) a month, so anybody can use this bot for free.
You can use this link to see the many apps that Zapier can automate.
What do you need?
To use this bot, you need these accounts:
- Google Drive
- Zapier
- A phone number to send the files to (you’re not sending them to my girlfriend)
Zapier says that you need a phone number from the US or UK, but Canadian phone numbers also worked for me.
How does it work?
Collect the files
First, you need files to send. I downloaded dog pictures from stock image sites, one for each day of the year. When the files were downloaded, I numbered them based on the date (using keyboard shortcuts, this only took a minute).
Files named as YYYY-MM-DD for each day of the year. Set a schedule
Using the ‘Schedule’ module, I set the bot to trigger at 6am each morning and run 7 days a week. Make sure to change your time zone!
Trending Bot Articles:
2. Automated vs Live Chats: What will the Future of Customer Service Look Like?
4. Chatbot Vs. Intelligent Virtual Assistant — What’s the difference & Why Care?
Find the file for today
Using the ‘Google Drive’ module, you can choose to ‘Find a File’ on your desired schedule. Connecting to your Google Drive account is as simple as logging in and selecting your desired folder.
The bot fuses the current day and month to find the name of the file that corresponds to today in your Google Drive.
Connect to the phone
The ‘Send SMS’ module sends a message of your choosing after the person validates their phone number. There is no easy way to directly send the picture in the text message, so I opted to send the ‘Web Content Link’ from Google Drive. This sends a link to the image right under the custom text that you choose.
And voila!
In only three steps, you have a custom bot that sends files from Google Drive at your desired frequency.
The link below will lead you to a copy of the bot that you can customize. Happy automating!
Schedule by Zapier → Google Drive & SMS
Don’t forget to give us your 👏 !
Building a Bot that Sends Dog Pictures in 20 Minutes was originally published in Chatbots Life on Medium, where people are continuing the conversation by highlighting and responding to this story.
-
Deploying a Machine learning model as a Chatbot (Part 2)
Welcome to the concluding part of our Machine learning integrated chatbot series. I’d recommend you read the first part using this link you haven’t.
In Part 1 of this series, we covered model training and integrating the Dialogflow chatbot into Telegram.
We will continue building the backend using the Flask web framework.
Flask
© https://palletsprojects.com/p/flask/ Flask is a python web framework used to build a lightweight, scalable webhook service to communicate with our chatbot. When the chatbot gets input from the user, it communicates to the machine learning model using Flask to make a prediction.
Create the flask webhook
Before creating our Flask webhook, we need to create a virtual environment to install Flask and its dependencies.
#Navigate to a folder on your computer
cd abdulquadri/oshoare/desktop/loanbot
#install the virtual environment
pip install venv myflaskbot
#myflaskbot is my virtual environment name
Install the Dependencies
Using the requirement.txt file found on my Github page, install the dependencies.
pip install -r requirement.txt
Create the app.py file
#import required libraries
import numpy as np
from flask import Flask, request, make_response,render_template,jsonify
import json
import pickle
from flask_cors import cross_origin#instantiate flask
app = Flask(__name__)
model = pickle.load(open('rfc.pkl', 'rb'))@app.route('/')
def hello():
return render_template('home.html')if __name__ == '__main__':
app.run()After creating the app.py file, create an optional folder called template. A simple HTML file with the tag H1 “Hello World” can be added to see the output in the local server.
Run the app.py
On the terminal, run python app.py
python app.py
Verify that Flask has started on port 5000, as shown in the image above.
Create the predict & Webhook method
Flask uses the predict & webhook method to return JSON information of the prediction to the Dialogflow chatbot.
Would you please copy the code below and paste it into your app.py file?
@app.route('/predict', methods=['POST'])
def predict():
json_ = request.json
query = (json_)
prediction = model.predict(query)
return jsonify({'prediction': list(prediction)})# geting and sending response to dialogflow
@app.route('/webhook/', methods=['GET','POST'])
@cross_origin()
def webhook():req = request.get_json(silent=True, force=True)
print("req")
res = mlprediction(req)
res = json.dumps(res, indent=4)
#print(res)
r = make_response(res)
r.headers['Content-Type'] = 'application/json'
return r# processing the request from dialogflow
def mlprediction(req):#sessionID=req.get('responseId')
result = req.get("queryResult")
#print(result)parameters = result.get("parameters")
ApplicantIncome=parameters.get("Income")
CoapplicantIncome = parameters.get("CoapplicantIncome")
LoanAmount=parameters.get("LoanAmount")
Credit_History=parameters.get("Credit_History")if str.lower(Credit_History) == 'yes':
Credit_History = int(1)
elif str.lower(Credit_History) == 'no':
Credit_History = int(0)
else:
return {
"fulfillmentText": "Error please start again and enter the correct information"
}try:
int_features = [ApplicantIncome, CoapplicantIncome, LoanAmount,Credit_History]
final_features = [np.array(int_features)]
except ValueError:
return {
"fulfillmentText": "Incorrect information supplied"
}print(final_features)
intent = result.get("intent").get('displayName')
if (intent=='Default Welcome Intent - yes'):
prediction = model.predict(final_features)
print(prediction)
if(prediction=='Y'):
status = 'Congratulations you are eligible for a loan 😀'
else:
status = 'We are sorry you are not eligible for a loan at the moment'fulfillmentText= status
print(fulfillmentText)
print(prediction)
return {
"fulfillmentText": fulfillmentText
}if __name__ == '__main__':
app.run()Trending Bot Articles:
2. Automated vs Live Chats: What will the Future of Customer Service Look Like?
4. Chatbot Vs. Intelligent Virtual Assistant — What’s the difference & Why Care?
Test the webhook using a Webtunnel
To test the webhook, we are going to use ngrok. ngrok is a web tunnel tool that exposes local servers behind NATs and firewalls to the public internet over secure tunnels. ngrok makes it easy to test a live application without deploying it to a cloud service.
Procced to https://ngrok.com/download to download ngrok. extract the .zip folder and run ngrok.exe HTTP 5000 to expose port 5000 on your computer to the internet
#expose http 5000 to the internet
ngrok.exe HTTP 5000
Make sure to copy the URL https://0931-105-112-38-173.ngrok.io and keep it handy. Dialogflow will use the URL to communicate with the flask app.
Test that the URL is exposed to the internet by pasting https://0931-105-112-38-173.ngrok.io in your browser. You should get the same welcome page as the one on the local server.
Connecting the backend and the frontend
Now that the Telegram bot and the flask app are live, we connect our bot to the backend.
Remember the URL field we left blank in part 1? Kindly go to the Dialogflow console and click on the fulfilment tab. We will add the URL gotten from ngrok to the webhook URL.
Click save and test your chatbot with Telegram.
Conclusion
Hooray!, we have successfully built our first Machine learning-enabled chatbot.
You can interact with the chatbot using the links below
Link to the chatbot hosted on a website: https://loan-predictor-bot.herokuapp.com/
Link to the Telegram bot: https://t.me/LoanPredictionBot
I hope you found this tutorial interesting. Please share and remember to comment with your suggestions or feedback.
Don’t forget to clap and follow me on LinkedIn for posts on Data Science and AI.
Don’t forget to give us your 👏 !
Deploying a Machine learning model as a Chatbot (Part 2) was originally published in Chatbots Life on Medium, where people are continuing the conversation by highlighting and responding to this story.
-
Deploying a Machine learning model as a Chatbot (Part 1)
© mygreatlearning.com/ “What use is a machine learning model if you don’t deploy to production.”
– Anonymous
Are you tired of waiting for a software developer to integrate your machine learning model into a website for testing after training your model for days?
Are you bored of the usual model deployment to a website?
Are you looking for a fun way to deploy your machine learning model?
Worry no more because, with your python skills, we can take an unusual approach and deploy the machine learning model as a chatbot instead.
Chatbot has been around the corner and is becoming increasingly popular post-COVID-19. What’s more, chatbots are easy to access, easy to build, and can be integrated on almost any platform.
You can check out my previous article on how chatbots can turbocharge your business here.
Grab a seat while I walk you through this beautiful adventure.
The Flow
This project would be divided into two sections, the frontend and the backend.
* The frontend
The frontend would consist of our chatbot, which would be built with Dialogflow and integrated with Telegram
* The backend
The backend Would consist of the ML model deployed as a flask API hosted on a server.
The Dataset.
The Dataset we are going to use is the Loan prediction dataset. The loan prediction dataset is a unique dataset that contains 12 columns. The data was gathered to predict if a customer is eligible for a loan.
The Dataset is publicly available on Kaggle and can be accessed using this link.
Cleaning and creating & saving the machine learning models
Let’s Start with the bottom-up approach and build a simple Machine learning model. For this project, we would not be concerned with achieving high accuracy on our models. We only need enough accuracy so that our chatbot can make decent predictions on the fly.
Loading and Analyzing the Data
We start by importing the necessary libraries like Pandas, NumPy, Matplotlib, and seaborn. We then use pandas read_csv() to read the data.
#import neccessary library
import pandas as pd
import numpy as np
import matplotlib.pyplot as plt
import seaborn as sns#loading the dataset
df_train = pd.read_csv("train.csv")
df_test = pd.read_csv('test.csv')Data preparation and cleaning
Checking the summary of the Dataset, we can see that we have a few missing data. We will take care of the missing data by filling it with the mean and mode.
Please note: that there are more advanced techniques to fill missing data; for the sake of this project, we will prioritize simplicity over accuracy.df_train.info()
<class 'pandas.core.frame.DataFrame'>
RangeIndex: 614 entries, 0 to 613
Data columns (total 13 columns):
# Column Non-Null Count Dtype
--- ------ -------------- -----
0 Loan_ID 614 non-null object
1 Gender 601 non-null object
2 Married 611 non-null object
3 Dependents 599 non-null object
4 Education 614 non-null object
5 Self_Employed 582 non-null object
6 ApplicantIncome 614 non-null int64
7 CoapplicantIncome 614 non-null float64
8 LoanAmount 592 non-null float64
9 Loan_Amount_Term 600 non-null float64
10 Credit_History 564 non-null float64
11 Property_Area 614 non-null object
12 Loan_Status 614 non-null object
dtypes: float64(4), int64(1), object(8)
memory usage: 62.5+ KBFilling missing Data
#Imputing Missing values with mean for continuous variable
df_train['LoanAmount'].fillna(df_train['LoanAmount'].mean(), inplace=True)#Imputing Missing values with mode for categorical variables
df_train['Gender'].fillna(df_train['Gender'].mode()[0], inplace=True)
df_train['Married'].fillna(df_train['Married'].mode()[0], inplace=True)
df_train['Dependents'].fillna(df_train['Dependents'].mode()[0], inplace=True)
df_train['Loan_Amount_Term'].fillna(df_train['Loan_Amount_Term'].mode()[0], inplace=True)
df_train['Credit_History'].fillna(df_train['Credit_History'].mode()[0], inplace=True)
df_train['Self_Employed'].fillna(df_train['Self_Employed'].mode()[0], inplace=True)Feature engineering
Converting categorical variables into dummy/indicator variables.
cat_cols = ['Gender','Married','Education','Self_Employed','Property_Area']
train_df = pd.get_dummies(df_train,columns=cat_cols,drop_first=True)
Training the Model
#split the data into train and test for training
from sklearn.model_selection import train_test_split
X = train_df.drop(columns='Loan_Status')
y = train_df['Loan_Status']X_train,X_test,y_train,y_test = train_test_split(X,y,test_size=0.3,random_state=42)
#import the randomForest algorithm to train the datasets
from sklearn.ensemble import RandomForestClassifier
from sklearn.feature_selection import SelectFromModel
from sklearn.metrics import accuracy_scoresel = SelectFromModel(RandomForestClassifier(n_estimators=100,random_state=0,n_jobs=-1))
sel.fit(X_train,y_train)
sel.get_support()X_train_rfc = sel.transform(X_train)
X_test_rfc =sel.transform(X_test)#Using Recursive Feature Eliminination
def run_randomForest(X_train,X_test,y_train,y_test):
rfc = RandomForestClassifier(n_estimators=100,random_state=0,n_jobs=-1)
rfc.fit(X_train,y_train)
y_pred = rfc.predict(X_test)
print("Accuracy: ", accuracy_score(y_test,y_pred))
print('n')
print("Confusion Matrix")
print('n')
print(confusion_matrix(y_test,y_pred))#Save our model as pickle so it can be reused to make predictions
import pickle
with open(r'rfc.pkl','wb') as model_pkl:
pickle.dump(rfc, model_pkl, protocol=2)After preparing the Dataset, I used recursive feature elimination to select features with the highest predicting factor. I found that using four features, we got an accuracy of 76%, while 11 features got an accuracy of 78%.
You can find the whole notebook containing the code on GitHub using this link.
Building the Frontend
The front end would consist of the Dialogflow bot and telegram integration.
What is Dialogflow?
Dialogflow is a natural language understanding platform designed by Google that makes it easy to design and build enterprise-grade chatbots.
Dialogflow makes creating chatbots easy, and It uses NLU Natural language understanding on pre-trained models to understand Users’ intent with little training data. One of the reasons I choose Dialogflow is its robustness and its easy Integration with another third-party app.
Trending Bot Articles:
2. Automated vs Live Chats: What will the Future of Customer Service Look Like?
4. Chatbot Vs. Intelligent Virtual Assistant — What’s the difference & Why Care?
Creating the chatbots using Dialogflow
We will follow the steps below in creating our chatbot
- Create the chatbot
- Create intents
- Fulfilment
- Integration
Create the chatbot
To create our chatbot, kindly go to https://dialogflow.cloud.google.com/ to create an account. After completing the account, click on create an agent to create the chatbot, as shown in the image below.
Create Intents
When creating a chatbot, Dialogflow presents you with two default intents; welcome intent and fallback intent.
Intents are the actions users want to execute. Intents represent something a user might ask for. Intents help the chatbot agent determine what the users want. e.g. One Pizza, please (Intent: Order Pizza).
Welcome Intent
The welcome intent is triggered when a user interacts with the bot; it is usually a greeting, as its name suggests. e.g. Hello, I’m the loanPredictionBot. Would you like to make a prediction?
Click on the plus sign on the intent tab to Modify the welcome intent and add the response below.
After adding the response, kindly click save and allow the chatbot to train.
After it has finished training, click on the default intent and create a follow-up intent.
Follow-up Intent
Follow-up intents are used to guide the user into making a prediction.
follow-up intent After the welcome intent is triggered, the user would be asked to make a Prediction; if the user clicks yes, the yes-follow up intent is triggered, and the user is asked for parameters to make the prediction. If the user selects no, the No-follow up intent is triggered.
Follow-up intent
The yes follow-up intent is where the real magic happens. This is where the user inputs details to be used for making predictions.
Kindly add the parameters(features) that we selected using recursive feature elimination. These are the features that the user would be prompted for when he tries to make a prediction.
Dialogflow uses entities to extract information from the intent. Use the default sys.number entity so that the chatbot would only accept numbers. Don’t forget to click the save button after adding the parameters.
Using the same technique, let’s create the No follow up intent.
The No follow-up intent would be triggered when the user clicks on No.
The fallback intents would be triggered when the Dialogflow agent cannot understand the user’s input. It would be populated to return a response to guide users on how to use the bot.
For now, the fallback intent would be configured as described below.
Fulfillments
Fulfilment is a feature in Dialogflow that allows the agent to communicate with external applications using a webhook. With fulfilment, you can connect the chatbot to a database, map API or backend service.
To use fulfilment, we must turn it on in the Dialogflow console, go to the fulfilment tab and turn on webhook. Leave the URL field empty for now.
Goto the default yes follow-up intent and turn on fulfilments. This will allow the yes follow-up intent to send input received from users to the backend flask service.
Testing the Agent
Using the Dialogflow console, test the chatbot by typing “hello”. This would trigger the Welcome intent.
Telegram Integration
To Integrate with Telegram, We need to create a Telegram bot.
Kindly go to Telegram and search for botFather. Using the on-screen guide, create a bot and copy the access token. We will use the access token to link Dialogflow with the telegram bot.
Kindly go to Dialogflow and click on the Integration>> Telegram.
Paste the access token as shown in the image below and click start.
Go back to the Telegram bot and interact. You should get the same response.
Conclusion
We have come to the end of the first part of creating a Machine learning model as a chatbot. In part two of this series (link here), we will deploy the machine learning model as a Flask API and link it with our chatbot.
I hope you found this tutorial interesting. Please share and remember to comment with your suggestions or feedback.
Don’t forget to clap and follow me on LinkedIn for posts on Data Science and AI.
Cheers!!!
Don’t forget to give us your 👏 !
Deploying a Machine learning model as a Chatbot (Part 1) was originally published in Chatbots Life on Medium, where people are continuing the conversation by highlighting and responding to this story.
-
How do you build a chatbot that drives sales?
You can…
❌ Tinker with DialogFlow and try to make your chatbot sound human ***SPOILER ALERT: It won’t work and no one likes faux customer service
❌ AB test a few ideas — sounds good but not quite as effective as…
✔️ Use A.I. to show the right message to the right person to get more clicks and sales (this is also what Facebook ads does)
Learn more at https://www.rallyseller.com
submitted by /u/RallySeller
[link] [comments]