Expo, React native… on boarding chatbot : Part two
How onboard user, simply and efficiently.
This is the second part of my chatbot article.
This time we will focus on making an input animation, indicating that your interlocutor is typing.
If you missed the first part, it’s over here !
As I explained in the first part, the chatbot and the user use bubbles, but there is a big difference… this famous animation.
This little animation gives life to the chat, and allows to simulate an interaction with a person and not a machine.

For this animation, we will create 2 components.
- The first one, chat-typing which will be the animation component. A kind of animated bubble with an opening and closing animation.
- The second component, chat-bubble, will look like the user-bubble but with the management of the chat-typing component.
At the end we will modified the chat-bot screen created in the part one, to used the chat-bubble component.
Chat-typing
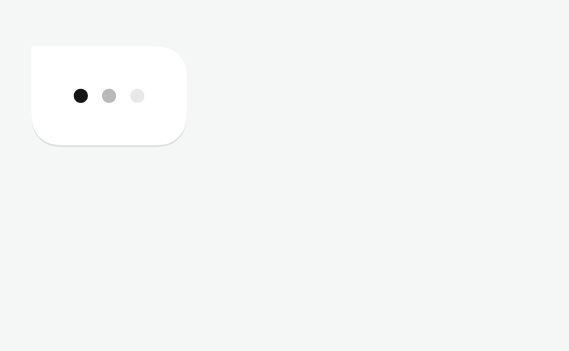
Let’s take a closer look at the design.
We can see 3 black circles, spaced one from the other, and with different opacity. You have to imagine this animated board of course …
We will break this down into three components. Dot, AnimatedWrapper, and finally the exported component ChatTyping.
Dot :
const Dot = ({ color = 'black', size = 8 }) => (
    <View
style={{
            width: size,
            height: size,
            borderRadius: (size || 0) / 2,
            backgroundColor: color
        }}
    />
)
A simple component with 2 props with default value, that can be easily modified.
AnimatedWrapper :
const AnimatedWrapper = ({ delay, children }) => {
const [timing] = useState(new Animated.Value(0))

    useEffect(() => {
const animation = Animated.sequence([
            Animated.delay(delay),
            Animated.loop(
                Animated.timing(timing, {
                    toValue: 1,
                    duration: 987,
                    useNativeDriver: true
})
            )
        ])
        animation.start()
return () => animation.stop()
    }, [])

const opacity = timing.interpolate({
        inputRange: [0, 0.5, 1],
        outputRange: [0.2, 1, 0.2]
    })

return (
        <Animated.View
style={
                {
                    justifyContent: 'center',
                    alignItems: 'center',
                    width: 18,
                    opacity
                }
            }>
            {children}
        </Animated.View>
    )
}
Trending Bot Articles:
2. Automated vs Live Chats: What will the Future of Customer Service Look Like?
4. Chatbot Vs. Intelligent Virtual Assistant — What’s the difference & Why Care?
This component is more complex. We will use the children props which is available for all react components to reuse the animation logic. We wrap children, in this case the circle, to animate it :
<Animated.View
style={
        {
            justifyContent: 'center',
            alignItems: 'center',
            width: 18,
            opacity
        }
    }>
    {children}
</Animated.View>
For the animation we use the Animated library of react native. If you have never used this library I advise you to look at the documentation and play with it a bit.
Let’s start our animation…
We create a state variable (timing), to animate the opacity of the encapsulated object, the circle. We initialise its value to 0. We find this variable in the object loop and in the interpolate function.
const [timing] = useState(new Animated.Value(0))
During the component initialisation, in the useEffect. We create the animation variable. It is an animation sequence, in our case, a delay, and a loop, with start and stop method.
- The delay will allow us to starts animation after the given delay.
- In the loop method, we pass a time animation with the timing method… this method will in a given time (duration), update our state variable, up to the desired value (toValue).
We will now interpret the value of our state variable with the interpolate method. Here is an excellent article explaining in details, the principles of this method. (https://eveningkid.medium.com/interpolation-with-react-native-animations-853e467fe5c1) :
const opacity = timing.interpolate({
    inputRange: [0, 0.5, 1],
    outputRange: [0.2, 1, 0.2]
})
The principle is to interpret the value of our state variable, using an array representing different input points (inputRange) to obtain a value according to the array we pass to it (outputRange).
In our case, for the value 0 we will get 0.2 in output, for the value 0.5 we will get 1, etc.
this way our state variable opacity will oscillate between 0.2 to 1 depending of the timing value.
ChatTyping :
Let’s put that togever…
function ChatTyping () {
const delayValues = [0, 300, 600]
return (
        <Fragment>
            <View style={styles.bubble}>
                <View style={{ flexDirection: 'row' }}>
                    {delayValues.map((delay) => (
                        <AnimatedWrapper key={delay} {...{ delay }}>
                            <Dot/>
                        </AnimatedWrapper>
                    ))}
                </View>
            </View>
        </Fragment>

    )
}
We declare a array of delay values, then use it with a map function and for each value as a millisecond delay, we pass it to the AnimatedWrapper as a de-structured object props :
{delayValues.map((delay) => (
    <AnimatedWrapper key={delay} {...{ delay }}>
          <Dot/>
    </AnimatedWrapper>
))}
Dot is wrapped by AnimatedWrapper and will be animated.
Chat-bubble
In the first part of this article, we have created a user-bubble component. Chat-bubble have the same approach with the chatTyping management.
We initialise de component by starting the chatTyping animation :
useEffect(() => {
let timer
if (!isTyping) {
        Opening.start()
    } else {
        FadeIn.start(() => {
            timer = setTimeout(() => {
                FadeOut.start(() => {
                    setTypingVisibility(false)
                    Opening.start()
                })
            }, 1000)
        })
    }
return () => { timer && clearTimeout(timer) }
}, [])
Like in the user-bubble component, opening is a parallel function used to change the opacity and horizontal position.
FadeIn and FadeOut are both animations created to display the chatTyping animation. You can easily guess their roles…
IsTypingVisibility state variable is used to display either the chatTyping animation or the bubble.
The start method of the animated library takes a completion callback that will be called when the animation is done. So, at the end of the FadeIn animation, we create a setTimeout method called timer. This will represent the duration of the chatTyping animation display. By setting isTypingVisibility to false we simply display the bubble.
return (
    <View style={styles.container}>
        {isTypingVisibility
            ? <Animated.View style={{ opacity: typingOpacityAnimated }}>
                <ChatTyping />
            </Animated.View>
            : <Animated.View style={{ ...styles.bubble, opacity: opacityAnimated, transform: [{ translateX: positionAnimated }] }}>
                <Text style={styles.textBubble} >{data.text}</Text>
            </Animated.View>}
    </View>
)
Few Chatbot Screen modification to finish
useEffect(() => {
if (data) {
        setComponents([
<BubblesFactory data={data?.chatBot.messages} bubble={<ChatBubble/>} interval={3000}/>
        ])
    }
}, [])
We add the chat-bubble component in the components array and modify the interval by adding 2s more to display the chatTyping animation. This way we have the typing animation and then the bubble just after.
You can find the all source code here.
Next step !
It’s finish for today… Thank you for taking the time to read this article. Don’t hesitate to leave comments, ask questions, improvements.
The next part, will be on the mechanics or how to make all the components communicate together and…
Don’t forget to give us your 👏 !


Expo, React native… on boarding chatbot : Part two was originally published in Chatbots Life on Medium, where people are continuing the conversation by highlighting and responding to this story.