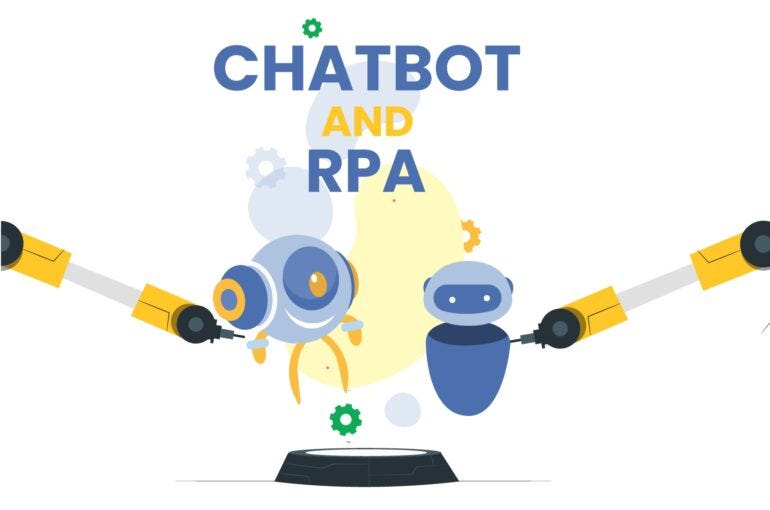
Blog

  • Automate Tier 1 while Keeping Agents in the Loop

    Using Live Chat to Seamlessly Handoff Chats to Agents.

    Chatbots are useful at *Tier 1*, but humans are good at solving complex problems. Sometimes it is tiring to do the same thing (e.g., booking a hotel room) over and over again while keeping the quality of service high.

    Now we have made it easy to argument chatbot experience with Live Chat.

    I will head to the Smartloop Conversation Builder and create a Nespresso Cafe bot.

    Let’s assume, it is a full-service bot to help me order and track Nespresso pods. I can track my shipment or in case If I never received it, it can seamlessly transfer me to a live agent.

    The basic part is simple, I can just say “chat with an agent “ and it immediately takes me to the agent flow or if the bot does not understand me, it can try possible routes and eventually take me to an agent too. This is more or less a happy path. What if the shipment is lost, Tier 1 should not be used to solve this type of problem but an agent should be there to solve it for me and resend or refund the order if necessary.

    Here in this scenario, I’ve bought a VirtuoLine pod, and it should not send me to the original line support channel. The bot should be collecting necessary profile information based on my previous engagement and should send me to the correct support channel (this is where AI part kicks in). Here in this case, when I type “I’ve lost my order”, it immediately takes me to the correct VirtuoLine agent which is set in the “new-order” block as a user attribute while the bot is taking me to the alleyways of conversation

    Now as the agent is connected, the bot is paused and communication happens between the agent the messenger seamlessly.

    The agent should be able to check the history and user should be able to return to the bot either way by typing “exit” as configured in the Live Chat plugin or agent can end the conversation.

    Here, AI and Human are complementing each other, along with flows defined as per our need to streamline the support process. Moreover, as the number of subscribers grows, we should be able to see their activity and jump in / out a conversation as soon as we see the conversation goes off track. This will help answer “Why most bots are failing”. We should not just build it and go to the bar while frustrated users *ditch* the service. It is a constant learning process and machine learning is useful and can do more for us only then.

    Live Chat and ability to seamlessly handoff to an agent is available now for Facebook, Viber, Telegram and Web.

    Get started with Smartloop Platform for Free and send us your query at hello@smartloop.ai

    Cheers!


    Automate Tier 1 while Keeping Agents in the Loop was originally published in Smartloop on Medium, where people are continuing the conversation by highlighting and responding to this story.

  • New Audience Capabilities Added to Smartloop Conversational AI Platform

    The Audience feature allows you to segment, nurture and engage your chatbot subscribers on all supported channels (web sites, Messenger and Viber). It is available to all Smartloop users in all plans, including in the free Starter plan.

    Marketers and public relations specialists know that audience segmentation is important for better communication. Audience segmentation is the process of dividing an audience into smaller groups, with similar characteristics, wants and needs. The better you can segment your audience, the more relevant message you can send.

    We are pleased to announce that we have extended the Smartloop Conversational AI Platform with a new feature:

    Audience

    It is a new section within the Smartloop conversation builder which allows you to keep track of your chatbot subscribers, to review your subscriber list and to identify and segment your audience. It also gives you access to your reachable users, when the user first visited the chatbot and when was the last time they chatted with the conversational agent.

    Audience Section in the Smartloop Conversational AI Platform

    Filter Your Audience and Save It as Segments

    You can create and save custom segments by using the filtering options. The available filtering options are:

    By user (as shown in the screenshot below). Here we will show the user information which is provided to us by the channel vendor:

    • Facebook: user ID, Photo, First Name, Last Name, Time zone, Locale, Gender, Reachable
    • Viber: user ID, Photo, First Name, Last Name, Time zone, Locale, Reachable

    By variable. Here you see a list of all variables, which have been set in the chatbot.

    Filtering an Audience with the Smartloop Conversational AI Platform

    Learn more about capturing user input and saving the information as variables in our documentation and in this blog post.

    Use Segments in Broadcasts

    Once you create your custom segments, they can be used to send broadcasts and push notifications:

    Sending Broadcasts with the Smartloop Conversational AI Platform

    Availability

    Audience is available today. It is a free addition to the Smartloop platform, which means that all Smartloop users should see the feature in their bot builders, regardless of whether they are in a free plan or in a paid plan.

    Enjoy!

    Smartloop is a conversational bot platform that helps brands engage with their users, promote new products, share content and promotions. The solution blends chatbot building tools, cross deployment, message broadcasting, analytics and cloud infrastructure in one complete package.

    Create your own conversational bot or contact our team to learn more about a solution for your brand.


    New Audience Capabilities Added to Smartloop Conversational AI Platform was originally published in Smartloop on Medium, where people are continuing the conversation by highlighting and responding to this story.

  • Download: Project Plan for an Enterprise Chatbot

    Free download 2 pages, 89kB Excel file

    Updated for 2019! In this download, Tangowork Consultants share their detailed project plan for deploying an enterprise chatbot. This is a tried-and-true plan that we use as the starting point for all our chatbot consulting engagements.

    Includes:

    • 5 key project phases for deploying an enterprise chatbot
    • 32 detailed steps including Task, Goal, Deliverable and Notes
    • Excel format; ready for you to modify

    Download our project plan for enterprise chatbots!

    • Tangowork Software uses your information to contact you about our products and services. You can unsubscribe from our communications at any time. Privacy policy


    Tangowork Chatbot Consulting

    Tangowork’s consultants use research, design and technology to help your organization create better digital experiences. We specialize in intranets, AI assistants and high-performance websites.

    The post Download: Project Plan for an Enterprise Chatbot appeared first on Tangowork: Consultants for Intranets, AI Assistants, Fast Websites.

  • How National Geographic Engaged its Facebook Subscribers with a Conversational Bot

    National Geographic — one of the world’s most iconic media companies — was looking for an innovative way to engage their 45 million Facebook fans and sell their new 2019 Almanac. Their idea was to create a daily trivia Messenger bot that was powered with content from their new almanac.

    2019 National Geographic Almanac

    National Geographic chose Smartloop to create a Messenger chatbot that could automatically onboard users and sends them daily trivia questions. In the onboarding, the user selects a trivia topic that interests him most, then receives a set of trivia questions based on that topic. Once the user completes the quiz, his results are calculated and he is given a score:

    National Geographic Conversational Bot

    After this, the user is asked if he’d like to opt-in to receive daily trivia questions. The Smartloop platform would then automate the full process of delivering the trivia questions to the users based on their preferred topic. In case people are not completing the quiz, the bot would automatically follow up with them to bring them back to the flow:

    National Geographic Conversational Bot

    The call to action to buy the Almanac was presented in two ways in the bot. First, as a user progressed through the daily trivia questions, National Geographic sent him more content to their website which contained ads to buy the Almanac. Secondly, the chatbot took multiple opportunities to send a discount code with a link to purchase the Almanac:

    National Geographic Conversational Bot

    As a result of using the Smartloop conversational platform, the fans of National Geographic were happy to engage with the chatbot. The National Geographic chatbot accomplished these results:

    • 65% of users came back daily to answer trivia questions.
    • 29% click-through rates out of the chatbot to additional content and the Almanac product page. (compared to email industry rates of 5%)
    • 43% open rate on promotional broadcast messages. (compared to email industry open rates of 20%)

    Smartloop is a conversational bot platform that helps brands engage with their users, promote new products, share content and promotions. The solution blends chatbot building tools, cross deployment, message broadcasting, analytics and cloud infrastructure in one complete package.

    Create your own conversational bot or contact our team to learn more about a solution for your brand.


    How National Geographic Engaged its Facebook Subscribers with a Conversational Bot was originally published in Smartloop on Medium, where people are continuing the conversation by highlighting and responding to this story.

  • How to Target Your Customers Using a Chatbot and Message Broadcasting

    Chatbots are a new way to automate customer service but it is also an excellent vehicle to engage/re-engage your customers and do push marketing (a.k.a. Broadcast) to increase your sales.

    Chatbots powered by AI is by far the best sales automation tool you can find. They capture the most important piece of information about your users via a Conversational User Interface (CUI). You are not only getting the basic demographic information of your customers but most importantly their preferences and interests that are essential for any product to improve and shine.

    FMCG chatbot demo built with Smartloop

    Let’s assume you are a beverage company and you are launching a new product through a chatbot (in our example, I will be using screenshots from the Smartloop Chatbot Builder). The success of your campaign relies on two simple factors:

    1. How many users actually went through the flow and claimed the coupon (or what is the turn around rate)?
    2. Are they loyal or new customers? Which specific age group is more engaged (or what is the target audience)?

    The first part of the chatbot automation process is to define what is that you are looking for — it could be a series of questions that can set the stage for a future qualification for a marketing push. You can store the replies to these questions in the chatbot platform for later use:

    User Input Block with validation in the Smartloop Conversation Builder

    In this case, when the campaign is over I can send them a broadcast based on the input which already has been captured. Here we are sending an additional promotional offer to the most loyal customers (customer = “yes”):

    Message broadcasting with Smartloop Conversation Builder

    The approach is similar to the ones who have not completed the flow or even left the conversation after the very first message by taking them to a survey that could provide valuable insights on what went wrong. The broadcast can also redirect the user back to the chatbot:

    Message broadcasting with Smartloop Conversation Builder

    Most of us think that just launching the chatbot is the end of the game but it is quite the opposite — being able to nurture the users properly can only bring the right feedback for your product. Broadcasting can play an important role despite the fact that both flows are rather simple but extremely effective if we want to channel customers to a direction we want them to go.

    Check out the new “custom variable” support in the Broadcasting section of Smartloop. This enables you to capture user input and user-defined variables and target your users at a later time. Broadcasting is currently available for Facebook Messenger, Web, and Viber. Reach out to us hello@smartloop.ai if you want to learn more.

    It is always free to get started with the Smartloop Conversation Builder!

    👏👏👏 One clap? 50 claps? Clap below to recommend this article to others 👏👏👏


    How to Target Your Customers Using a Chatbot and Message Broadcasting was originally published in Smartloop on Medium, where people are continuing the conversation by highlighting and responding to this story.

  • How to Send an Email from a Smartloop Chatbot using Zapier

    A Smartloop Conversation Platform Step-by-Step Tutorial

    Make a Smartloop Zap!

    In this tutorial you will learn how to:

    • Set up your Smartloop chatbot to send an email with information collected from the chatbot by using Zapier. Zapier is an automation tool (or “glue”) for integrations — in this case an integration between a Smartloop chatbot, Zapier and sending an email to a particular mailbox.

    Notes:

    • This tutorial uses the data collected from a Smartloop chatbot, as described in How to Collect User Data with a Chatbot
    • This tutorial is level 101, i.e. it is for everyone. It doesn’t require previous programming knowledge
    • Everything in this article is valid for all channels that Smartloop supports for publishing chat bots on: website, Messenger, Viber, WeChat, etc.

    Create Your Zapier Account

    (if you have one, go to step 3)

    1. Go to https://zapier.com/ and enter the details, needed to create your account.

    2. If you see the “Find Smart Ways to Save Time” popup, choose any app (say Google Sheets) and click Finish Setup. This step is not important for this tutorial and you can edit this information later.

    3. Click on “Make a Zap!”:

    4. Name your ZAP with a descriptive name:

    5. Scroll down, locate and select the built-in app, called Webhooks:

    6. Once you select Webhooks, Zapier will ask whether this is a “Catch Hook”. The Catch Hook will wait for a new “message” to be sent to a Zapier URL (from your Smartloop chatbot). The URL will be created in following steps. Confirm the catch hook by pressing Save + Continue:

    7. The next screen a set up screen which we will skip, because it is not needed for this tutorial. Press Continue:

    8. On the next screen, which is “Test This Step”, Zapier will give you a custom unique URL for you to send your chatbot requests to. Copy the URL — we will need it in your Smartloop chatbot:

    9. Leave Zapier as is for now, and let’s go to your Smartloop chatbot (in a new browser tab). Locate the block where you collect the last bit of information about your user. In my case I will use the bot described in How to Collect User Data with a Chatbot and I will open the email block:

    Smartloop chatbot platform

    In this bot, I collect two types of data points (also called variables):

    • {{user_name}} which stores the name that user has entered and
    • {{email}} which stores the email that the user has entered

    10. In the block where you collect the last bit of information about your user, add a JSON API card:

    Smartloop chatbot platform

    We will use this card to integrate with Zapier. Since Zapier is set to “catch” the data, we need to set Smartoop to “post” the data, so we’ll leave the Method to post, as shown above.

    11. Paste the URL which Zapier provided you in the URL field. Also, click on “more” to expand the card:

    Smartloop chatbot platform

    Once you expand the card, you will see different sections. The Query section can be used to filter, sort and aggregate the data you send to Zapier (which we will not do here). The Header section will not be used either for the current example. We will only use the Body section.

    12. In the Body section we will enter the information which we want to send to Zapier (and ultimately to our email) in the following format (don’t forget to add the curly brackets — they are important for the JSON API to work properly):

    {
    “name”: “{{user_name}}”,
    “email”: “{{email}}”
    }

    With this we give names to our variables and instruct Zapier what to handle and how:

    Smartloop chatbot platform

    13. If you recall, in step 8, Zapier is still “waiting” for the test to go through, so let’s go through the bot flow and collect the needed user information (you can do it in the Test console as well) — once this is done, Zapier will receive the name and email of the user and will have finished the test:

    Smartloop chatbot platform

    14. Once you finish entering the data, go back to Zapier and click on “Ok, I did this”. This will bring you to a screen, which will confirm that the zap worked (if you don’t see that screen, check the URL you entered in Smartloop for completeness, and also check the body in the JSON API card for errors):

    15. In Zapier, click Continue to add an Action step. This is the step where we will define what Zapier needs to do with the data it is receiving from your bot, i.e. to send it an email. Scroll down, locate and select the built-in app, called Email:

    16. Since we will be sending an email, click on Save + Continue on the next screen:

    17. On this screen we will “compose” our message. In the TO field enter the email address where the user data will be sent to; in the SUBJECT field enter the subject of the email and in the email BODY enter the text you would like to be sent in the email. Use the “Insert a field” button to add the fields which Zapier is getting from the bot:

    18. Click Continue and feel free to send a test email. Of course, you can always go back and edit the email contents to suit your needs, so feel free to play around.

    19. Once you test the whole process, click FINISH and turn on your ZAP:

    You can test a few more times and play around before going live. Note that Zapier turns the zap off when you make changes, so make sure that your zap is on (green) and working before going live.

    That’s it! Enjoy!


    How to Send an Email from a Smartloop Chatbot using Zapier was originally published in Smartloop on Medium, where people are continuing the conversation by highlighting and responding to this story.

  • Use Chatbots for Employee eLearning

    I recently had to use the eLearning system at a Fortune 100 corporation. All consultants, including me, were required to complete a module on Privacy. I was struck by 3 things:

    – How dated the eLearning system felt
    – How difficult the interface was to understand
    – How disruptive the training was to my day

    If you use an eLearning system at your organization, there’s a good chance you feel similarly.

    I believe chatbots have the potential to transform eLearning at any organization. Watch this demo of the Tangowork Chatbot Accelerator configured for micro-learning.

    There are 3 reasons why chatbots are so powerful for eLearning:

    1. The interface is intuitive. Everyone understands how to use the messaging-style conversational interface.

    2. The information is bite-sized. The nature of the chatbot medium forces brevity.

    3. Chatbots can nudge. A short, proactive broadcast can be sent to employees’ messaging apps, nudging them towards the desired behavior.

    The eLearning systems in most organizations are getting long in the tooth. eLearning by chatbot — or “microlearning” — is an exciting development for anyone tasked with delivering a training or change management initiative to a large group of employees.

    Tangowork Chatbot Consulting

    Tangowork’s consultants use research, design and technology to help your organization create better digital experiences. We specialize in intranets, AI assistants and high-performance websites.

    The post Use Chatbots for Employee eLearning appeared first on Tangowork: Consultants for Intranets, AI Assistants, Fast Websites.

  • How to Collect User Data with a Chatbot

    A Smartloop Conversation Platform Step-by-Step Tutorial

    Chatbots are not only great at chatting with humans, but they can also help you collect user data, such as the user’s name and email. This data can be very useful for profiling your users, for re-targeting, and for creating tailored conversation flows for specific types of users.

    In this tutorial you will learn how to:

    • Set up your first Smartloop chatbot (and account)
    • Collect the User’s Name
    • Get and Validate the User’s Email

    Notes:

    • This tutorial is level 101, i.e. it is for everyone. It doesn’t require previous programming knowledge
    • All screenshots and flows explained in this article are done with the Smartloop chatbot platform
    • Everything in this article is valid for all channels that Smartloop supports for publishing chatbots on: website, Facebook Messenger, Viber, etc.

    Set Up Your Smartloop Chatbot (and Account)

    (if you already have a Smartloop account, please move on to the next section)

    1. Head to the Smartloop website
    2. Click SIGN UP at the top of the screen

    Smartloop chatbot website

    3. Follow the instructions to setup your account. This step takes less than a minute.
    4. Log in your new Smartloop account (feel free to go through the onboarding tutorial).
    5. Once you are in the Smartloop dashboard, click on “+” and enter the required info. In my case, I’ve entered “User Data Collection Bot” as the title and description, my channel is Facebook, and the bot language is English:

    Smartloop chatbot platform

    Feel free to go through the new onboarding tutorial.

    Collecting the User’s Name

    1. For this example, let’s open your chatbot and create a new conversation block, which will ask the user what his/her name (in my case, this is the Start block). Add a TEXT card to the block:

    2. We want the user to input his/her name in the chatbot. The way to do this is to add a User Input card to the block:

    3. Since a person’s name is usually plain text, set the Data Type of the User Input card to Text, as in the screenshot above.

    4. Enter a name for this variable. The variable name should be descriptive enough to explain what data is stored under it (think of this as a label). In my case, I will use {{user_name}} — see screenshot above.

    5. It is fairly hard to validate how names are spelled out, so let’s keep Validation to none.

    6. Let’s add a new TEXT card which will thank the user for his/her input. Let’s also make the conversation a bit more personal, by using the variable we’ve just created:

    Congrats! We have just programmed the Smartloop chatbot to collect the name of the user! This also means that the platform will store the name of this user for future use.

    NOTE: When the User Input card is used, the chatbot will expect input from the user. If you type a command in the chatbot when it is expecting an input, the chatbot will interpret it as input, and not as a command.

    Getting and Validating the User’s Email

    1. Let’s create a new conversation block, which will ask the user for his email. I will call this block email:

    2. Since this block is not the ‘start’ block which the bot will start the conversation with, we need to add a keyword which will later allow us to call this block from the chatbot. Go to the Expressions tab and enter email as a keyword:

    3. Go back to the Response tab of the block, and add a TEXT card which to prompt the user to enter his/her email.

    4. Since we want the user to type his/her email, let’s add the User Input card to the block:

    5. Since the email is text-only, set the Data Type of the User Input card to Text.

    6. Let’s enter a name for this variable. I will use {{email}} — see image above.

    7. Smartloop can automatically validate the email addresses for you, so let’s set Validation to email. Once we do this, the platform will give us the option to enter a Message in case the email that is entered is invalid:

    8. Let’s test the flow by typing the email keyword in the chatbot and hitting Enter (you may need to refresh the test console). If you type a wrong email address, the bot will give you the invalid message (see image above).

    9. Let’s add a new TEXT card to the flow which will thank the user for his/her input (refresh the chatbot if you want to test the new flow):

    Well done! Your Smartloop chatbot will now store the user’s email.

    Putting It All Together

    It is easy to connect the two flows described in this article in one seamless chat flow. Go to your initial block (in my case it was the Start block) and add a Go To Block card, which to point to our email collection block:

    The Go To Block card instructs the bot to go to the email block once it completes the name collection process.

    Hit refresh in the test console and go through the flow — you’ll see that don’t need to use any keywords anymore:

    HINT: The Go To Block card allows you to design more complicated flows, based on conditions that are triggered by a user inputs or events. We discuss some of these scenarios in this blog article: Customizing a Conversation Flow Based on User Input

    Questions? Comments? Let me know in the comments below.

    Enjoy using the Smartloop chatbot platform! Please feel to reach out to us if you have any questions.


    How to Collect User Data with a Chatbot was originally published in Smartloop on Medium, where people are continuing the conversation by highlighting and responding to this story.

  • 5 best practices for deploying an employee or HR chatbot

    Starting a chatbot project can seem overwhelming, but following best practices makes the road ahead smoother. Benefit from our team’s experience deploying chatbots with five need-to-know techniques to improve the success of your chatbot implementation.

    1. Start with a narrow domain

    Don’t try to build Siri. Unless you have a massive budget, and a team of hundreds of engineers, you’re not going to be able to keep up with the likes of Microsoft Cortana, Google Assistant or Siri. Even those teams don’t always get it right.

    Even teams with hundreds of engineers don’t get everything right. (Don’t worry, they’ve fixed it.)

    Keeping the domain of your chatbot narrow to start and setting your users’ expectations about what the bot can deliver is a realistic way to achieve success. Ideas for a first phase could be a bot that delivers company news, gives information about a conference, provides contact details, or answers questions on a specific subject matter. Later, the chatbot can be expanded to have a wider domain.

    Keep the domain of your chatbot narrow at the start

    A good example of this is a Tangowork chatbot implemented at international healthcare company Bupa (read the Bupa case study). When Bupa planned to move their headquarters, they created a chatbot to answer questions about the move, like “when are we moving?” or “do I need to pack my own things?”. After the office relocation, they gradually expanded the bot to answer common day-to-day questions, like “where can I print?”, “where do I get a new Skype headset” or “what’s the number for HR?”.

    “Before our move to Angel Court, the chatbot focused mainly on the office move: things like ‘when are we moving?’ and ‘do I need to pack my own things?’ After the move, we expanded to questions about day-to-day work in the new environment.”
    Del Green

    Senior Digital Communications Manager, Bupa

    2. Have one killer feature

    What answer does your chatbot have that your employees can’t live without? When your chatbot has a feature that keeps employees coming back again and again, they’re going to turn to it as a resource for other information as well.

    At Bupa, now that Cyan (the Bupa chatbot) answers questions about day-to-day work, the number one question it gets asked is “What’s the guest wifi password?” Since the password changes frequently, many employees find that the easiest way to get the password for a guest is to ask Cyan.

    3. Design failure carefully

    You need to intentionally design what failure looks like, because a chatbot is not always going to be able to give a user the answer they are looking for. That happens for several reasons:

    • The chatbot might need more examples to delineate related questions
    • The chatbot might need more training on unexpected terms the employee is using
    • The chatbot doesn’t contain any answers related to the employee’s question

    Every response the chatbot gives will fall into one of the four categories on a tool known as the confusion matrix:

    • True positive: the chatbot knows the right answer and delivers it
    • False positive: the chatbot knows the right answer, but delivers an incorrect answer
    • True negative: the chatbot doesn’t know the answer, and says it doesn’t know
    • False negative: the chatbot knows the right answer, but says it doesn’t know

    Each possible type of response that the bot might give needs to be considered

    The Tangowork Chatbot Accelerator reduces false positive answers by using a confidence threshold: it only returns an answer if the chatbot is at least 40% sure that it has the correct answer. For answers where the Tangowork Chatbot Accelerator is 40 to 60% confident, it delivers the answer but then asks the user to confirm whether their question was correctly understood.

    It’s good to consider each of these scenarios for your bot, and analyze what the chatbot will do in each case. Because failures (incorrect or unknown answers) are going to occur, designing for failure will result in the best possible outcome when it happens. Make sure that the chatbot is giving the best answer possible in each scenario, and steer the user back to supported tasks when needed.

    If a user is asking the chatbot for information that it is not designed to provide, redirecting a user back to supported tasks helps the user know what the chatbot can do for them.

    Instead of:

    Sorry, I don’t understand. Ask me something else.

    Try:

    Sorry, I don’t understand. I know things about 
    Acme Human Resources policies and benefits. 
    Try "benefits", "payroll" or "time off".

    4. Grow your pilot gradually

    At the beginning, a small team of stakeholders and subject-matter experts brainstorms questions and answers that the chatbot will be fielding. Starting the pilot with 10 or 20 people allows the team to review the conversation transcripts and see questions that weren’t anticipated or that the bot is misunderstanding. They can then teach the bot to handle those questions, expand the pilot by another 10 or 20 people, and repeat the process.

    As the pilot grows, the percentage of successful responses climbs higher and higher. If you launch at the very beginning, the number of unsuccessful responses will result in user frustration and failed adoption. Once the success rate is in the 90-95% range, the chatbot is ready to launch to the entire organization.

    As the chatbot pilot gradually grows, incorrect responses decrease

    Growing your pilot gradually allows for transcript review, chatbot training and greater insight into user needs, for a high conversation success rate on launch.

    5. Review transcripts constantly

    Reviewing chatbot conversation transcripts is especially important during the pilot period for your chatbot, but it continues to be an important part of general maintenance. Transcript review allows you to see when the chatbot doesn’t understand a message, or doesn’t have the answer a user is looking for. Fine-tuning the bot by adding more information on a topic, or training it to understand a user’s intention in a particular message allows for continuous improvement.

    Transcript review pinpoints answers the chatbot is missing, which are added for an increased success rate

    Conclusion

    Apply these best practices to find success as you enhance your employees’ digital workplace with an informed, responsive chatbot.

    Summer Chatbot Webinar Series

    In July, August and September, sign up for 3 free webinars that explore 3 types of chatbots: Intranet Chatbots, Event Chatbots, and HR Chatbots.

    Tangowork Chatbot Consulting

    Tangowork’s consultants use research, design and technology to help your organization create better digital experiences. We specialize in intranets, AI assistants and high-performance websites.

    The post 5 best practices for deploying an employee or HR chatbot appeared first on Tangowork: Consultants for Intranets, AI Assistants, Fast Websites.

  • Tangowork Chatbot Accelerator Release Notes

    Tangowork Chatbot Accelerator v22: Excel import/export

    July 16, 2018

    What’s new: chatbot

    • Buttons with links. Now you can add hyperlink buttons to messages. When the user clicks, they’re redirected to a URL.
    • Messages with non-text. Tangowork Chatbot Accelerator now recognizes unsupported messages and responds appropriately. For example, if a user sends a photo, Tangowork Chatbot Accelerator responds with “Thanks for the photo. Unfortunately, I only understand text.” Works for audio, video, images, location, and the Messenger “thumbs up” button. Responses are customizable.

    What’s new: management console

    • Excel import/export. Add and maintain content via Excel. You can export existing content to a spreadsheet, make changes, then import it again.
    • People import/export. For private bots, add and maintain a list of users via Excel or JSON. It’s ideal for scenarios where automated synchronization via API isn’t possible.
    • Phone number internationalization. Phone numbers are automatically converted to the E.164 standard when they’re added to the system. For example, (604) 555-1212 is converted to +16045551212. This ensures that duplicates are recognized and ensures that SMS messages are delivered. A “Country” preference in “Bot settings” allows the Tangowork Chatbot Accelerator to infer country code (e.g. “+1”) when none is provided.
    • Default introduction for broadcasts. Set a default introduction for broadcasts, such as “**ACME EMPLOYEE ALERT**”.
    • We moved the “Chat” button to the top-right corner so it’s easier to find.
    • We changed the behavior when you click on intent names. Clicking now shows and hides the intent’s messages. To edit the intent, click the pencil icon.
    • We changed the behavior when you click on intent metadata like sample questions, sort order and list type. Clicking now opens the entire “Edit intent” dialog and highlights the metadata you clicked on.
    • We’ve changed dialogs so that they can only be closed by clicking a button or by clicking a close icon. Previously, clicking outside the dialog closed it, but that led to inadvertent closures.

    Bug fixes

    • The prompt to “Train language model” was occurring too often. Now it’s only appearing when it really needs to.
    • Buttons in messages couldn’t be edited in the management console. Now they can.
    • Long intent names were getting truncated on narrow screens. Now they’re not.

    Tangowork Chatbot Accelerator v21: Easy entity editing

    June 21, 2018

    What’s new: management console

    • We completely overhauled working with entities (e.g. in “What is John Doe’s phone number?”, the entity is “John Doe”). Now you can add new entities and tag them within sample questions, all within the management console.
    • Sometimes you need to run custom integrations on a schedule, like for running a nightly import. Now you can.
    • If users ask about a date or time, the “DateTime” prebuilt entity needs to be enabled. Now you can do that yourself in the management console, without asking Tangowork Support.
    • We added a tiny little X to the right-hand side of the search box so you can quickly delete your search term. No more backspace backspace backspace.
    • Now you can instantly change confidence thresholds from within the “Bot settings” page. The default minimum confidence is 40%, but some bots can benefit from dropping it lower. The default confidence for sending user verifications, i.e. “I’m only 45% confident in my answer… did I understand you correctly?” is 60%.
    • We changed the default response setting for new content to “Random” and “No list”. It used to be “Newest” and “List: Cards”, but we found this wasn’t appropriate in the majority of cases.

    Bug fixes

    • When you delete content, we used to move sample questions to the “None” category, but that was degrading the accuracy of the AI. Now we just make deleted content vanish, and the AI is much happier.
    • It wasn’t possible to use your iPad to add new content in the management console. We made a few tweaks, and now the iPad compatibility, while not perfect, is much better.
    • We lost the ability to log on to the management console in Safari, but we found it again.

    Tangowork Chatbot Accelerator v20: Custom buttons in messages

    May 9, 2018

    What’s new: chatbot

    • Messages with buttons. Add any button to any message. Buttons can trigger a certain message, a certain intent, or can send quick-reply text.

    What’s new: management console

    • Add custom buttons or triggers to any message. A new “Buttons” option on Add/Edit Message lets you define custom buttons or triggers for any message. In Skype for Business or SMS, buttons don’t display, but the button can down-render to a prompt, such as “Type ‘more’ for more info.”
    • Bot settings screen. The new bot settings screen lets you quickly adjust the appearance of your bot across channels. For example, you can change the color, font and icon for web chat.
    • Manual message ordering. For lists of messages, you can now select manual ordering. Drag and drop messages to sort them how you want.
    • To make room for expanded functionality, the Add/Edit Message screen now uses collapsible cards.

    Bug fixes

    • Whenever we displayed Cards in Slack, we were showing action buttons twice — before and after the card. It looked confusing, so we eliminated the first set of buttons.

     Tangowork Chatbot Accelerator v19: Custom integrations

    April 2, 2018

    What’s new: management console

    • Help. Inline help is now available on every page.
    • Content categories. Create your own categories to organize content.
    • Custom integrations. It is now possible to execute any custom code in response to an intent. For example, a user could type “search for expense form” and the Tangowork Chatbot Accelerator can execute that search on SharePoint.
    • Previous button. Users can now page through lists of messages using “Next” and “Previous” buttons. This only affects intents where lists are enabled. (Buttons are not supported on Skype for Business or SMS.)
    • Content export. Export content. This is designed primarily for exchanging content with other Tangowork Chatbot Accelerator installations.
    • Content import. Import content. This is designed primarily for exchanging content with other Tangowork Chatbot Accelerator installations.
    • Parent & child intents. There is now full support for parent & child (nested) intents. This allows for lists of lists.

    Tangowork Chatbot Accelerator v18: Confidence thresholds

    February 13, 2018

    What’s new: chatbot

    • Fewer false positives. the Tangowork Chatbot Accelerator now employs a confidence threshold that a potential answer must meet before being sent to the user. If the chatbot is less than 40% confident (configurable) that the potential answer is the right one, it sends a ‘not understood’ reply instead.
    • User confirmation for medium-confidence answers. If the Tangowork Chatbot Accelerator is 40 to 60% confident (configurable) that an answer is correct, it sends the answer, but then verifies with the user whether their question was correctly understood. The user is presented with a “Yes” or “No” button on platforms that support it, or a prompt to enter “yes” or “no” on text-only platforms.

    What’s new: management console

    • Verified answers screen. A new “Verified answers” screen lists questions and corresponding answers that end users have confirmed are correct or incorrect. The administrator can agree, disagree or discard the confirmation.
    • Unrecognized questions screen. A new “Unrecognized questions” screen lists user questions that weren’t understood (i.e. that were below the confidence threshold). The administrator can align the question with the correct answer or discard it.
    • Transcripts now list the confidence under each user question. If a user confirms a medium-confidence answer, it’s noted on the transcript. If an administrator updates the “Verified answers” or “Unrecognized questions” screens, the change is marked on the corresponding transcript.
    • The list of transcripts now scrolls indefinitely. Once you scroll near the bottom of the list, the next 100 conversations load.

    Tangowork Chatbot Accelerator v17: Minor changes

    February 1, 2018

    What’s new: chatbot

    • Long questions rejected. Very long questions aren’t usually understood by the language engine, and they’re usually entered in error anyway. If a user asks a very long question (longer than 140 characters), the bot now responds with, “I have trouble understanding long sentences. Please try again using fewer words.” This response is configurable.

    What’s new: management console

    • White space is now automatically trimmed from the start and end of all input on the management console.

    Bug fixes

    • Transcripts were sorting by date created instead of date updated, causing some current conversations to be hidden low on the list. Now transcripts are sorted by date last updated.
    • Transcripts weren’t being recorded for Microsoft Teams or Cortana. Now they are.
    • Some errors returned by Microsoft Cognitive Services weren’t being surfaced in the management console, and it appeared the console was hanging. Now those errors are shown.

    Release history

    • Version 22: Excel import/export
    • Version 21: Easy entity editing
    • Version 20: Custom buttons in messages
    • Version 19: Custom integrations
    • Version 18: Confidence thresholds
    • Version 17: Minor changes
    • Version 16: Annotate transcripts with notes
    • Version 15: Direct language model training
    • Version 14: Chatbot analytics
    • Version 13: Features for when the chatbot doesn’t know
    • Version 12: Chatbots for Sharepoint, easier content management
    • Version 11: Messages with multiple intents
    • Version 10: Skype for Business improvements
    • Version 9: Transcripts, Subscribe, Test Broadcasts
    • Version 8: Better date support, broadcasts for public bots
    • Version 7: New search technology
    • Version 6: Intent management & embedded web chat
    • Version 5: Enhanced management console
    • Version 4: Skype for Business, image management
    • Version 3: Carousels & buttons
    • Version 2: More preferences
    • Version 1: Content management, broadcasts and language processing

    Tangowork Chatbot Consulting

    Tangowork’s consultants use research, design and technology to help your organization create better digital experiences. We specialize in intranets, AI assistants and high-performance websites.

    The post Tangowork Chatbot Accelerator Release Notes appeared first on Tangowork: Consultants for Intranets, AI Assistants, Fast Websites.