A step-by-step guide to build your first AI Chatbot

IBM Watson is a powerful platform where software developers and non-technical users can co-create AI solutions. Its easy-to-use interface allows you to quickly create an AI model, from simple chatbots to complex enterprise solutions.
In this article, we will explore how to create, train and integrate your first Cognitive Virtual Assistant.
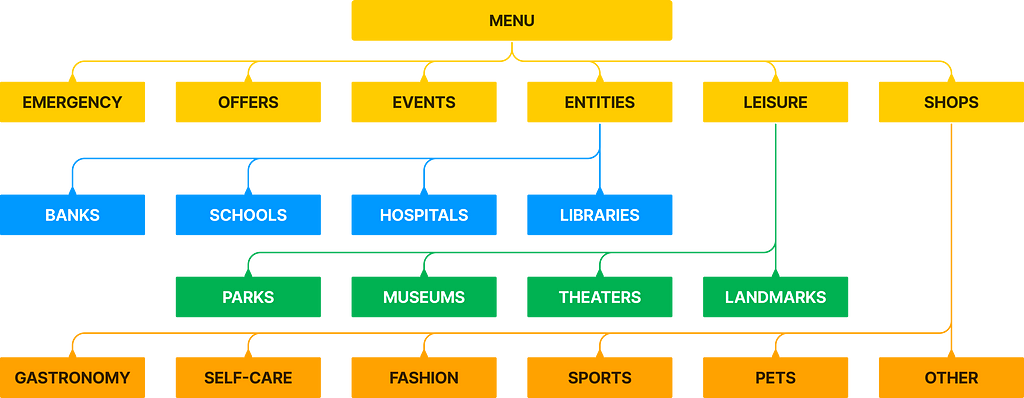
Step 1: Information Architecture
The Information Architecture defines a collection of all the sections to be included in your assistant, placed in a hierarchical order.
The following example shows all the sections for providing useful information about a city regarding shops, landmarks, museums, etc.
Step 2: Creating the Assistant
An assistant is a cognitive bot to which you add skills enabling it to interact with end users. To create a new assistant, you need to log into the IBM Cloud platform first — https://cloud.ibm.com.
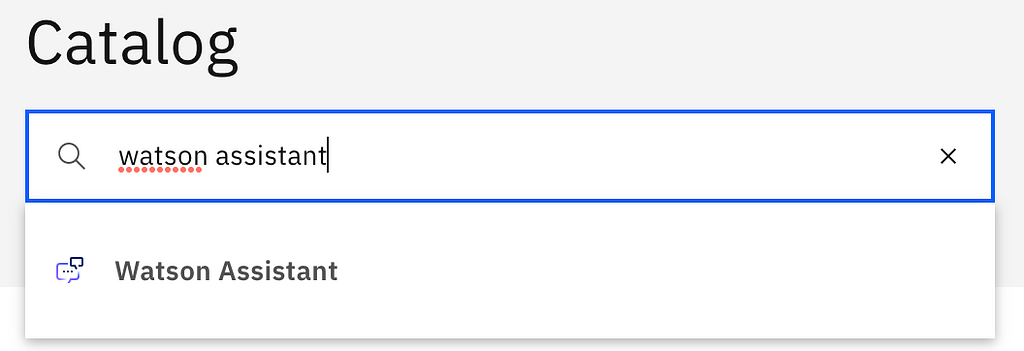
- Once logged in, go to the catalog and search for “Watson Assistant”.
2. Set up the assistant with the following attributes:
- Region: “Dallas”.
- Pricing Plan: “Lite”.
- Service Name: This is the name of the Watson Assistant service being created.
- Resource group: Only those who have access to this Resource Group will have access to the Watson Assistant service. For the moment, leave it as “Default”.
Accept the terms and conditions and click on “Create”.
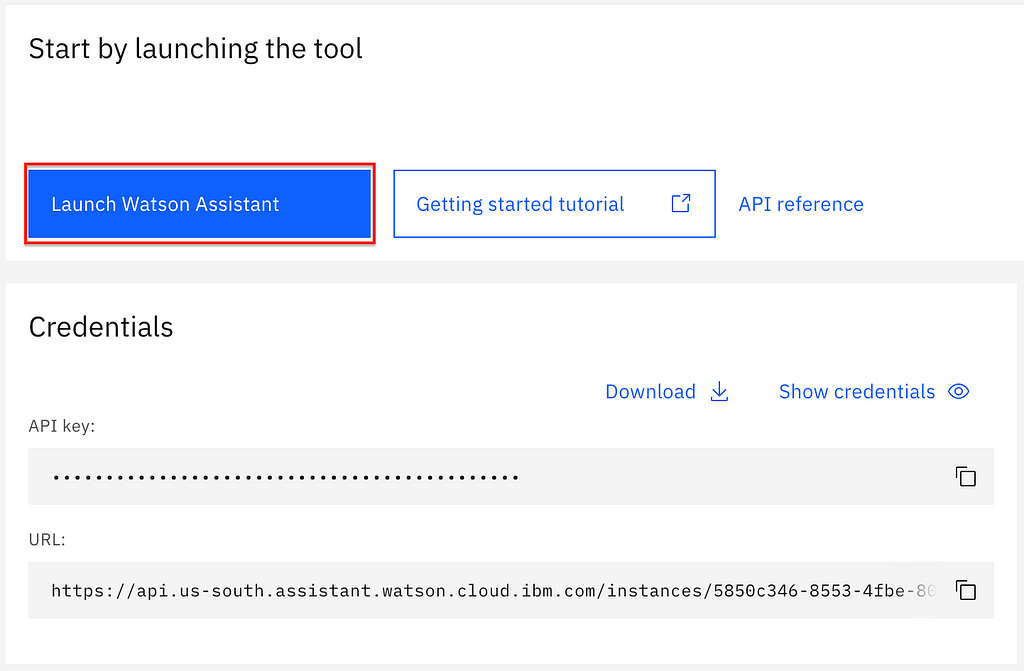
3. Once the assistant is created, click on “Launch Watson Assistant” to access the Modeling Tool.
4. Click on “Create assistant” and name it.
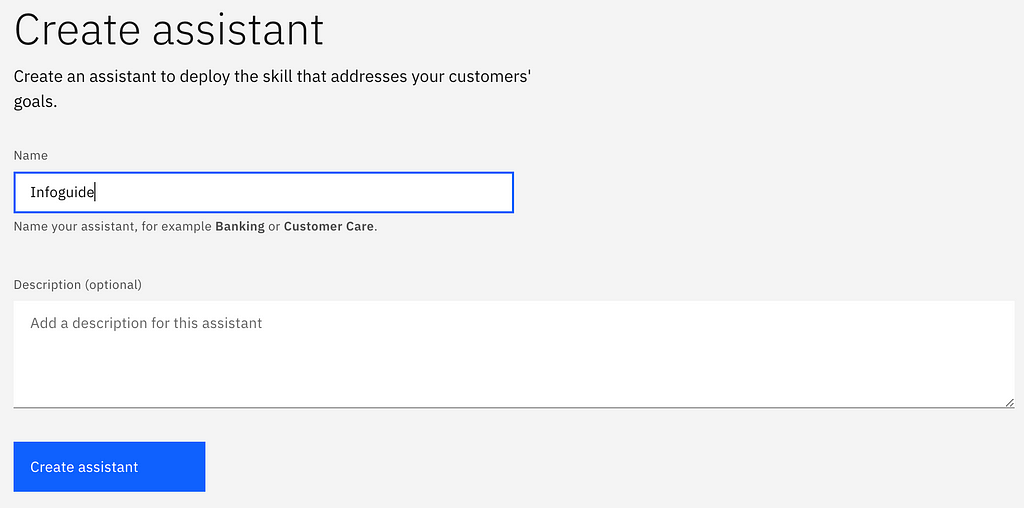
Click on “Create assistant”.
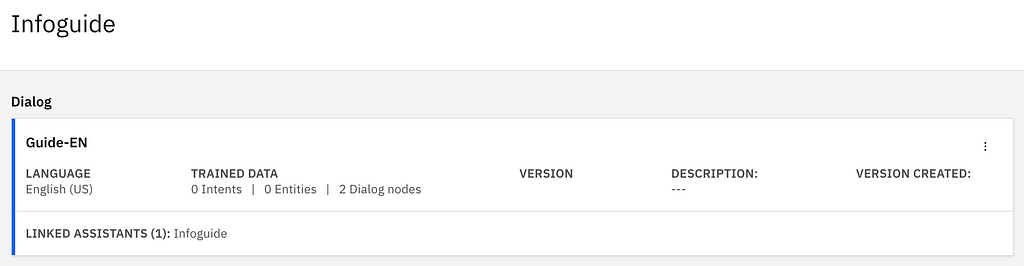
Step 3: Creating a Dialog Skill
A dialog skill uses Watson NLP — Natural Language Processing — and machine learning technologies to understand user questions and requests, and respond accordingly.
1. Click on “Add dialog skill.”

2. Select “Create skill” and set up the skill with the following attributes:
- Name: In case of having more than one skill, enter meaningful names in order to establish a clear differentiation between them.
- Language: Set the language that the assistant is going to support.
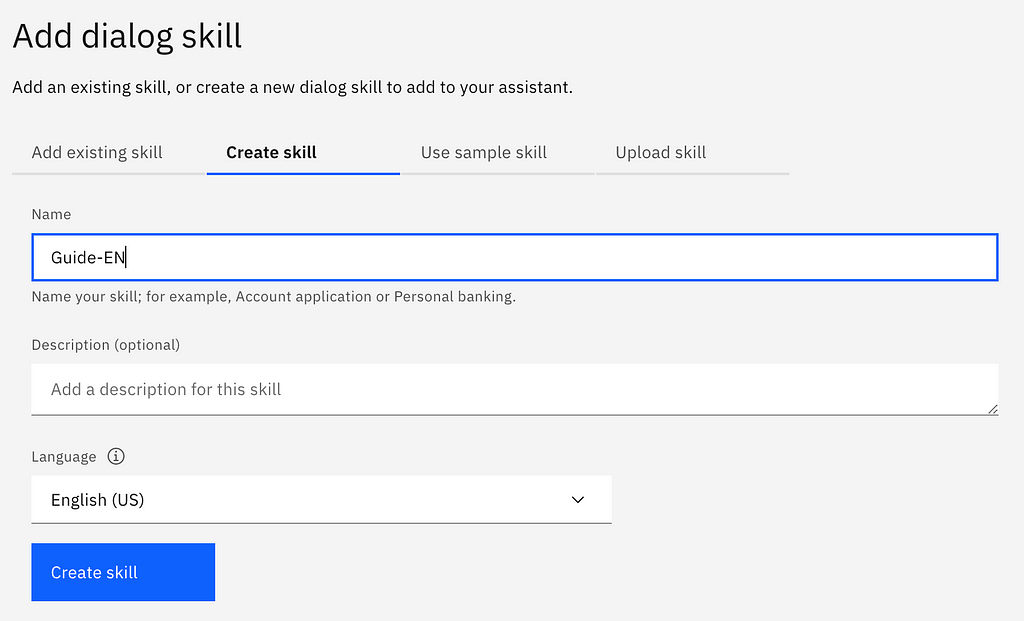
Click on “Create skill”.
Step 4: Adding Intents and Entities
In this step, you will add training data built by IBM and your own training data to the skill.
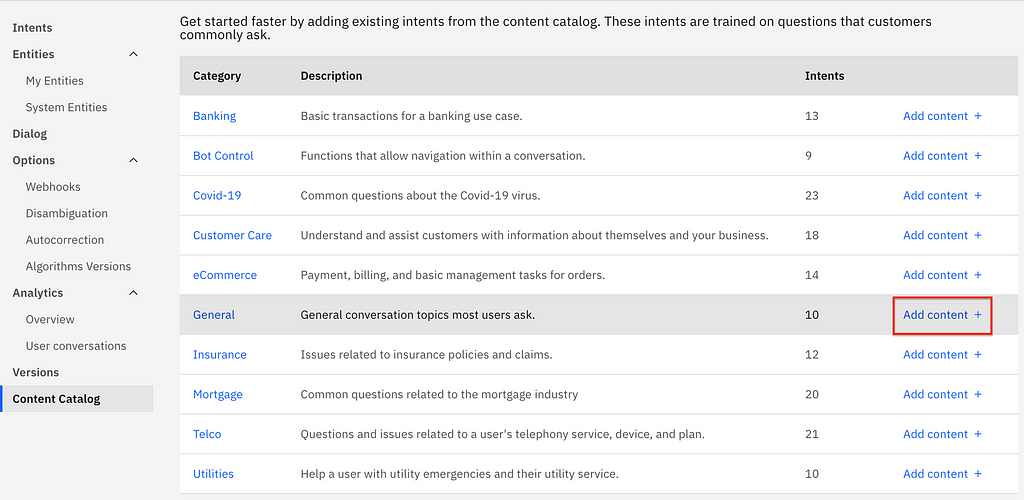
Content from Content Catalog
First, add the General content catalog so the assistant can greet users and end conversations.
- Open the Dialog by clicking on it.
2. Click on “Content Catalog” from the side menu. Go to General and select “Add content +”.
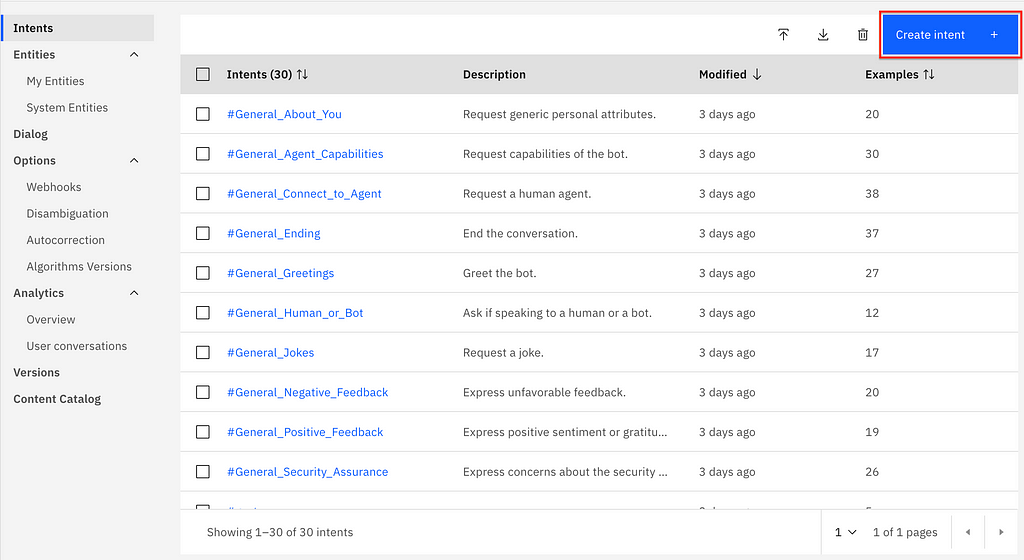
Intents
An intent is a collection of user statements based on intentions and examples of what the user might say.
1. Select “Intents” from the side menu and click on “Create intent”.
2. Go back to the Information Architecture from Step 1 and create an intent for each section.
Name the intent and click on “Create intent”.
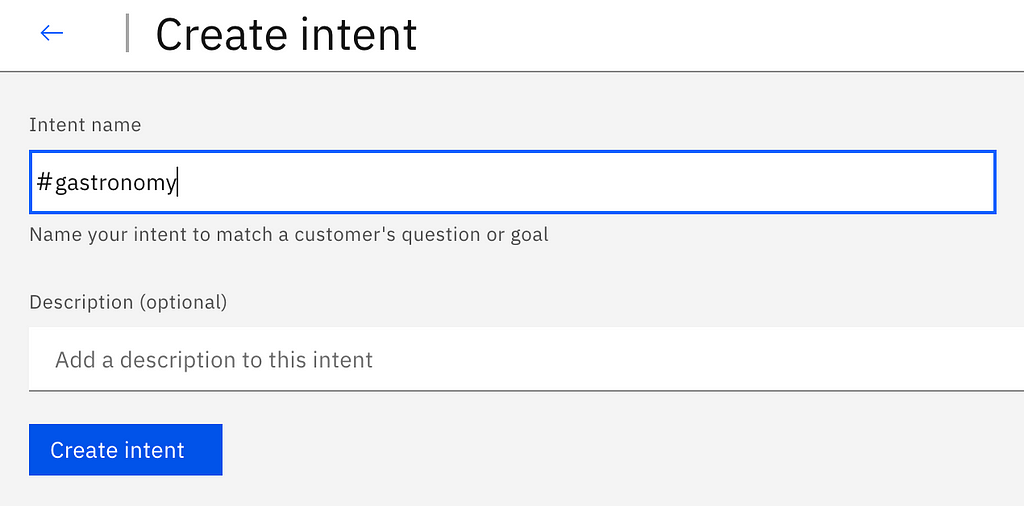
3. Once your intent is created, add at least five examples of what the user might ask.
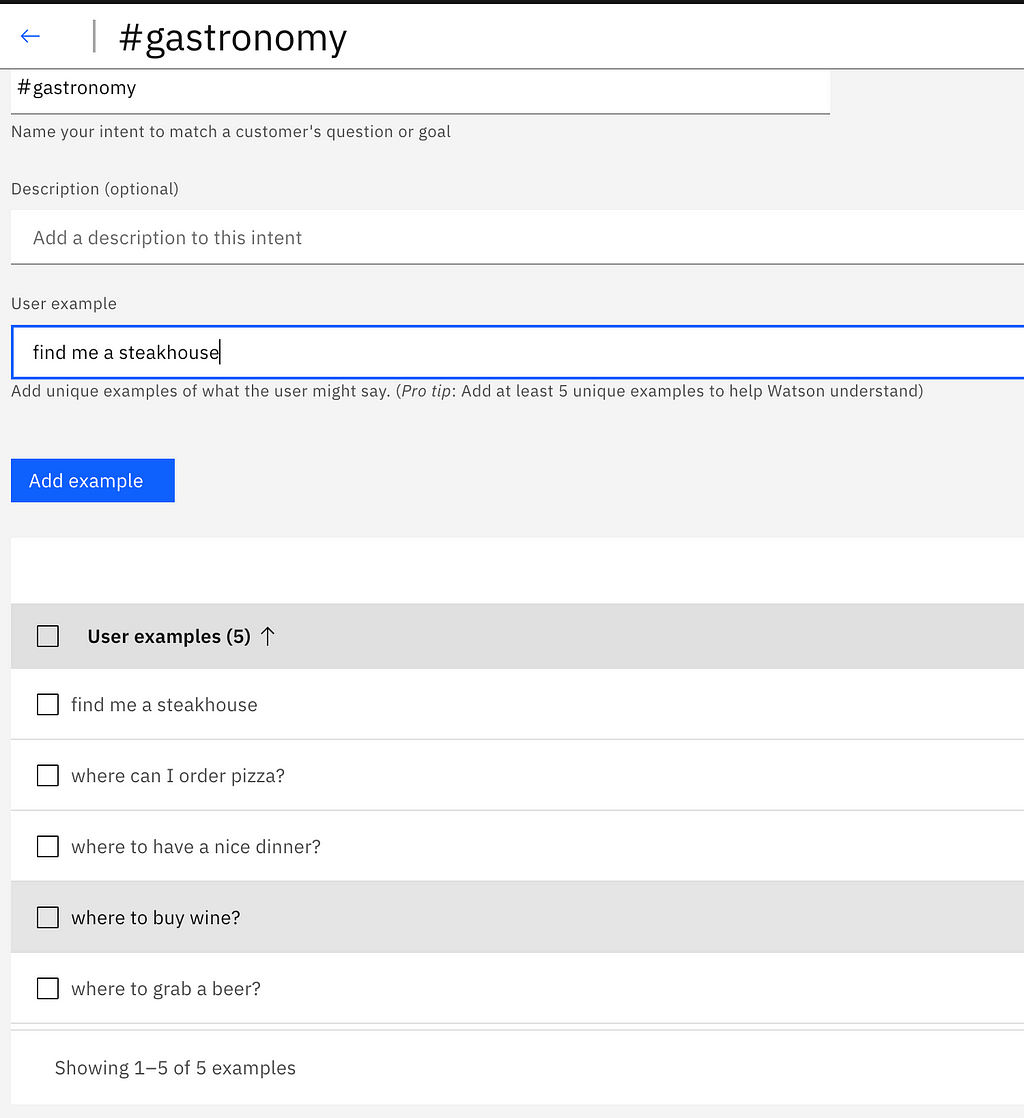
Keep adding new intents and examples until you have them all created, and don’t forget to include the #menu intent.
Entities
Entities represent information from the user input that is relevant to the user’s goal.
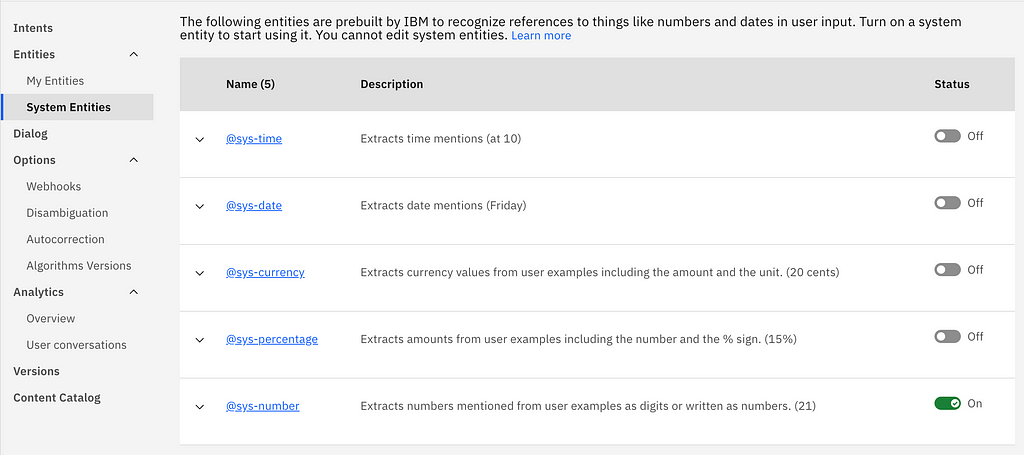
In this example, we are not creating entities, but using system entities instead. A system entity is a synonym that is prebuilt for you by IBM. They cover commonly used categories, such as numbers, dates, and times.
Select “Entities” from the side menu and click on “System Entities”. Enable @sys-number entities as shown in the example below.
Step 5: Dialog Flow
A dialog flow defines all the possible ramifications of the conversation in the form of a logic tree. The dialog matches intents (what users say) to responses (what the assistant replies).
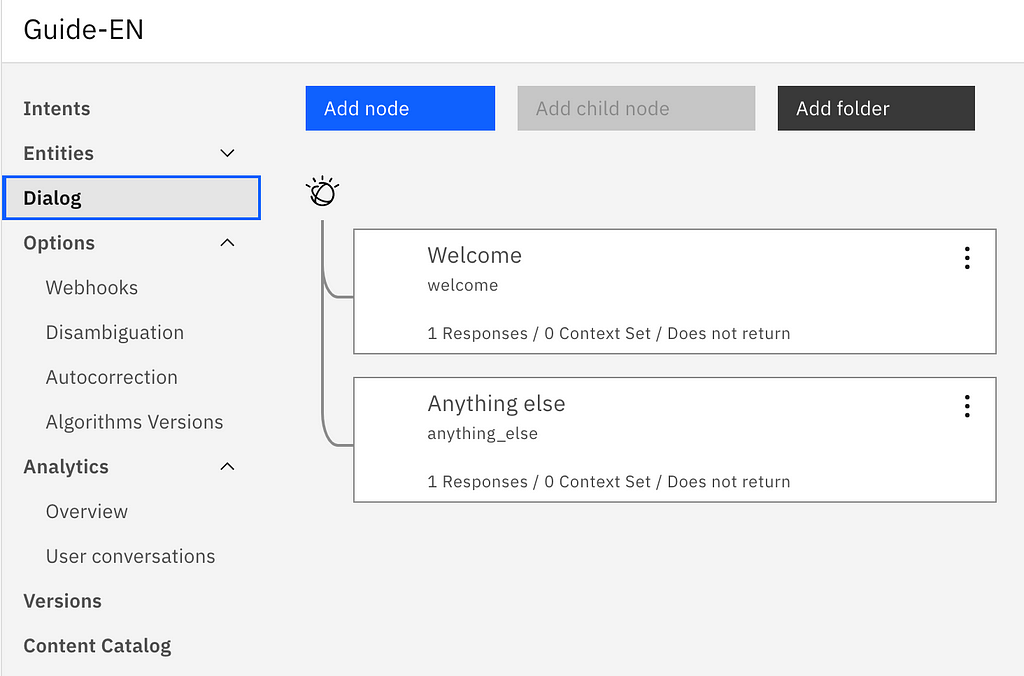
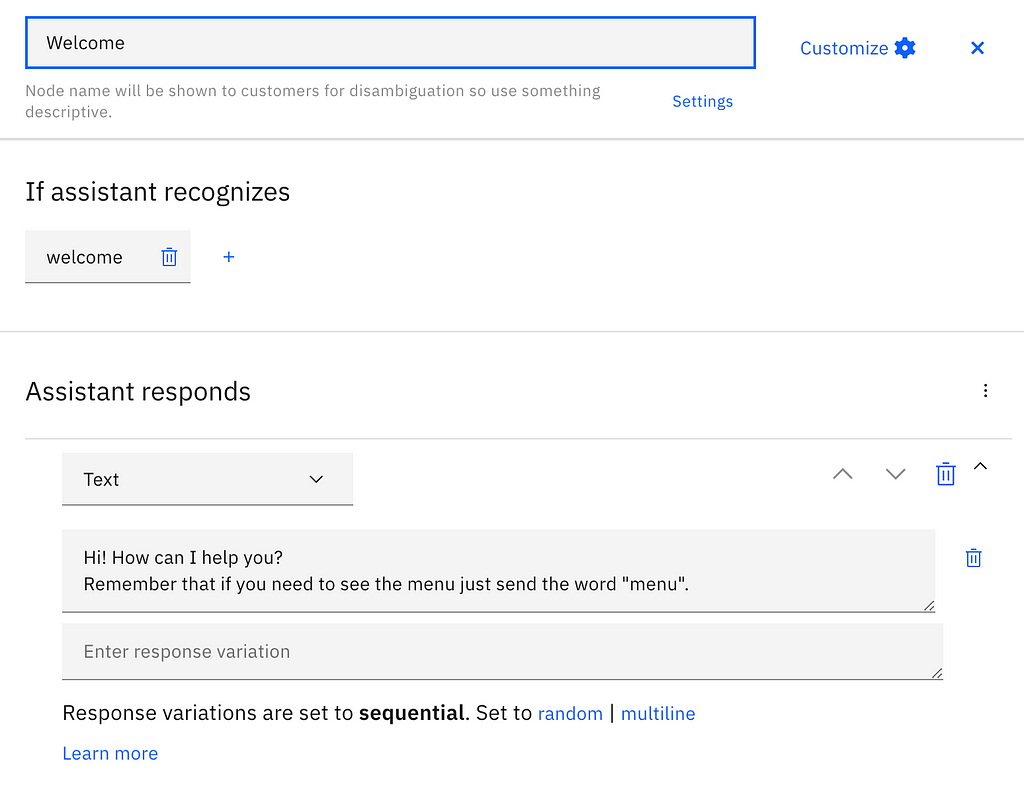
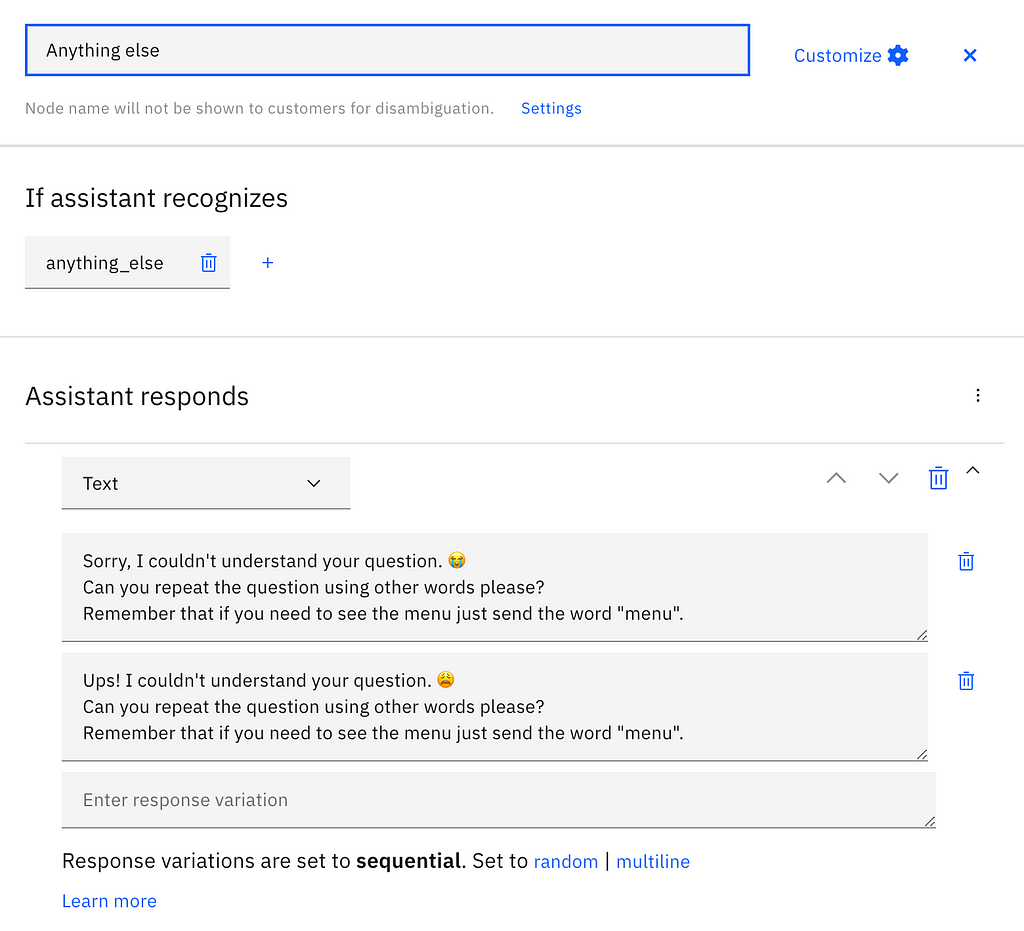
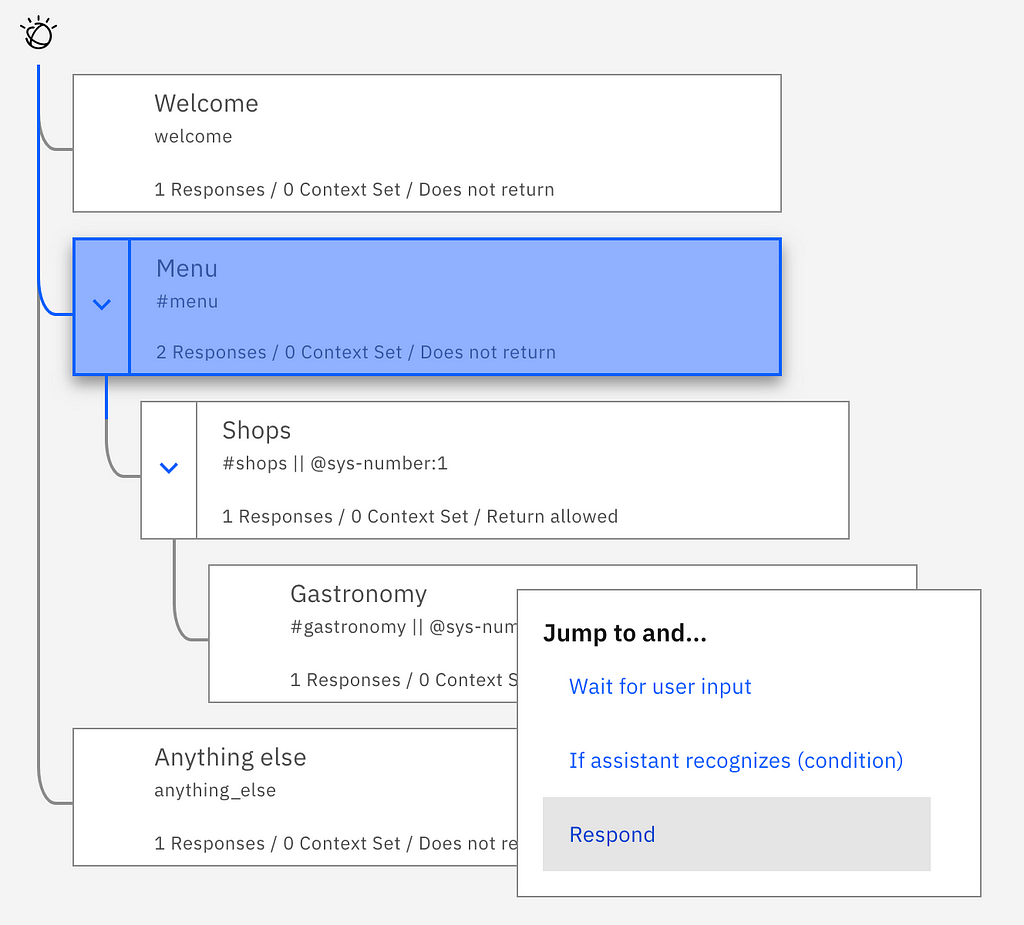
The “Welcome” and “Anything else” nodes
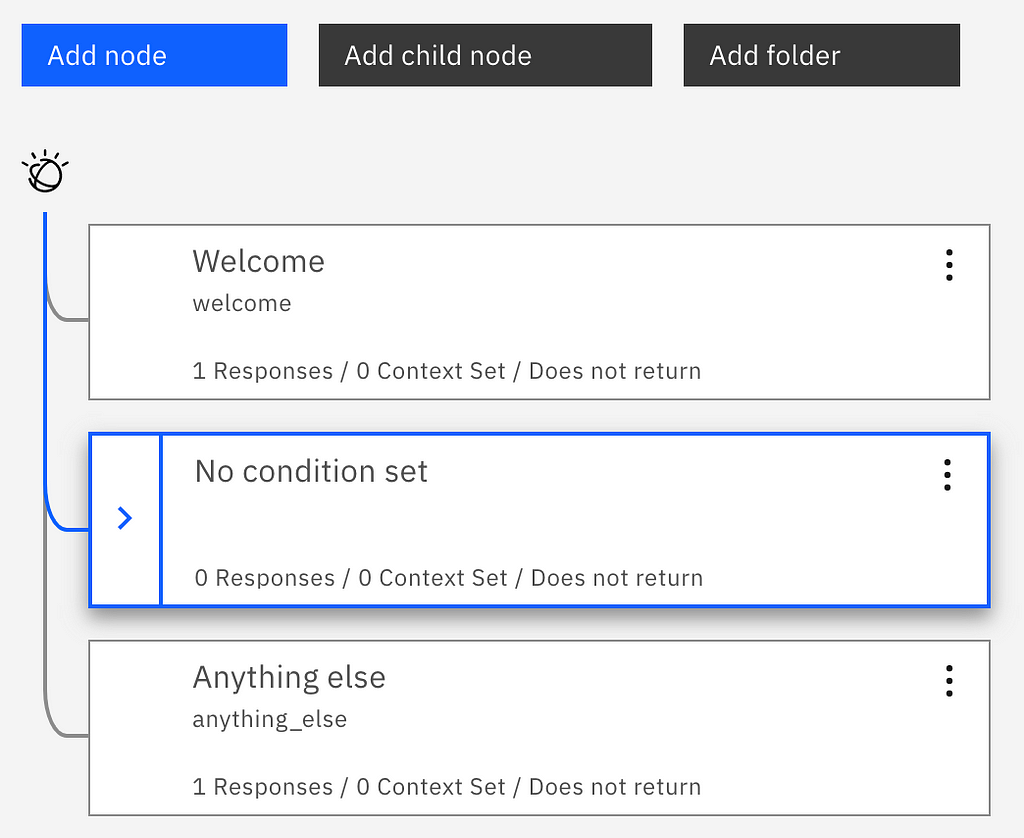
The following two dialog nodes are created automatically:
- Welcome: It contains a greeting that is displayed to your users when they first engage with the assistant.
- Anything else: It contains phrases that are used to reply to users when their input is not recognized.
1. To edit these nodes, select “Dialog” from the side menu.
2. Click on the “Welcome” node, and add your greeting message in the response section.
3. Click on the “Anything else” node, and add your response variations for those questions that the bot cannot answer.
Adding Nodes
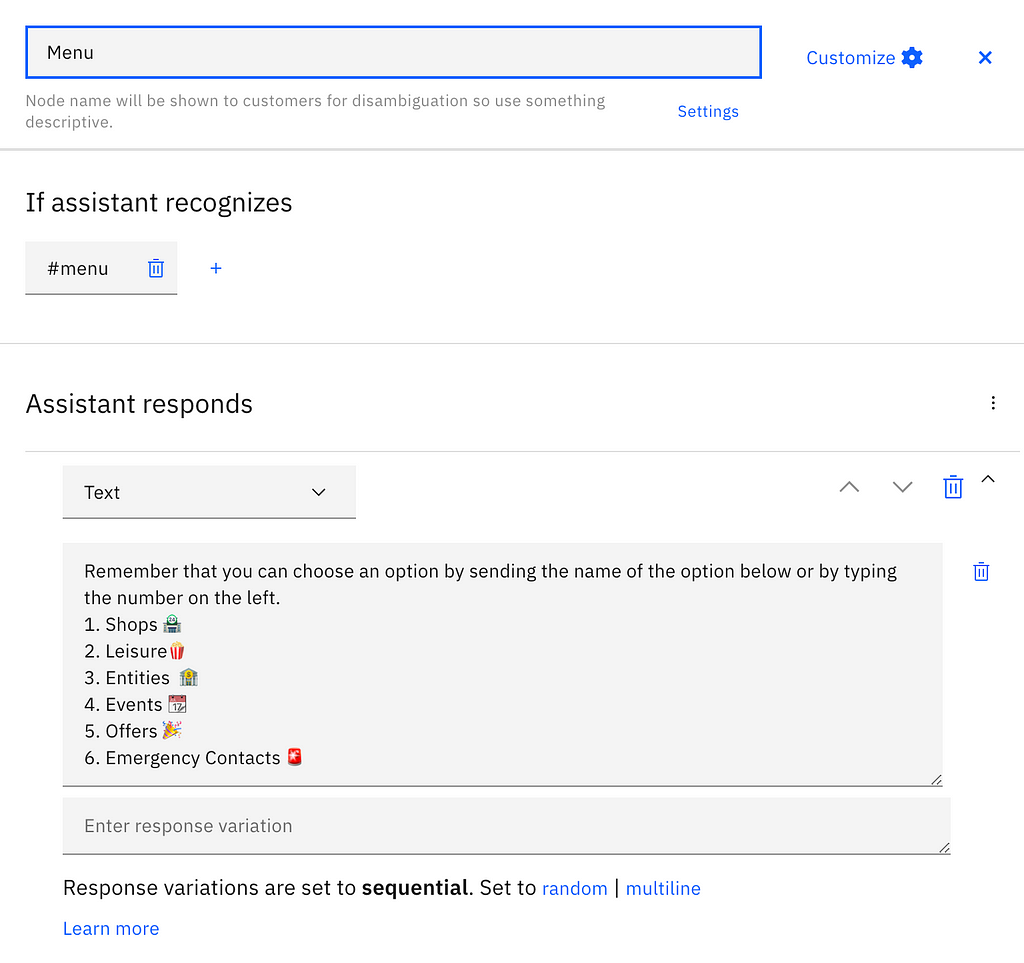
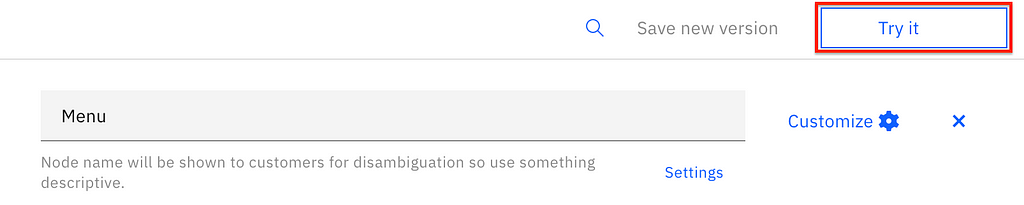
Let’s add a new node containing the menu.
- Click on “Add node”.
2. Name the node as “Menu”. In the “If assistant recognizes” section, add the #menu intent. Finally, add the text for the menu in the response section based on your Information Architecture.
3. Now, let’s try out what we have built so far.
Click on “Try it” to open the pane. You should see your welcoming message.
Ask your Virtual Assistant for the menu as shown in the animation below.
Great! The assistant recognized the intent and replied with the menu.
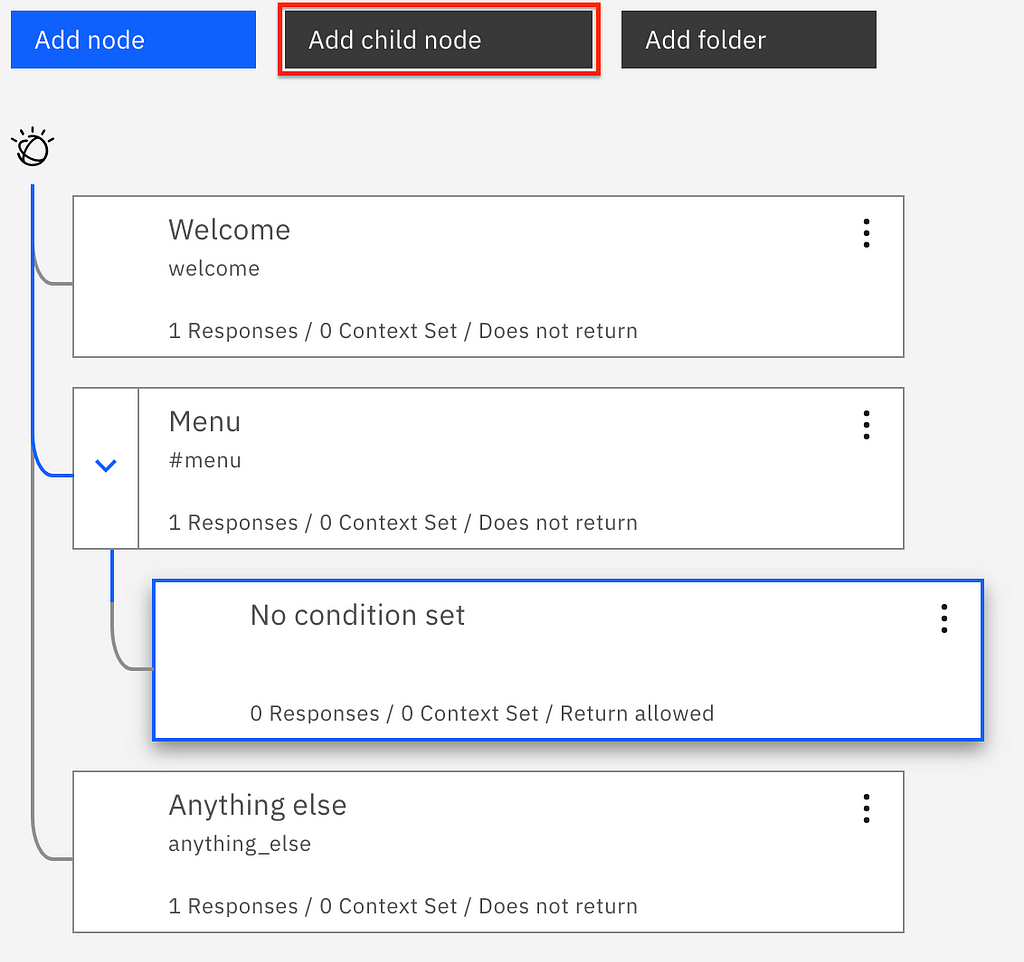
Child Nodes
Let’s add a child node inside the Menu based on the Information Architecture’s hierarchy.
- Select the Menu node and click on “Add child node”.
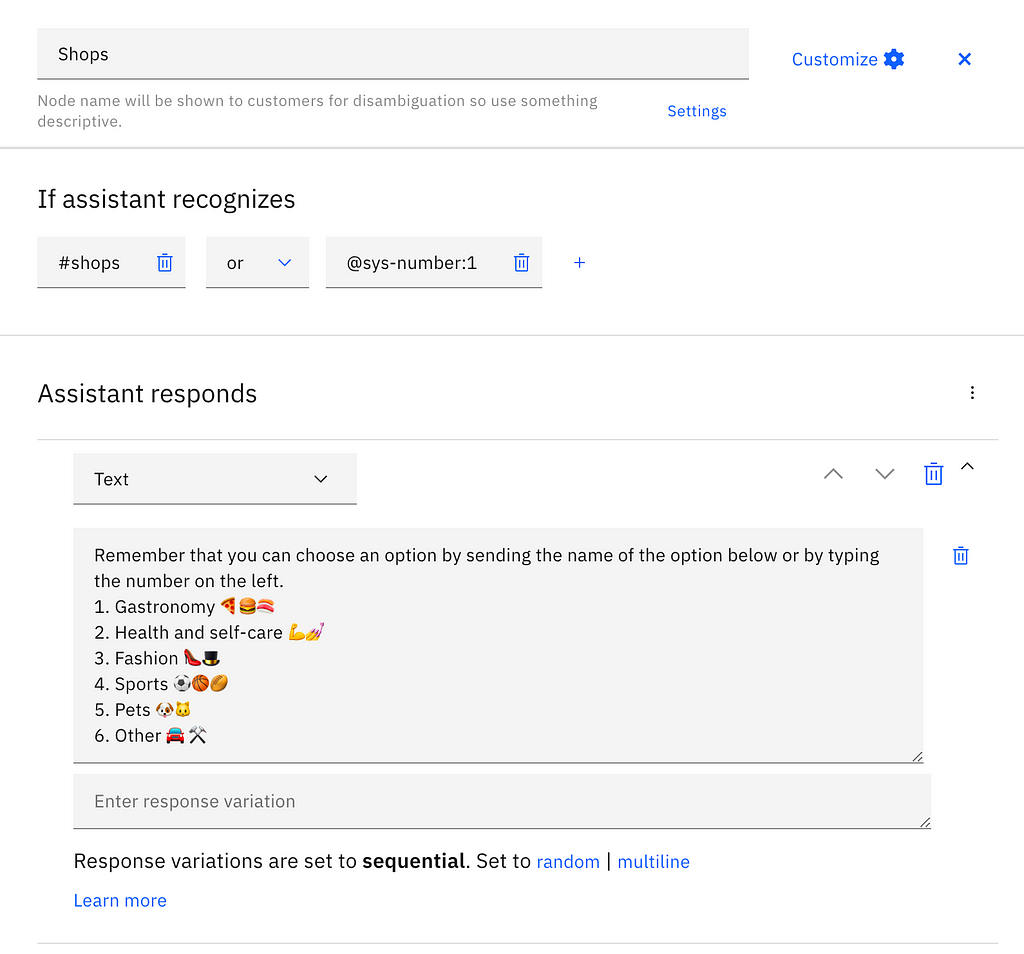
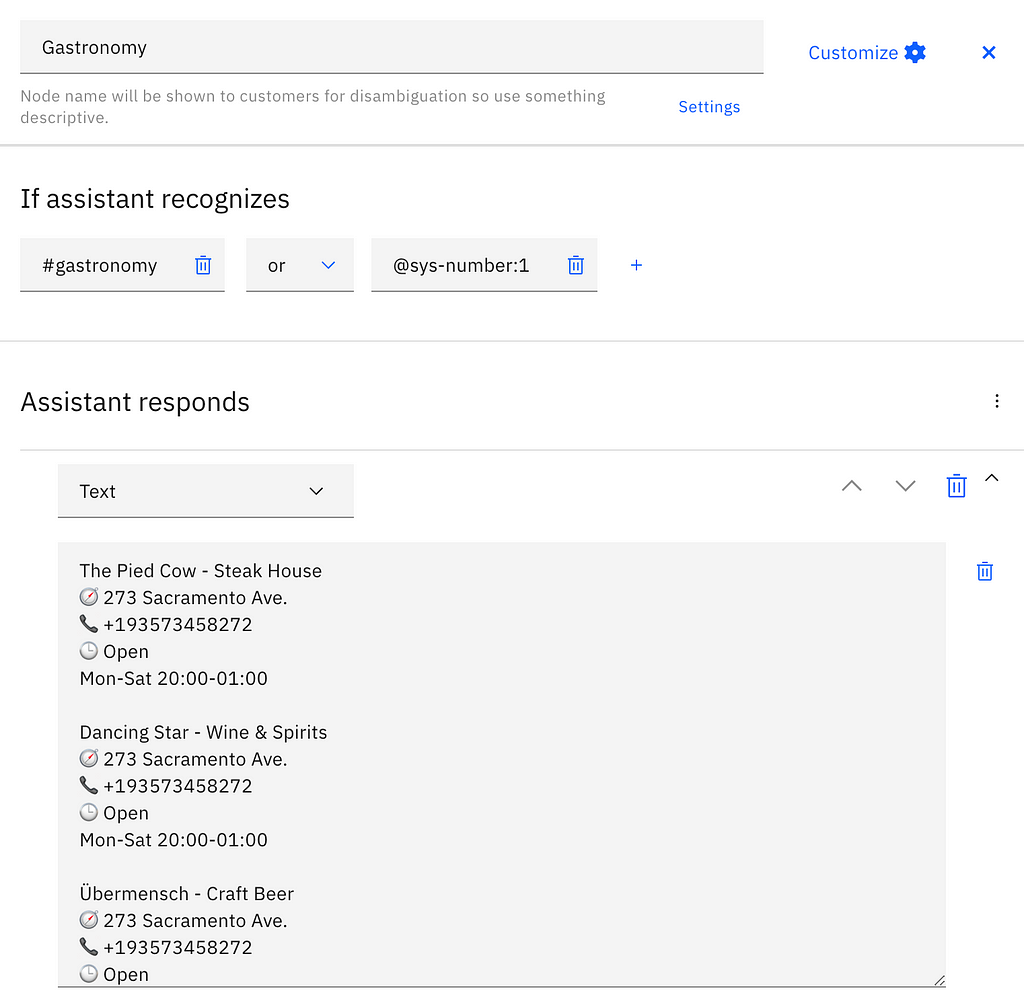
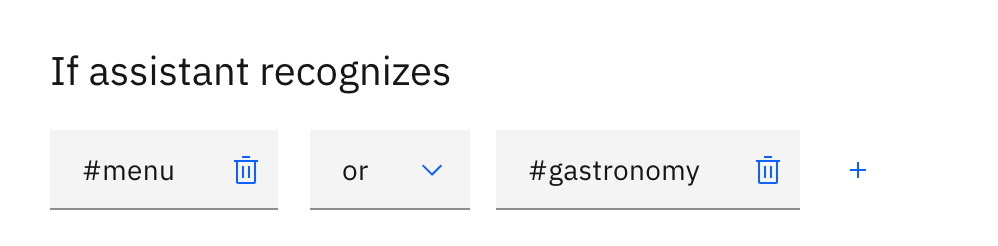
2. Name the node. Add the intent in the “recognize” section and, using the logical operator “or”, add the entity representing the same intent (in this example, we set @sys-number:1). Then, add the text in the response section.
3. Add a new child node inside the child node.
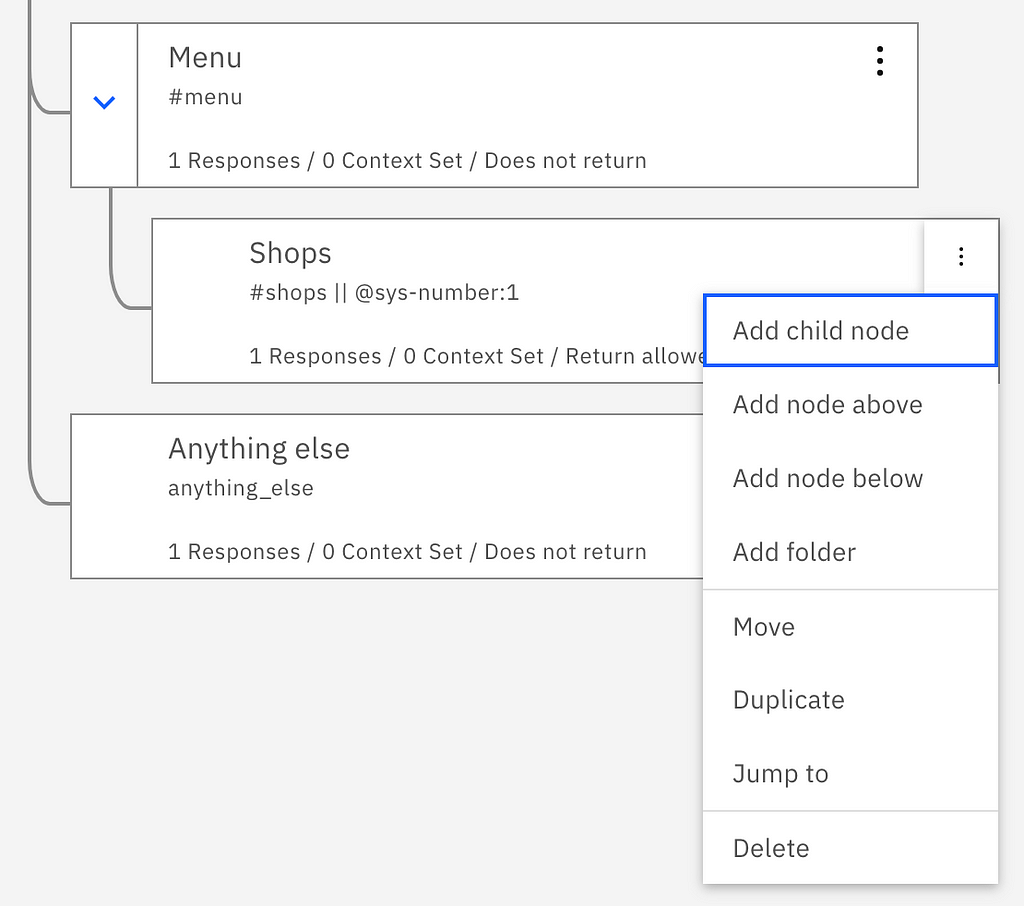
4. Name the node. Add the intent and the entity representing the same intent with the logical operator “or”. Then, add the text in the response section.
5. Let’s try it out.
First, click on “Clear” to reset the conversation. Then, ask the assistant for the menu and navigate using option numbers as shown in the animation below.
Awesome! The assistant recognized the entities, and now we can go through the different menus.
Jumping between Nodes
An important aspect about cognitive bots is their ability to recognize user requests and interpret the natural language used by us (humans). Thus, users should be able to directly ask what they want, and the dialog should “jump” to the node containing the response.
- Go to the menu node and click on “Customize”.

2. Turn on the option “Multiple conditioned responses”.
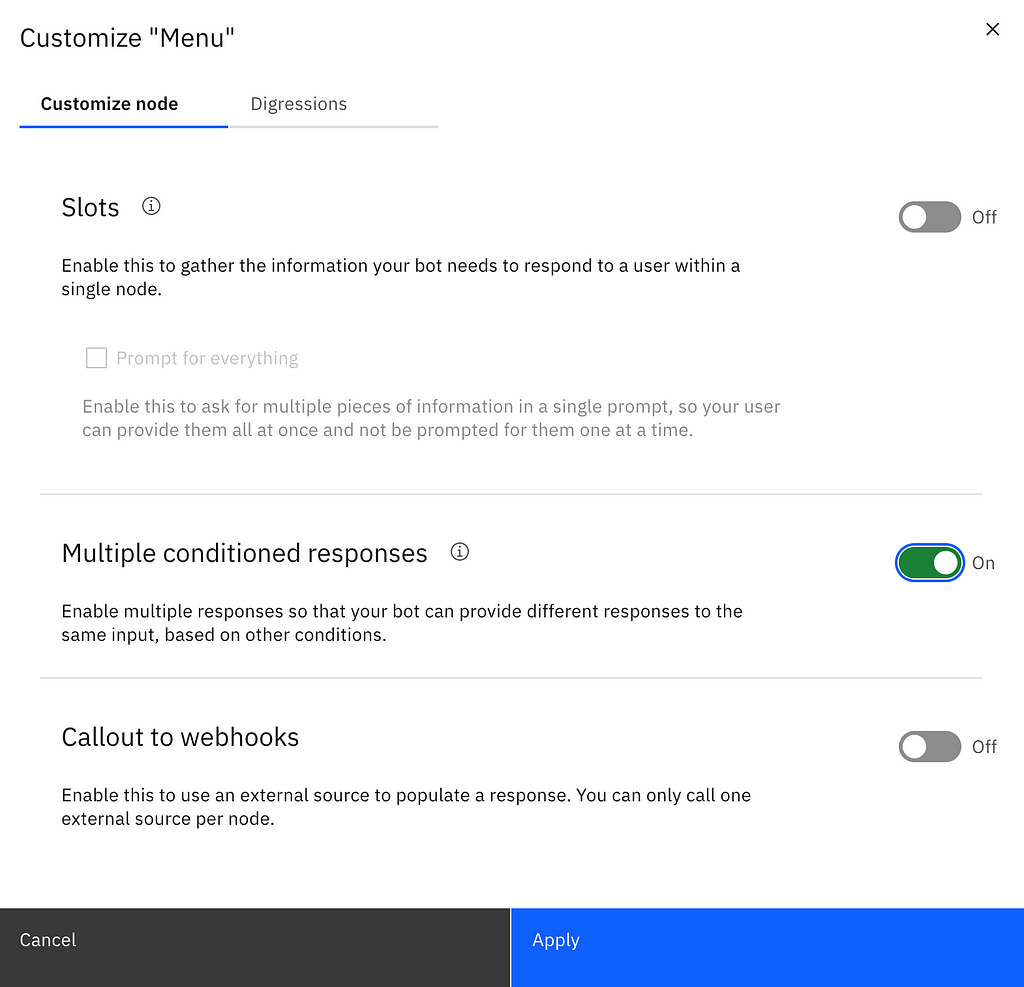
Click on “Apply”
3. To respond with the menu, use the #menu intent.
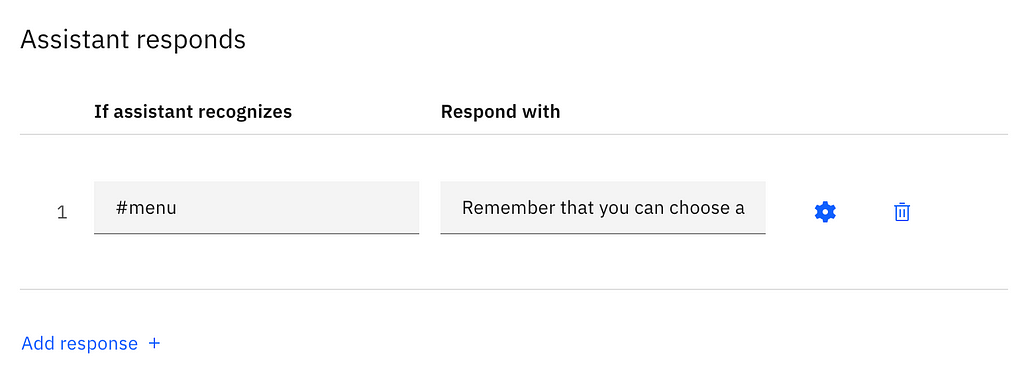
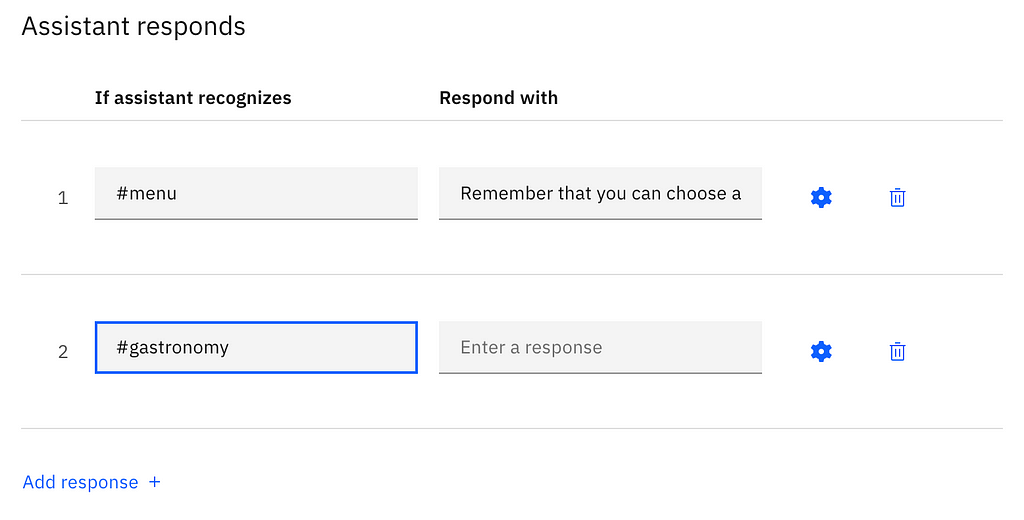
4. Click on “Add response +” and add the intent to jump to the corresponding node.
5. Click on the gear icon between the response and the delete icon. Go to the end of the customization pane, and in the “Then assistant should” section, select “Jump to”.
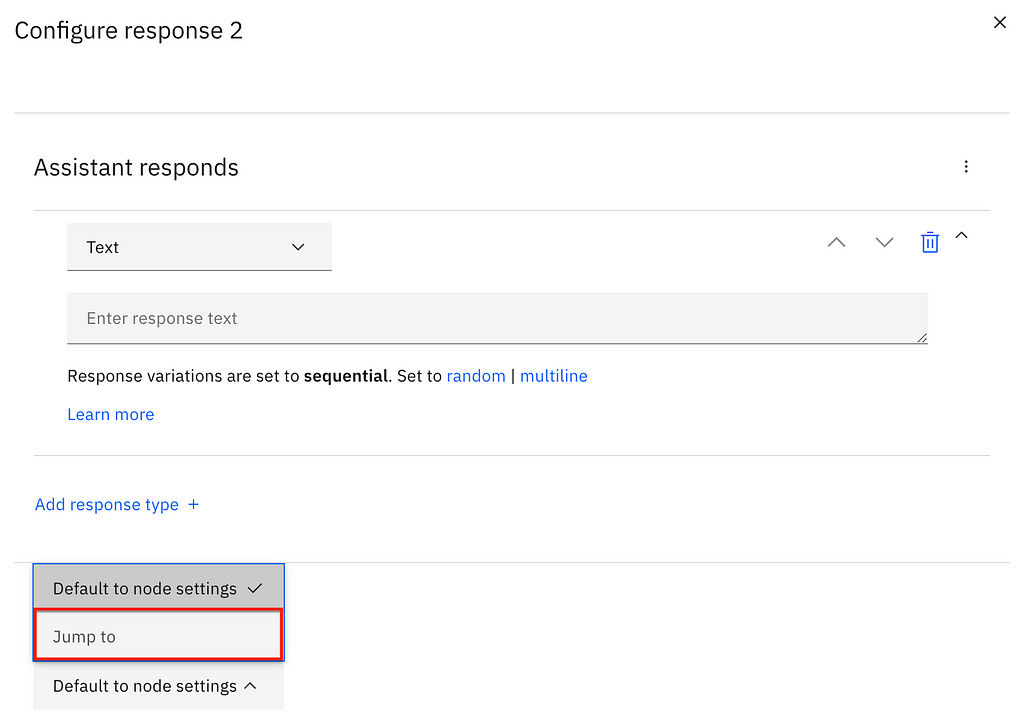
6. Select the node you want to jump to, and select “Respond”.
Click on “Save”.
7. Finally, in the menu node, add the intent with the logical operator “or” in the “recognize” section.
8. Let’s try it out.
Wow! The assistant recognized the question and was able to respond accordingly.
Step 6: Training
The more you use your assistant and the more examples you teach it, the better its AI model will get at answering those questions it does not know yet.
You can use the “Try it out” pane not only for testing purposes, but also as a training tool. Simply ask those questions that the user might ask that were not added in the intent, and change the “Irrelevant” tag to the desired intent as shown below.
Step 7: Integration
For the integration, IBM provides a REST API. The Assistant v2 API provides methods your client application can use to send user input to the assistant and receive a response.
- Go to the Assistants section, select your assistant and go to Settings.

2. Here, you will see the API details to use the REST API.
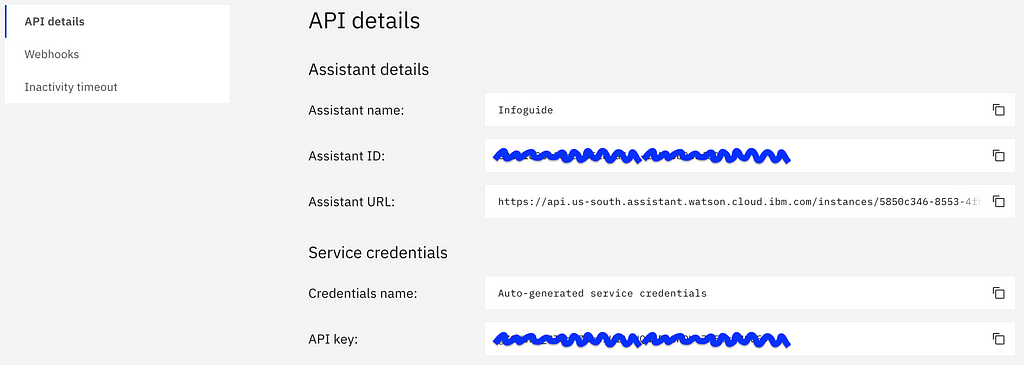
3. Access the API documentation here and replace {apikey}, {url} and {assistant_id} with the information from the API details.
Thanks for reading. I hope this was helpful!
How to Create a Cognitive Virtual Assistant with IBM Watson was originally published in Chatbots Life on Medium, where people are continuing the conversation by highlighting and responding to this story.