
Introduction
Slack is a useful tool for remote teams to interact more quickly and keep documents in one location. Slackbot is helpful for creating automatic messages for many purposes.
Here in this tutorial, we will learn how we can create a bot in slack and add it to our channel and get the text response from the bot, and further how we can get an image, video, audio, or file through the bot.

In addition to that, we will also learn how to save the file sent by the user in the channel to the bot on the server-side. Here we will also learn how we can get customized responses from the bot such as buttons and polls.
Here we learn how we can get different types of responses from the bot such as:
- Text
- Image
- Video
- Document
- Audio
- Buttons
- Poll
Steps to create a Slack Bot
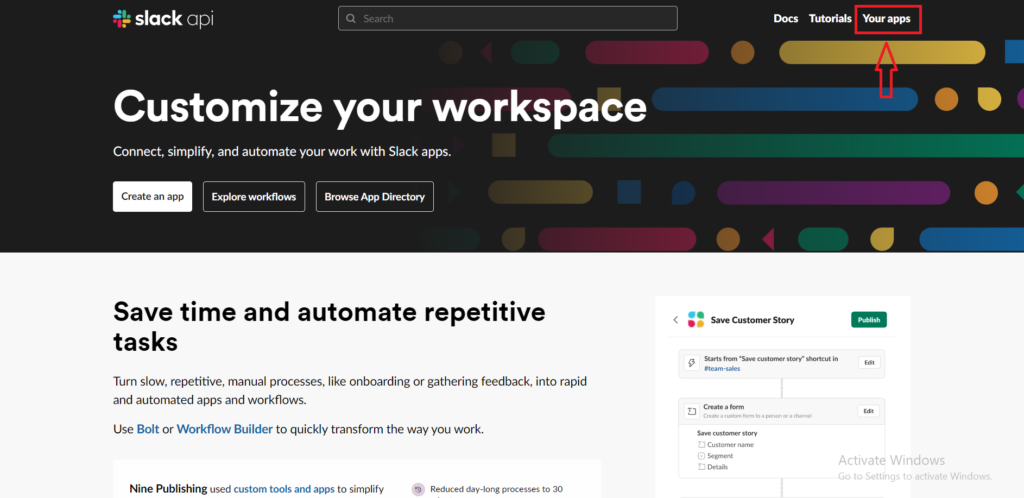
Step 1: Open slack API console. ( https://api.slack.com/).
Step 2: Click on “Your apps”.
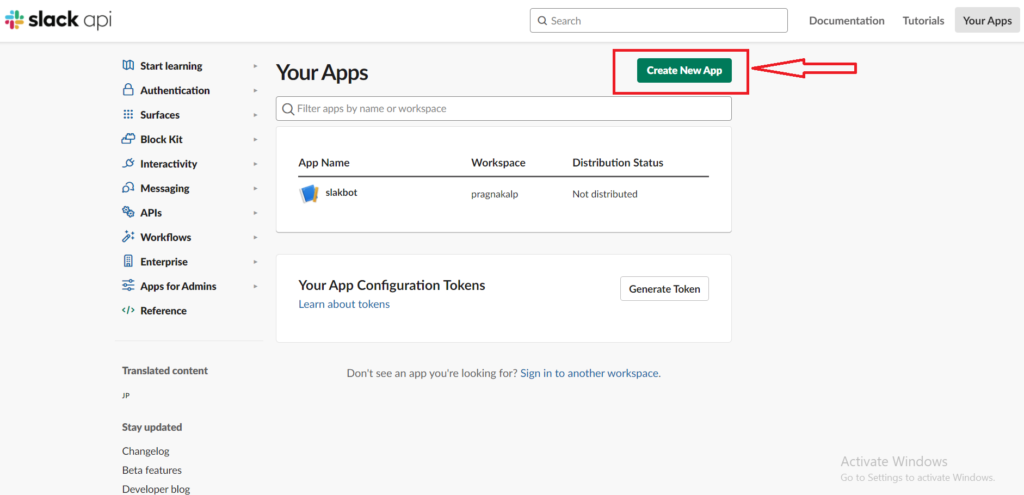
Step 3: Click on “Create New App”.
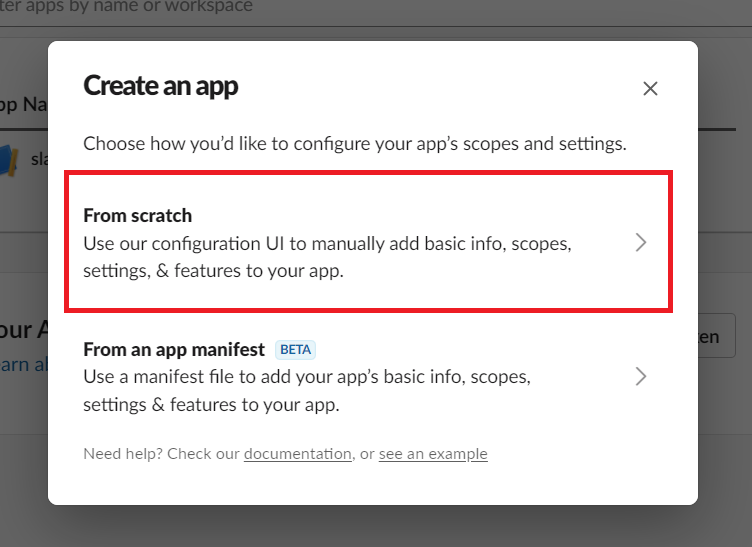
Step 4: Click on “From scratch “.
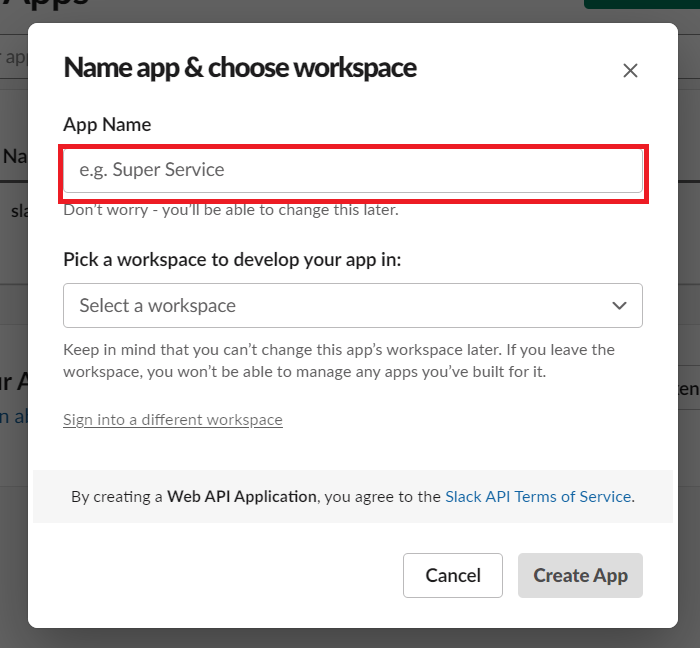
Step 5: Now give your app name and select workspace then click on the “Create App” button.
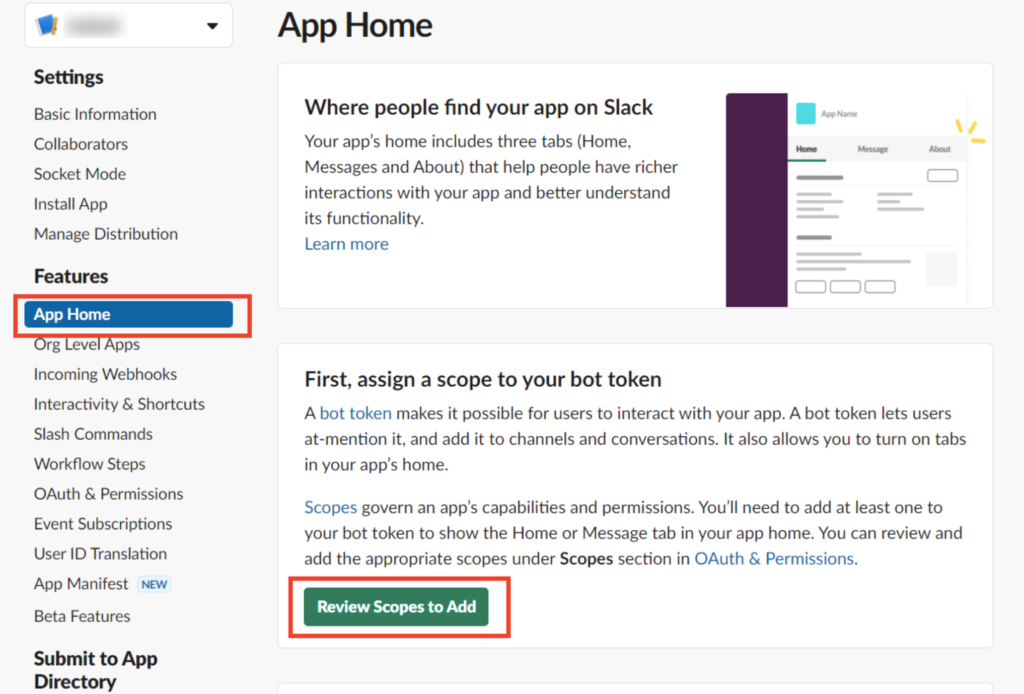
Step 6: Click on the “App Home” button and click on “Review Scopes to Add”.
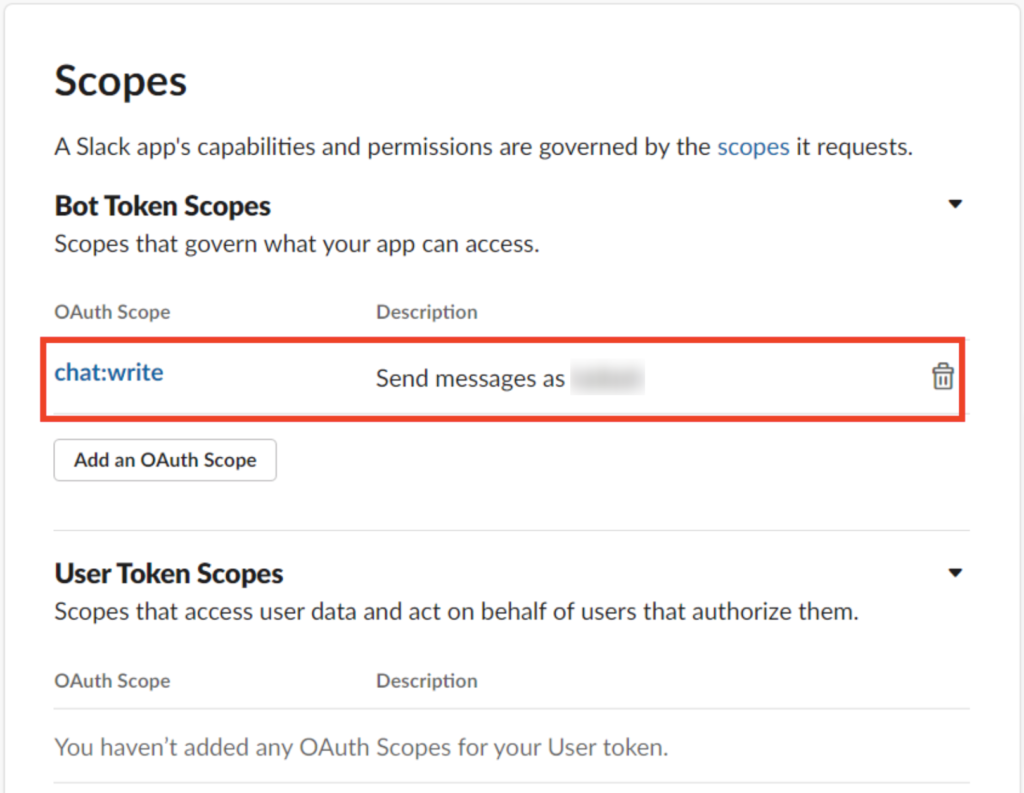
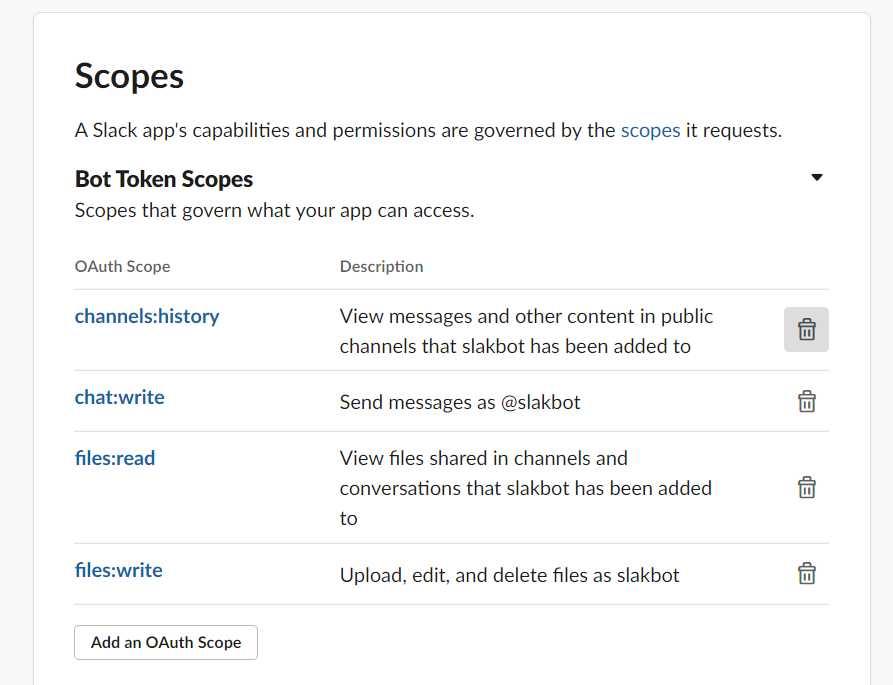
Step 7: After clicking on the “Review Scope to Add” button, scroll down and find the Scope section. Then click on the “Add an OAuth Scopes” Button and add “chat: write” as shown in the below image.
Step 8: Now click on “Install to Workspace” and press on “Allow” to generate an OAuth token.
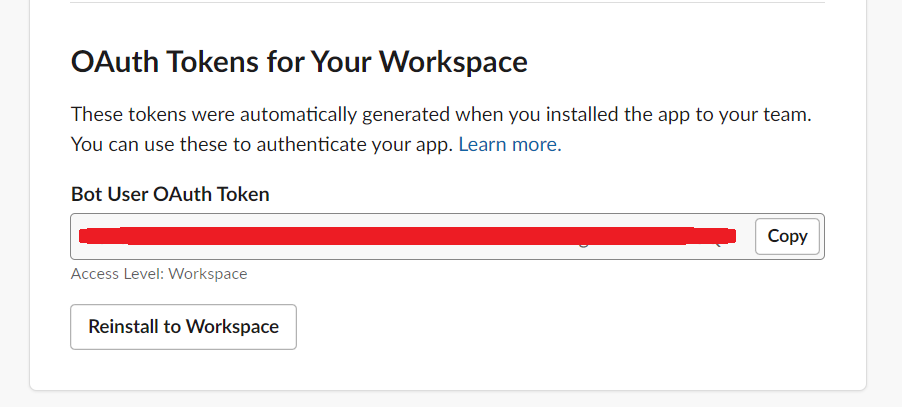
Step 9: Now create a python file (bot.py) and copy the above “OAuth Token” and paste it into the .py file as shown below image.
SLACK_TOKEN="<Your Token>"
Step 10: Now we install slack client python packages using “pip install slackclient” in our virtual environment.
Step 11: Now we create the channel in slack and add our app to it. To open your slack account go to the channel bar and click on the “+” sign. Then click on “Create a new channel”.
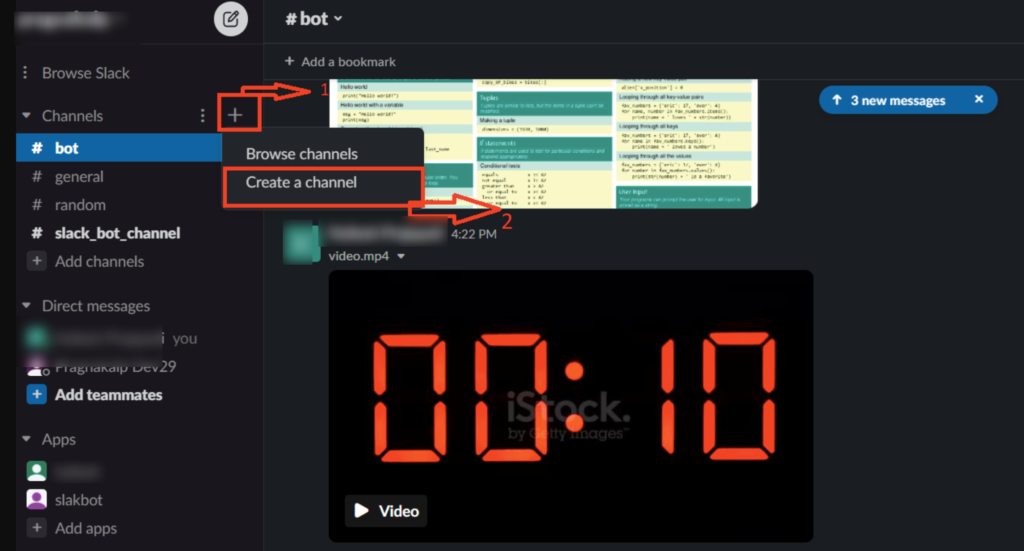
Step 12: Now type your channel name and click on the “Create” Button.

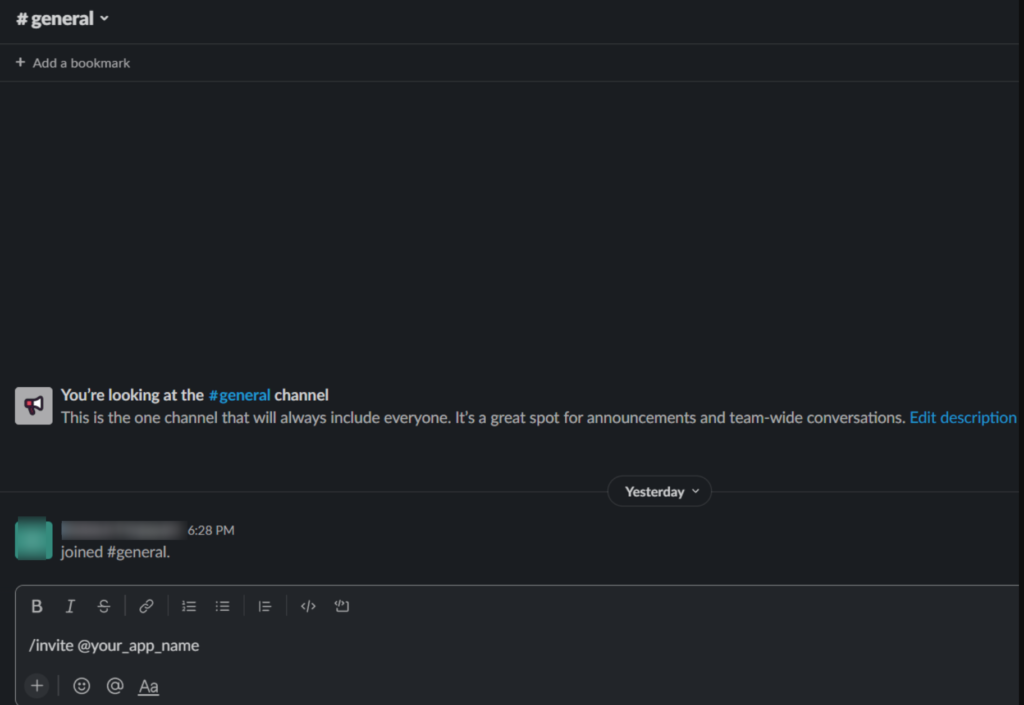
Step 13: Now Add your app to the channel by just typing “/invite @Your_App_Name” (use the app name that you want to connect with the channel) in channel chat.
Step 1 4: Now import the slack module and follow the code shown in the image below. Using this code we can send a “Hello” message to our “#test” channel. Also, we will discuss how to create a channel in the next step.
import slack

SLACK_TOKEN="<Your Token>"

client = slack.WebClient(token=SLACK_TOKEN)
client.chat_postMessage(channel='#justtest',text='Hello')
Step 15: Now we will see how we can respond to the “Hi” message from the user with a “Hello” message from the bot.
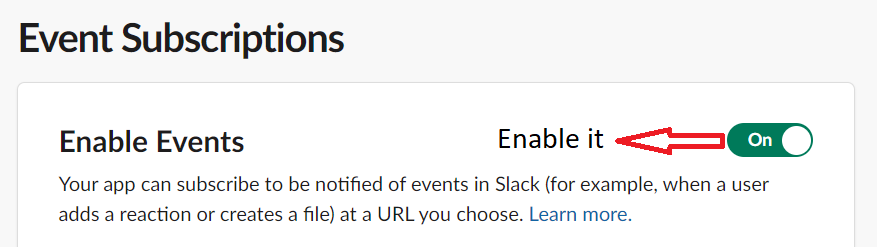
First off, all go to the Slack Developer Console in that go to event subscription and Enable Events.
Step 16: Now install some packages.
$ pip install flask
$ pip install slackeventsapi
Step 17: Now just create a simple flask app like shown below.
import slack
from flask import Flask
from slackeventsapi import SlackEventAdapter

# This is slack token
SLACK_TOKEN="<Your Token>"

app = Flask(__name__)

client = slack.WebClient(token=SLACK_TOKEN)
client.chat_postMessage(channel='#justtest',text='Hello World!')


if __name__ == "__main__":
    app.run(debug=True)
The channel name and channel=’#justtest’ string should be matched otherwise, it will not work.
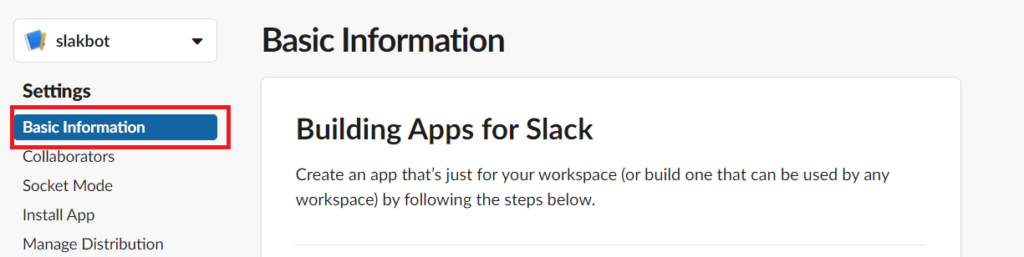
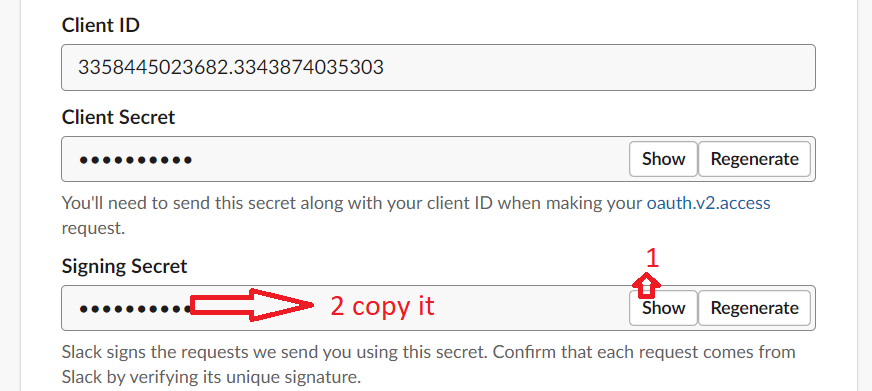
Step 18: Now again go to the Slack Developer Console. In that go to “Basic Information” in the left panel, then scroll down to “Signing Secret” copy it, and add it to the code.
Step 19: Now after adding Signing Secret to our code we need to pass it to the slack event adapter.
import slack
from flask import Flask
from slackeventsapi import SlackEventAdapter

SLACK_TOKEN="<Your Token>"
SIGNING_SECRET="<Your SIGNING SECRET>"

app = Flask(__name__)
slack_event_adapter = SlackEventAdapter(SIGNING_SECRET, '/slack/events', app)

client = slack.WebClient(token=SLACK_TOKEN)
client.chat_postMessage(channel='#justtest',text='Hello World!')


if __name__ == "__main__":
    app.run(debug=True)
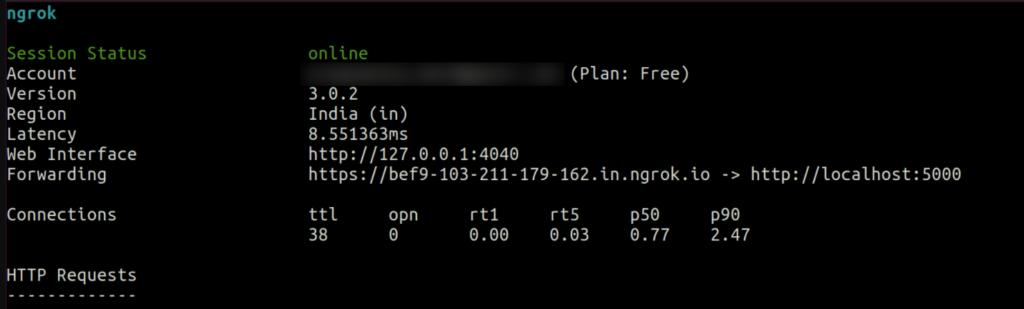
Step 20: Now we need to run this code and we will notice that now we will have a webserver running on http://127.0.0.1:5000/.
Now we will need NGROK for running that program and get the public IP address by running the code “ngrok http 5000” on NGROK and then we will get a public IP address.
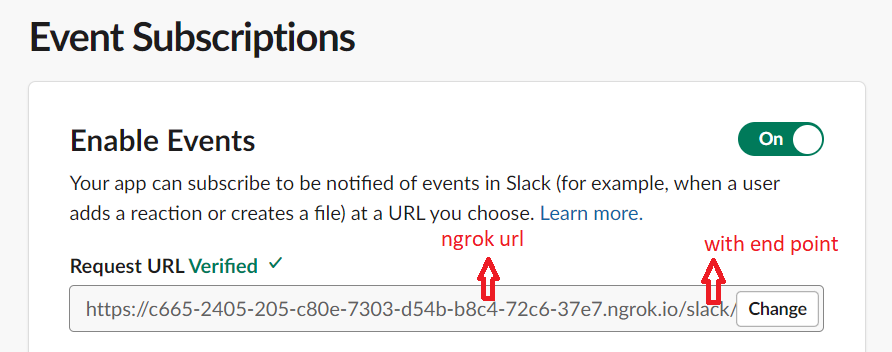
Now we need to again go to the Slack Developer Console, then go to Event Subscription and paste Ngrok URL with the endpoint that we define in the code.
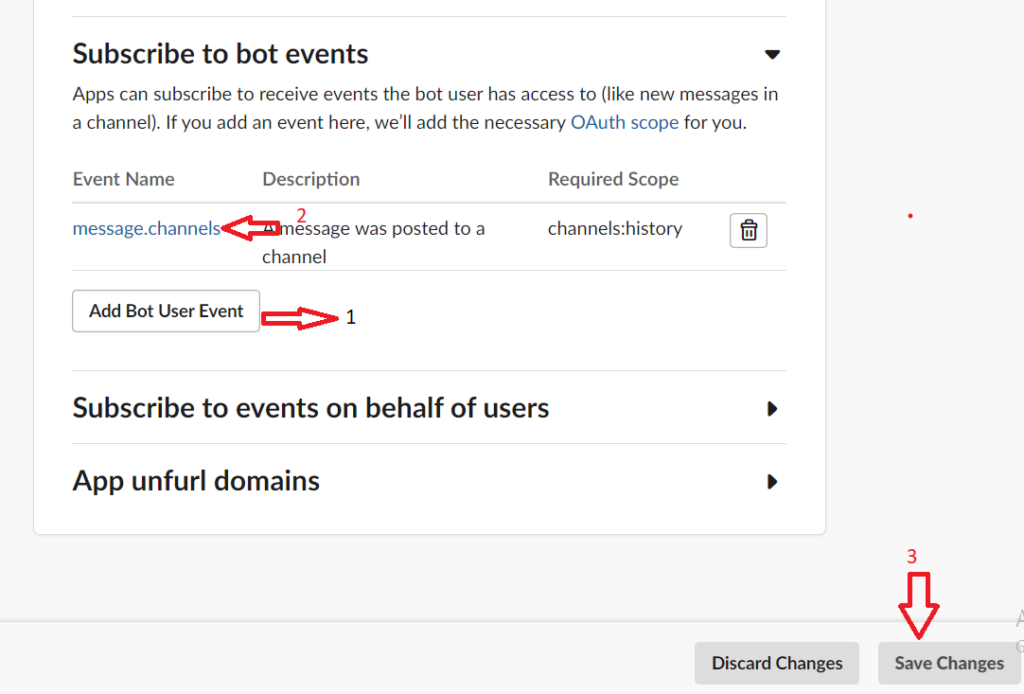
Step 21: After that scroll down and go to the “Subscribe to bot events” then go to “Add Bot User Events” and then add a message. channels to it.
After that click on Save Changes.
Step 22: Now go to “OAuths and Permission” and scroll down to “Scopes” there you will see that a scope name “channels: history” is added, if not then add it to the “Scopes”.
Now Just Scroll up to “OAuth Tokens” & “Redirect URLs”. Click on Reinstall App and then click on Allow.
Step 23: Now we need to create a route, create a function that can handle all these events.
Here in the code, we can get the event information about what that event was about like the message that was sent in the text and all of that.
Channel_id will return the channel id in which the message was sent.
User_id will return the id of the user who sends the message.
Text will give us the text which was written by the user.
Then below is the code to check the message when the user says “hi” and the slack bot responds with “Hello”.
import slack
from flask import Flask
from slackeventsapi import SlackEventAdapter

SLACK_TOKEN="<Your Token>"
SIGNING_SECRET="<Your SIGNING SECRET>"

app = Flask(__name__)
slack_event_adapter = SlackEventAdapter(SIGNING_SECRET, '/slack/events', app)

client = slack.WebClient(token=SLACK_TOKEN)

@ slack_event_adapter.on('message')
def message(payload):
    print(payload)
    event = payload.get('event', {})
    channel_id = event.get('channel')
    user_id = event.get('user')
    text = event.get('text')

    if text == "hi":
        client.chat_postMessage(channel=channel_id,text="Hello")

if __name__ == "__main__":
    app.run(debug=True)
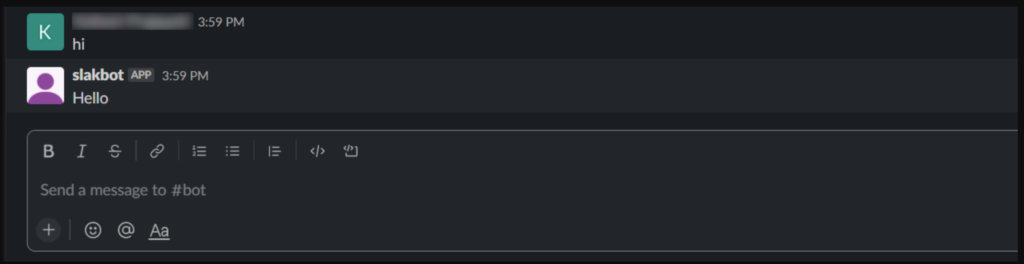
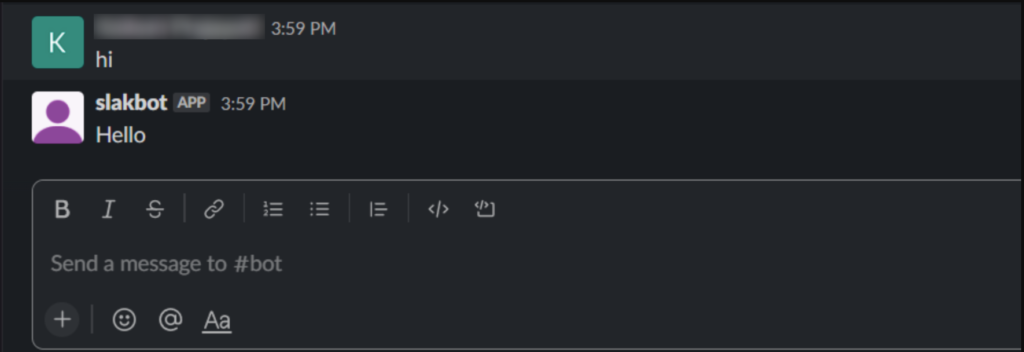
After running the code when we type “hi” in our channel, we will get the reply “Hello” from the bot.
Step 24: Get an image through the bot.
Now to get the image through the bot we need to store the image at the specific path which we want to send to the user and give that path of the image in the file section.
Now by adding the following code to the above code we can get an image through the bot.
if text == "hi":
    client.chat_postMessage(channel=channel_id, text="Hello")

if text == "image":
    try:
        response = client.files_upload(
            file='/home/pragnakalpdev23/mysite/slack_file_display/download (2).jpg',
            initial_comment='This is a sample Image',
            channels=channel_id
        )
    except SlackApiError as e:
        # You will get a SlackApiError if "ok" is False
        assert e.response["ok"] is False
        # str like 'invalid_auth', 'channel_not_found'
        assert e.response["error"]
        print(f"Got an error: {e.response['error']}")
Here we can also send the caption with the text so to send the text with the image we need to pass the text in the “initial_comment”.
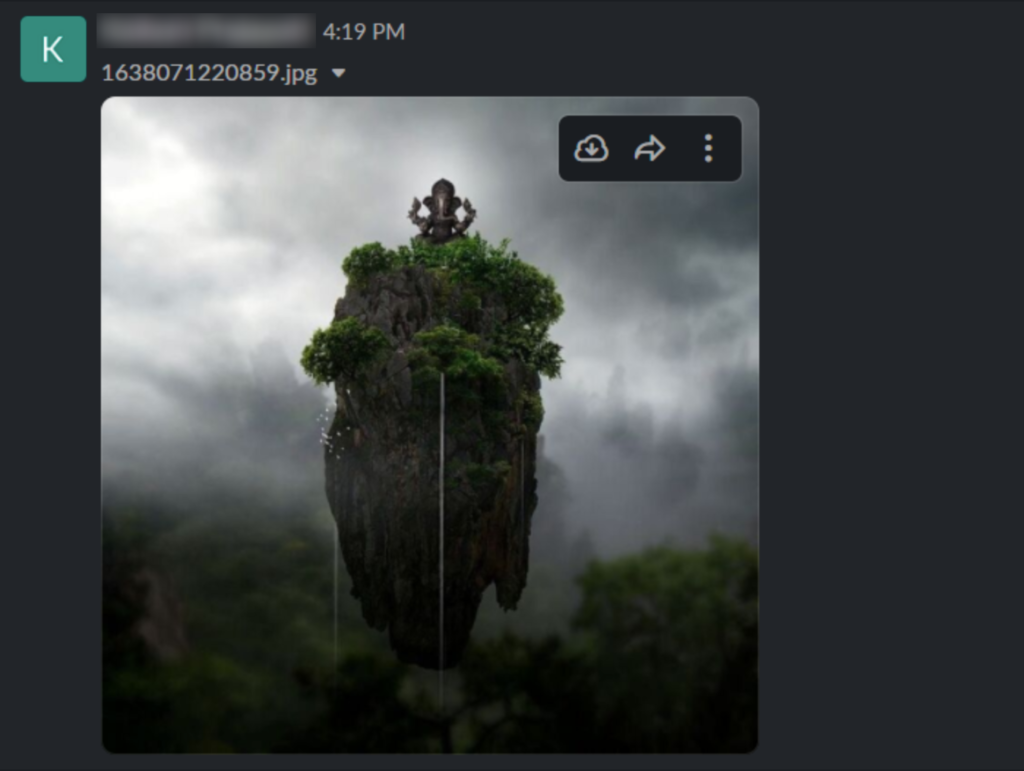
After running the code when we type “image” in our channel, we will get a reply from the bot with an image that we have passed.

Step 25: Get avideo from the bot.
To get the video from the bot we need to do the similar thing as we have done in the image and we also need to specify the path where the video is stored.
First, we will need to import the following library to our code.
from slack.errors import SlackApiError
Now add the below code.
if text == "video":
    try:
        response = client.files_upload(
            file='/home/pragnakalpdev23/mysite/slack_file_display/sample-mp4-file-small.mp4',
            # initial_comment='This is a sample video',
            channels=channel_id
        )
    except SlackApiError as e:
        # You will get a SlackApiError if "ok" is False
        assert e.response["ok"] is False
        # str like 'invalid_auth', 'channel_not_found'
        assert e.response["error"]
        print(f"Got an error: {e.response['error']}")
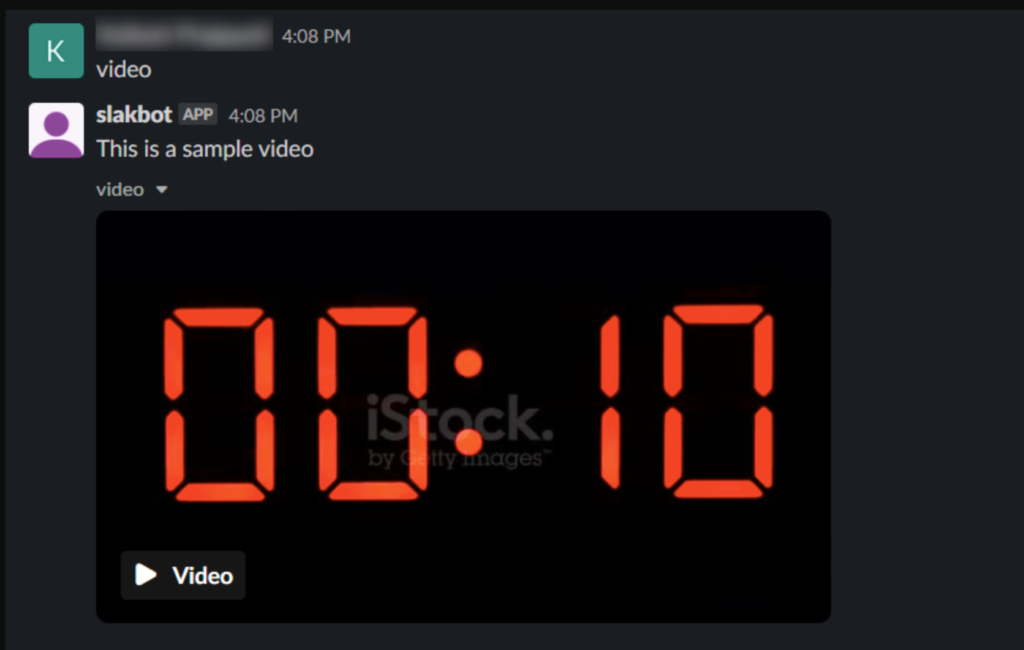
Here also get the caption with the video by passing the caption in “initial_comment”.
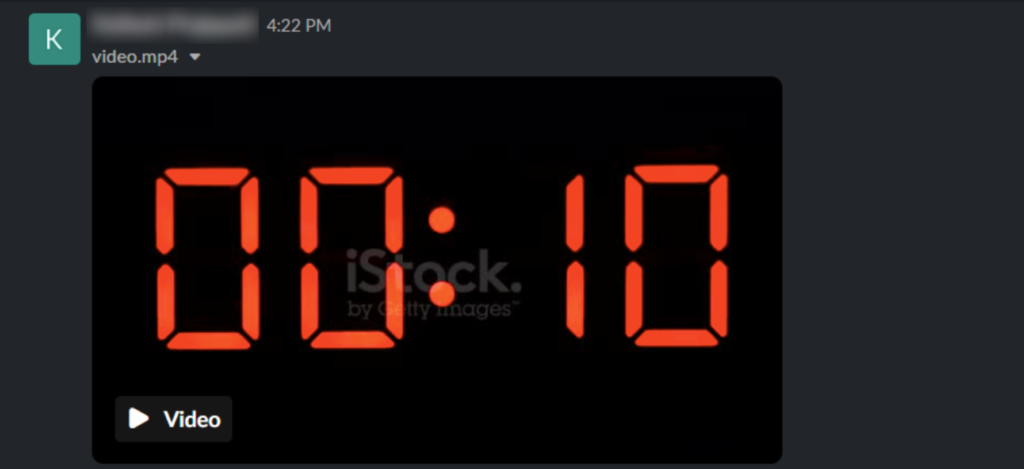
After running the code, if we type “video” in our channel then we will get a reply from the bot with the video that we have passed.
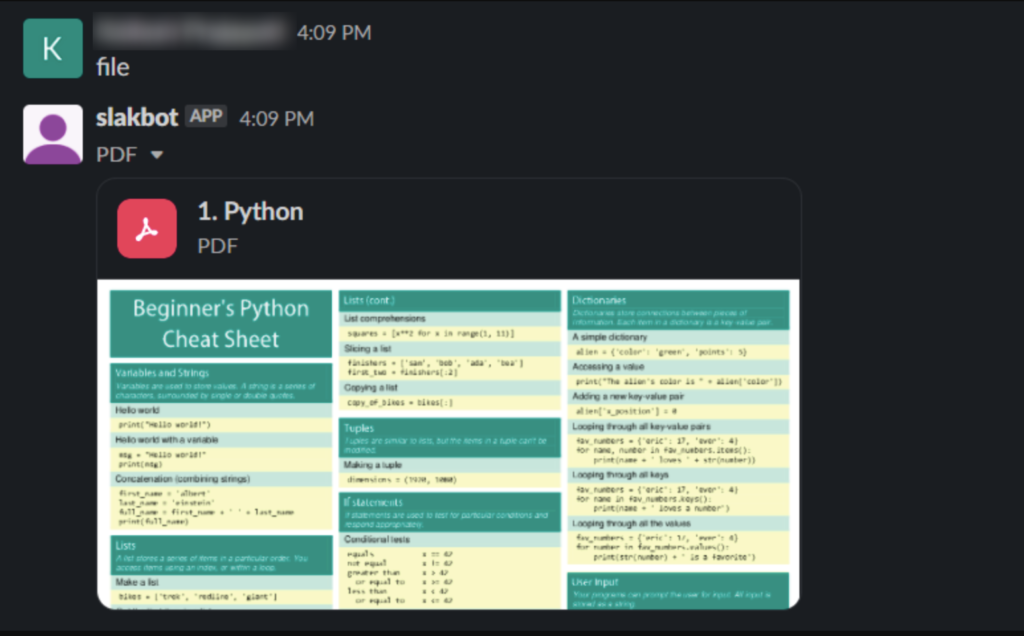
Step 26: Get audio and document through the bot.
In a similar way, we can get the audio and document through the bot by passing the file for audio and video.
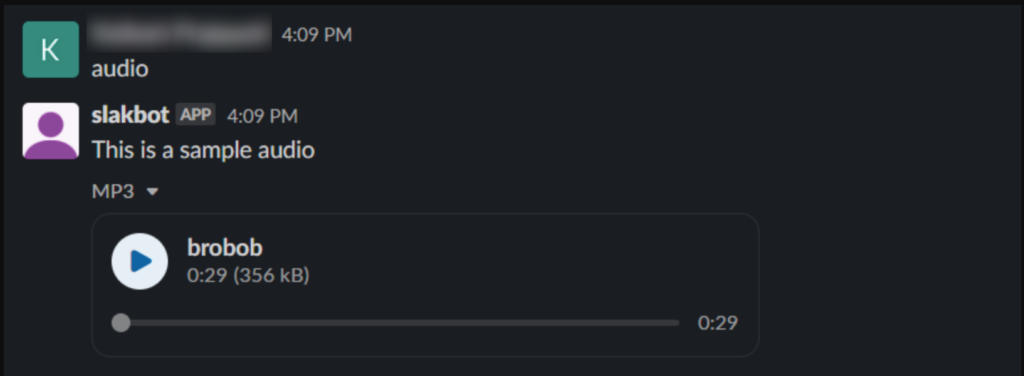
Here also we add a caption with audio and document that we are sending by passing the text in the “initial_comment”.
if text == "file":
    try:
        response = client.files_upload(
            file='/home/pragnakalpdev23/mysite/slack_file_display/sample.pdf',
            # initial_comment='This is a sample file',
            channels=channel_id
        )
    except SlackApiError as e:
        # You will get a SlackApiError if "ok" is False
        assert e.response["ok"] is False
        # str like 'invalid_auth', 'channel_not_found'
        assert e.response["error"]
        print(f"Got an error: {e.response['error']}")

if text == "audio":
    try:
        response = client.files_upload(
            file='/home/pragnakalpdev23/mysite/slack_file_display/file_example_MP3_700KB.mp3',
            # initial_comment='This is a sample audio',
            channels=channel_id
        )
    except SlackApiError as e:
        # You will get a SlackApiError if "ok" is False
        assert e.response["ok"] is False
        # str like 'invalid_auth', 'channel_not_found'
        assert e.response["error"]
        print(f"Got an error: {e.response['error']}")
Now run the code, when we type “audio” in our channel then we will get the reply from the bot with audio that we have passed and when we type “file” in our channel then we will get the reply from the bot with a file that we have passed.
Step 27: Get Images with different methods.
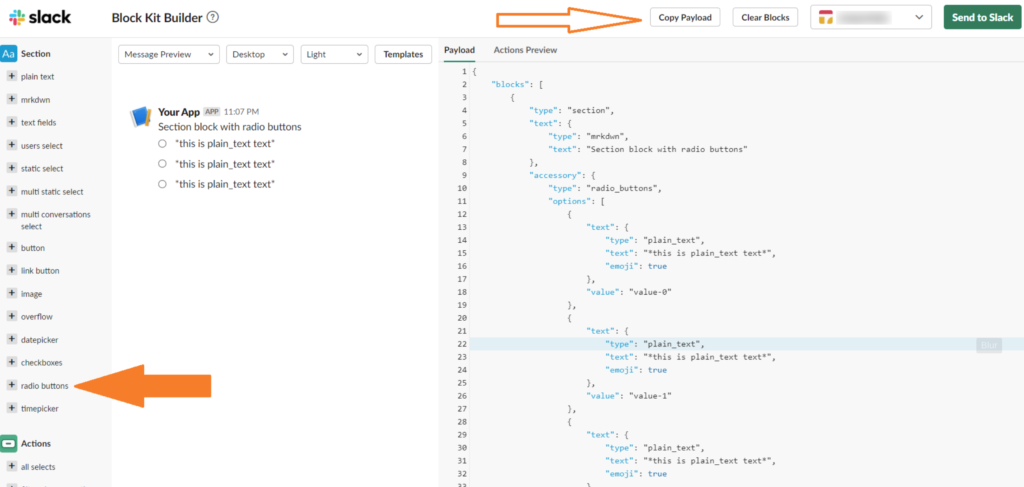
We can also get images by passing the image in different formats. Go to the website for the Slack Block Builder. There we can see a screen like this.
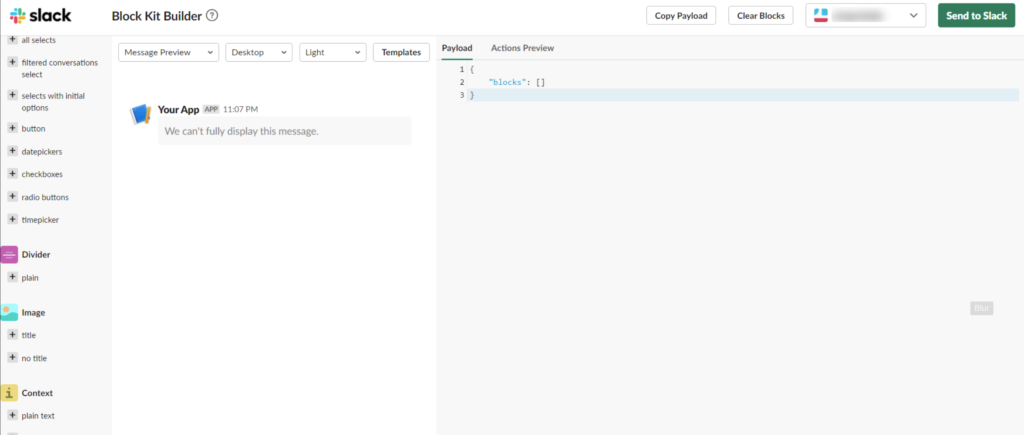
Here on the Left side scroll to the image and click on “no title”. After that, you will see the block of code which is generated. So copy that block of code.
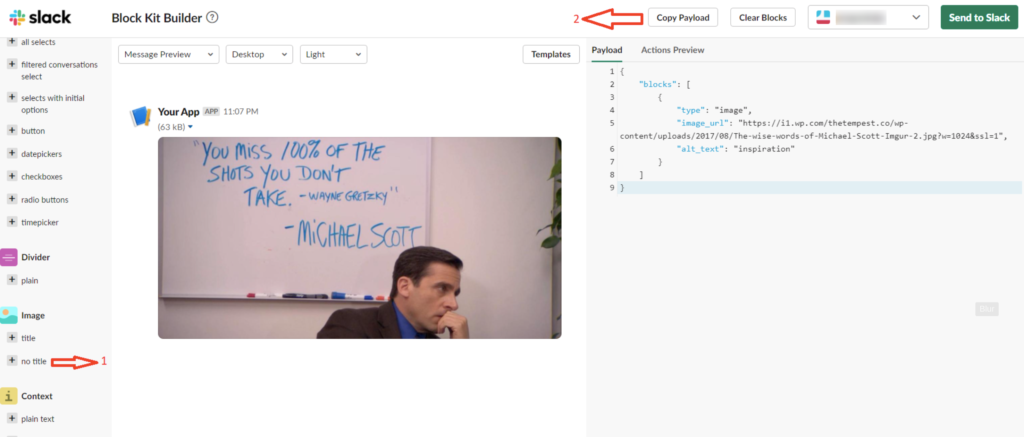
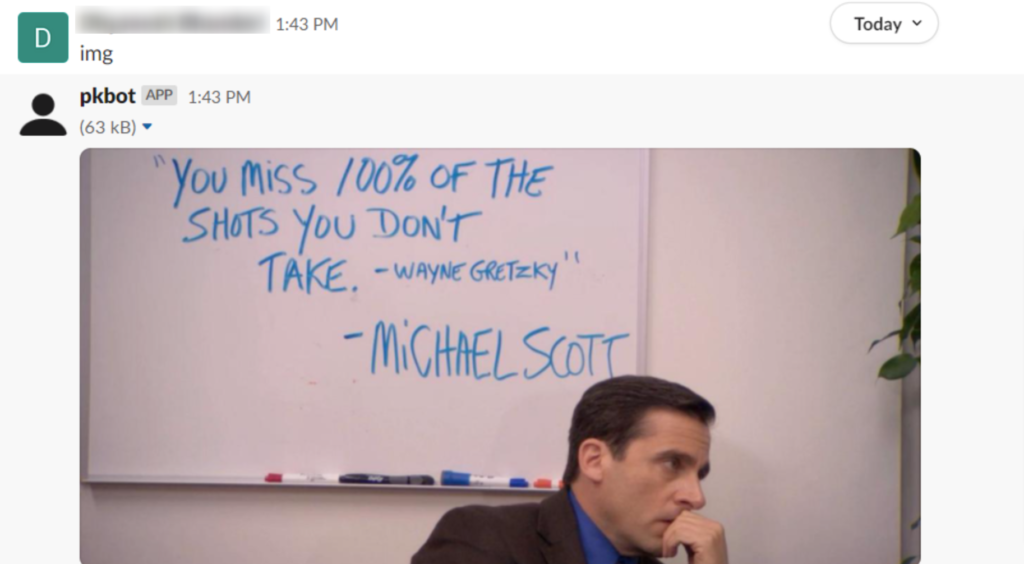
Now merge the below code with the previous code and run it.
if text == "img":
    message_to_send = {"channel": channel_id, "blocks":  [
        {
            "type": "image",
            "image_url": "https://i1.wp.com/thetempest.co/wp-content/uploads/2017/08/The-wise-words-of-Michael-Scott-Imgur-2.jpg?w=1024&ssl=1",
            "alt_text": "inspiration"
        }
    ]}


try:
    return client.chat_postMessage(**message_to_send)
except:
    print("No hi found")
After running the code when we type “img” in our channel, we will get the reply from the bot with an image which URL we have passed in the URL section.
Step 28: To get the radio button.
Now to get the radio button from the bot we need to again go to the website.
Now again scroll down to the “Input” and select “radio buttons” and then copy that payload of code.
Now we need to add the below code in our previous code of the “blocks” section.
if text == "radiobtn":
    message_to_send = {"channel": channel_id, "blocks": [
        {
            "type": "input",
            "element": {
                    "type": "radio_buttons",
                    "options": [
                            {
                                "text": {
                                    "type": "plain_text",
                                    "text": "*this is plain_text text*",
                                            "emoji": True
                                },
                                "value": "value-0"
                            },
                        {
                                "text": {
                                    "type": "plain_text",
                                    "text": "*this is plain_text text*",
                                            "emoji": True
                                },
                                "value": "value-1"
                                },
                        {
                                "text": {
                                    "type": "plain_text",
                                    "text": "*this is plain_text text*",
                                            "emoji": True
                                },
                                "value": "value-2"
                                }
                    ],
                "action_id": "radio_buttons-action"
            },
            "label": {
                "type": "plain_text",
                "text": "Label",
                "emoji": True
            }
        }
    ]}

try:
    return client.chat_postMessage(**message_to_send)
except:
    print("No hi found")
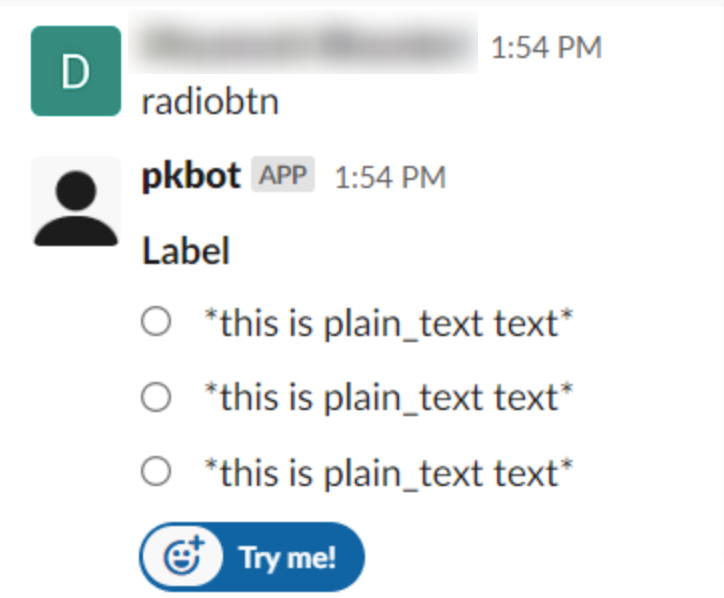
After running the code when we type “radiobtn” in our channel then we will get a reply from the bot with a radio button.
We can also add more responses and combine many responses together. To get the response we just need to create the payload from the website, copy the payload and paste it in the “blocks” section as we have done in the above code.
Step 29: Get an image at the server-side if we send the image to the bot.
First, send the image to the bot.
Now check at the terminal we will get the JSON response as shown in the below screenshot when we send an image to the bot.

Now we need to get the file name, URL for the file, and user id for the image that we have uploaded by adding the given code in our previous code.
We will get the response like the following in our terminal.

try:
    img_name = payload['event']['files'][0]['name']
    print("img_name:-->", img_name)
    img_url = payload['event']['files'][0]['url_private']
    print("img_url:-->", img_url)
    user_n = payload['event']['files'][0]['user']
    print("user_n:-->", user_n)
    file_name = img_url.split('/')[-1]
    print("file_name:-->", file_name)
except:
    print("not found 1-->>")
Now we have saved the image that we send by passing the URL and saving the file in our current directory at our server-side.
For that, we need to add the following code to our previous code.
try:
    img_name = payload['event']['files'][0]['name']
    print("img_name:-->", img_name)
    img_url = payload['event']['files'][0]['url_private']
    print("img_url:-->", img_url)
    user_n = payload['event']['files'][0]['user']
    print("user_n:-->", user_n)
    file_name = img_url.split('/')[-1]
    print("file_name:-->", file_name)
    try:
        json_path = requests.get(img_url)
    except:
        print("nnnn mm ")
    if user_n != "<Your Bot User Id>":
        with open(file_name, "wb") as f:
            f.write(json_path.content)
except:
    print("not found 1-->>")
Here in the code, we are specifying the user id of the bot because when any file such as an image, video, etc is being sent by the bot then also we are getting a similar type of JSON at the backend which we get when a user sends any file. So we only want the files that have been sent by the user not by the bot to be stored on our server-side. Therefore we are specifying the user id for the bot and if the user id is not equal to the bot user id then only the file would be saved.
After adding the code and running it we can see that our image will be saved on our server-side.
Step 30: Get video at the server-side if we send video to the bot.
First, send the video to the bot.
We will get the following JSON at the backend.

Similarly, we need to extract the file name, URL, and user id. Then run the code in the similar way we get in the video at our server-side.

Similar way we can also get audio and file on our server-side.
We have implemented the code to get the image, video, and audio from the file and also the same on the server-side if we send the file to the bot. In this Github Repository, you can find the full code implementation with all functionalities that we discussed in the above tutorial.
With the tutorial, we learned about the creation of the slack bot and getting the response through the bot such as text, image, video, audio, and file. Moreover, when a user sends any type of file to the channel bot we can get it saved at the server-side in our computer.
Try to build Slack Bot by yourself with the tutorial. Please comment below if you will face any difficulty while following the tutorial. You can also implement such a bot on the Telegram channel. You may do this by following our Telegram Bot instructions given in the tutorial.
Originally published at Create Slack Bot Using Python Tutorial With Examples on April 13, 2022.
Create Slack Bot Using Python Tutorial with Examples was originally published in Chatbots Life on Medium, where people are continuing the conversation by highlighting and responding to this story.