Year: 2021

  • Student Review —  Voice User Interface Design Course by CareerFoundry

    Student Review — Voice User Interface Design Course by CareerFoundry

    Me: Alexa, could you write a blog for me, please?

    Alexa: Blog is spelled, B-L-O-G

    Never mind. I still love you, Alexa.

    I published my first blog last month, and WOW! I could have never imagined the love and support it received. Thank you for taking out the time to read and reach out to me. It means the world to me!

    I had mentioned that enrolling in an online course while waiting for my work permit, has been the best investment so far. So what better than writing about it in this blog. Now, many of you may not connect with this blog as much as you did with my previous one. But we all learn something new from people around us, don’t we?

    Anyone who stops learning is old, whether at twenty or eighty. Anyone who keeps learning stays young. The greatest thing in life is to keep your mind young.

    — Henry Ford

    I spent a good amount of time on Youtube watching UX design videos. While I did learn a thing or two, it wasn’t enough. I went back to reading design books. (Doing a happy dance). But, I craved for more and wanted a major skill upgrade. I was determined to use this time to learn something new and pivot my design career.

    I came across CareerFoundry on Youtube. So I did some research and came across their Advanced Courses for Designers. The one that immediately caught my attention was Voice User Interface Design Course. My first reaction was, “How cool would it be to be able to design voice assistants and chatbots! Immediately followed by another thought. “Wait, how do you design voice?

    I have had an Echo Dot device for about 3 years now. To be honest, I do not use it to its full potential, but it’s still a part of my day-to-day life. Music, Amazon package tracking, alarms, and reminders. Working heavily with visual interfaces as a UX Designer, I never took a moment to pause and appreciate the Echo device’s voice design.

    Photo by Lazar Gugleta on Unsplash

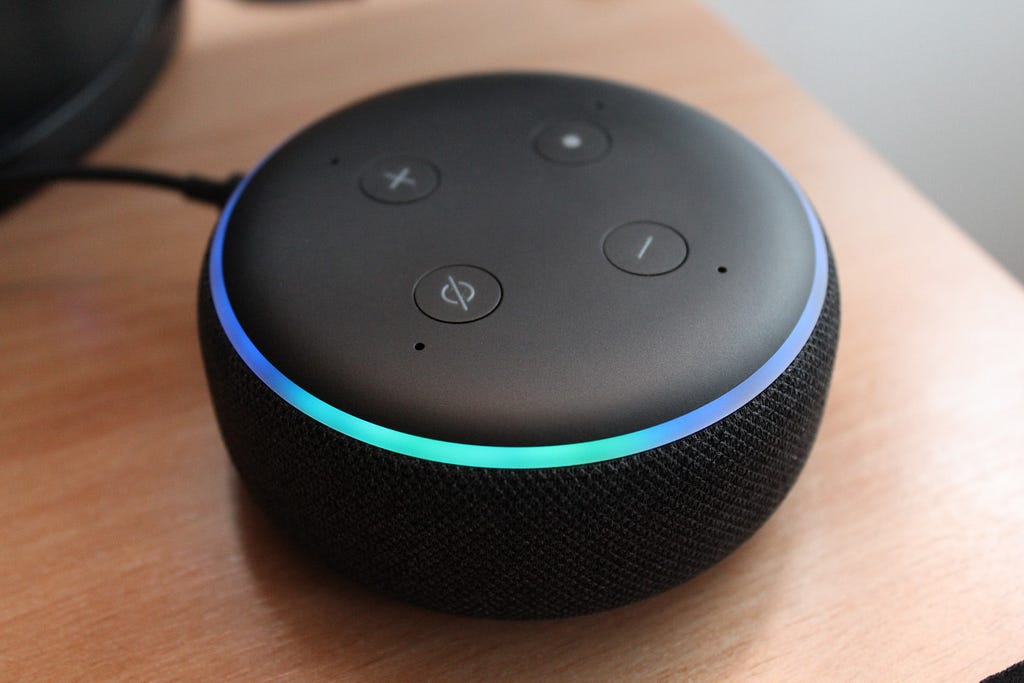
    I did appreciate the tech side of it. I was in awe of how capable it is of understanding speech and processing it. It understood my Indian accent and every request ranging from web search, fun facts, to a specific Bollywood song. I was of the impression that copywriters would write Alexa’s responses, and the developers would simply put those responses in their code. What would they require a designer for? But oh boy, was I in for a surprise!

    Career Foundry’s VUI Design course was perfect for me in several ways. It requires some prior knowledge of UX Design. So my 4 years at IBM, India, as a UX Designer provided a solid base. The course duration (2 months) was perfect.

    Trending Bot Articles:

    1. How Conversational AI can Automate Customer Service

    2. Automated vs Live Chats: What will the Future of Customer Service Look Like?

    3. Chatbots As Medical Assistants In COVID-19 Pandemic

    4. Chatbot Vs. Intelligent Virtual Assistant — What’s the difference & Why Care?

    Course Curriculum

    Did you know the first speech recognition device was a children’s toy called Radio Rex in the early 1900s? Isn’t that amazing!? (Wonder why, as a kid, was I playing with toys that had weird Bollywood songs playing out of them? Hmph..)

    CF’s curriculum comes with such fun facts along with solid teaching. It covers everything starting from the History of Voice to How to conduct Voice Usability Testing. The fact that this was not a regular “read and answer multiple-choice questions” type of course (like corporate training courses :P) stood out to me. Their bite-sized module and assignments at the end of each module helped me reinforce what I learned and build a strong foundation for future modules.

    Course details: https://careerfoundry.com/en/courses/voice-user-interface-design-with-amazon-alexa/

    Prepping for my assignment (Image is subject to copyright)

    Mentorship

    Pros: I was assigned a personal mentor, an industry expert, who would solve my doubts, assess and approve all my assignments, and give feedback. This was a major deciding factor for me. I did not want to read a bunch of course material and give some random online tests. Feedback from my mentor, a Voice Design expert, has been invaluable for me. He was always available and provided me with additional resources to help me understand and learn better.

    Cons: You only get 3 phone calls with your mentor for the course duration. Though I could reach out to my mentor over chat and always received prompt replies, I wish CF increased the no. of calls.

    Also, to receive the course completion certificate, I had to finish the course before losing mentor access, i.e., two months from joining the course.

    Portfolio Project

    I designed and built 1 complex skill and 2 relatively simple skills. CF provided me with the basic editable JS code to get started with skill-building. Not knowing how to code did not stop me from creating skills for Alexa. I was able to modify and upgrade the code with some help from my husband. So it is up to the student on how advanced they want their projects to be. The first time I tested my skill on the Echo device, it felt surreal. The plastic cover on my new Echo Dot that I did not bother to remove before testing my skill, is proof of my excitement.

    Price

    Money is a very personal issue. While I may I have found the course worth the fee, it could be different for you. No worries. But if you wish to enroll, you can use my referral (affiliate) link below and avail 5% discount on the course fee! Please note: This is not a sponsored post

    My affiliate link:

    https://careerfoundry.com/en/referral_registrations/new?referral=V7WqRK0g

    Student Advisors

    The student advisors help with the operational side of the course. They reach out if you fall back on an assignment, need time management tips, or extra time to finish your course. They do not believe in the “One size fits all” approach and tackle individual requests.

    What could have been better?

    • I missed having a community of students studying the same thing. There are Slack channels and Forums to connect with them for user research and testing, but I found it restricting and very to the point.
    • More no. of phone calls with the mentor.
    • Would have loved more video content. The content is good but text-heavy. So be ready to do a lot of reading.

    To sum it up, I am glad I signed up for the VUI Course and would 100% recommend it if you are looking to upgrade your skills.

    Every day I learn something new about Conversation Design and dream of getting my first gig as a Conversation Designer. The idea of it is exciting enough to keep me going. Remember, doing a course is just one way of learning it. Read books, watch videos and tutorials, build your own skill, offer to help with conversation design projects at work, if possible. Explore and enjoy the process!

    I recently stumbled upon a quote by Zig Zagler and found it so relevant. I am preparing without worrying (mostly) about the result while waiting for the opportunity (a.k.a Work Permit.)

    Success occurs when opportunity meets preparation

    — Zig Ziglar

    My Conversation Design projects will soon be available on my website www.thatbombaygirl.com

    If you are looking for some Conversation Design beginner-friendly resources, let me help you, my friend. Sharing it with you all and hoping to continue our “Conversation” in my next blog (pun intended 😜)

    Videos

    Books

    Amazing people to follow

    Design & Prototyping tools

    Don’t forget to give us your 👏 !


    Student Review —  Voice User Interface Design Course by CareerFoundry was originally published in Chatbots Life on Medium, where people are continuing the conversation by highlighting and responding to this story.

  • How to Use Visuals to Make Your Chatbot More Lively and Empathetic — EmpathyBots

    How to Use Visuals to Make Your Chatbot More Lively and Empathetic — EmpathyBots

    Do you know? according to research, visual messages are processed 60,000 times faster than text messages.

    And, that is the reason adding visual elements into chatbots is considered as one of the top 2 best practices of conversational UI (user interface) design.

    In the last guide, I have shown you how to build a simple FAQ Chatbot with ManyChat to get started with your journey of chatbot development.

    And in this guide, I will continue that example of FAQBot to show you how to make your chatbot more lively by adding some visual elements to it so that it could feel more empathetic, interesting, and fun to interact with.

    The tool that we are going to use for designing those visuals is none other than, Canva — a simple yet powerful graphic designing tool!

    So, without further delay, let’s get started!

    How to Use Visuals to Make Your Chatbot More Lively & Empathetic
    Source: EmpathyBots

    Types of Visual Elements You can Add to Your Chatbot

    Before start creating, you must know the types of visual elements that are mostly used in chatbots.

    1. Emojis

    Emojis are often used along with text, but you can use them smartly for creating emoji-based quick replies, buttons, and many other things as well.

    These are already available in most chatbot builders, so you don’t need to create them. If it’s not available in your tool, then you can directly copy them from getemoji.com.

    2. Images

    Images are also widely used in chatbots. It can be memes, product photos, pictures to express certain emotions, and so on.

    3. GIFs

    GIFs are normally 2–3 seconds long and they can be a very powerful way to express the feeling of energy, hyperactivity, and frenzy.

    4. Documents

    Documents like pdfs, word documents, excel sheets can also be used in chatbots as lead magnets.

    5. Videos

    Most developers link to external sources like YouTube to show videos to users, but if it is not that big in size then it can be shown within chatbots as well.

    Trending Bot Articles:

    1. How Conversational AI can Automate Customer Service

    2. Automated vs Live Chats: What will the Future of Customer Service Look Like?

    3. Chatbots As Medical Assistants In COVID-19 Pandemic

    4. Chatbot Vs. Intelligent Virtual Assistant — What’s the difference & Why Care?

    How to Create Visual Elements for Your Chatbot Using Canva

    It’s very simple and easy to create those visual elements with Canva.

    For this tutorial, I will design two images to welcome and say goodbye to our FAQBot users.

    So, let’s start!

    First, you need to create an account with Canva, if you haven’t had one.

    Then, click on “Create a design”, and select “Facebook Post”.

    You can select the custom size as well. I just select the Facebook post because I want to create that size image, not for any special reason.

    Next, head over to the “Elements” tab in the left sidebar, select the element and edit it as you want.

    Here’s how I have designed two images for my FAQBot,

    Similarly, you can create any kind of visual elements with Canva including GIFs, Videos, Documents, and so on for your chatbot.

    Now, let’s add it to our FAQBot.

    Head on to ManyChat, click on the “Automation” tab, select a flow, and click on the “Edit Flow” button.

    Then, add the images to the content blocks and click “Publish

    Source: EmpathyBots

    Still wondering exactly why you must use visual elements in your chatbot?

    Then, read the next section!

    4 Reasons Why You Should Add Visual Elements to Your Chatbot

    1. To Trigger Emotions

    Visuals convey feelings, especially in a specific situation you have to add some visuals where words alone are not enough to make that positive difference to a conversation.

    For example, we use smiley emoji in a welcome message as it conveys the sense of happiness and evokes a warm response from a receiver.

    2. To Make Conversation More Interesting and Engaging

    Do you read an article full of text?

    Maybe not!

    Because adding visuals such as images, infographics, videos, etc. makes it more engaging.

    Otherwise, you will smash on that back button to exit from the article as soon as possible, Isn’t it?

    So, similar to the case of chatbots, if you add some visuals to it, it will become more interesting and engaging.

    3. To Help People

    Remember how do we know that restroom is intended for men or women?

    By seeing symbols on the restroom door, right?

    This is the best example of understanding how visuals are intuitive and can help people by giving directions.

    Similarly, you can do it in your chatbot as well.

    For example, if your user asks for the direction of your shop’s location, then your chatbot can simply send a map.

    4. People React to Visual Elements Faster than Text

    And the final reason is, as I said earlier, that people react to visuals way faster than text because the human brain processes visual data more quickly than any text-based data.

    So, let’s wrap up this article now!

    Wrapping Up

    So, you just read the importance of visual elements, the most popular types of them for a chatbot, reasons to add them, and how to add them.

    Now, it’s time to take action and put some time and effort to add some visual elements to your chatbot to make it more lively and empathetic.

    And, it is up to you which type of visual elements you have to add, but remember to use it only where is necessary otherwise, it will look very ugly and can easily annoy your chatbot users.

    Liked this story? Consider following me to read more stories like this.

    You can also follow me on Twitter and LinkedIn.

    Don’t forget to give us your 👏 !


    How to Use Visuals to Make Your Chatbot More Lively and Empathetic — EmpathyBots was originally published in Chatbots Life on Medium, where people are continuing the conversation by highlighting and responding to this story.

  • Battle of the Bots in The Crypto You

    Bots, Sniper Bots, and Anti-Sniper Bots in The Crypto You

    The Crypto You is the first Baby Metaverse blockchain game on Binance Smart Chain (BSC). Players can summon characters, complete daily mining missions, conquer the Dark Force, loot rare items to play and earn.

    Same as before, I’ll skip the briefing of The Crypto You as many KOLs have done it already. If you are new to this game, Do Your Own Research before entering any games. Also, I am not responsible for any account suspension or loss. If you like my article, you can use my referral link to support me.

    This article aims to share what interesting observation I saw when coding a market bot of The Crypto You. Bots, Sniper Bots, and Anti-Sniper Bots.

    Bots

    There are two currencies in the market, $BABY & $MILK. $BABY is a lot more valuable than $MILK.

    Targeting the cheap baby in the marketplace. Let’s say the floor price of a baby at the moment is pricing at 20 $BABY. If a careless guy lists his baby at 10 $BABY, then the bot will buy it once the baby is listed.

    Screenshot of market contract on bscscan

    How do bots do it?

    Easy. Just keep tracking the market contract and use the “fillOrder” function to buy the targeted baby.

    Trending Bot Articles:

    1. How Conversational AI can Automate Customer Service

    2. Automated vs Live Chats: What will the Future of Customer Service Look Like?

    3. Chatbots As Medical Assistants In COVID-19 Pandemic

    4. Chatbot Vs. Intelligent Virtual Assistant — What’s the difference & Why Care?

    Sniper Bots

    Targeting the bot in the marketplace by changing the currency. It baited the bots to buy the baby with the wrong currency.

    If you look into the input data of the “fillOrder” function, it requires 2 parameters, NFT id & price. It doesn’t care what currency is used because the currency was fixed when the baby is listed on the market.

    How do sniper bots do it?

    Scenario: Bots that buys all babies with<2000 $MILK or <20 $BABY.

    The sniper bots will perform fast combo transactions:
    1. Listing baby with 50 $MILK (0.3 USD).
    2. Cancel listing.
    3. Listing baby with 50 $BABY (75 USD).

    When the bots find someone is listing a baby with their target price, they will call the “fillOrder” function immediately, i.e. fillOrder(NFT id, 50). Then they were baited with the combo and resulting in buying the baby with 50 $BABY.

    Anti-Sniper Bots

    Targeting the sniper bots in the marketplace by breaking their combo.

    breaking sniper bot’s combo

    How do anti-sniper bots do it?

    The sniper bots will perform fast combo transactions. How if the anti-sniper bots are faster than the sniper bots? Buying the cheap baby before they cancel the listing order?

    1. Listing baby with 50 $MILK (0.3 USD).
     — anti-sniper bots bought it
    X. Cancel listing.
    X. Listing baby with 50 $BABY (75 USD).

    Conclusion

    To conclude in a simple word — fast.

    Screenshot of the movie Kung Fu Hustle
    1. Bots can buy cheaper babies than humans because they are faster than humans.
    2. Sniper bots baited bots because they are faster than normal bots.
    3. Anti-sniper bots killed sniper bots because they are faster than sniper bots.

    How to become fast is a complicated topic that is affected by many elements. It depends on your knowledge of blockchain, coding skills, equipment… The road is long to learn.

    Do you have any thoughts? I’d love to hear from you.

    Don’t forget to give us your 👏 !


    Battle of the Bots in The Crypto You was originally published in Chatbots Life on Medium, where people are continuing the conversation by highlighting and responding to this story.

  • The Future of Education: 2022 Education Trends (In the Classroom) for Educators

    Every year, educational bodies, educators, and learners reflect on their year of learning in order to identify problems faced during the academic year and find solutions to fix them.

    This reviewing process leads to newer and better ways of learning thanks to new paedagogy and technological advancements. With the pandemic, the changes in education trends are even greater due to our new environment, platform, and needs.

    As we gear up and prepare to enter the new year, let’s take a look at the 2022 education trends. We’ve divided the education trends into two categories: in the classroom and beyond the classroom.

    Today, we’ll explore the education trends in the classroom that will affect how educators conduct classes.

    How will these trends change the future of education?


  • Chatbot Training Data Recommendations

    Hi everyone,

    I have been working on a chatbot as my senior project. Our aim is to build a chatbot that will talk about unimportant things (like chit-chat but based on domain like sports arts health etc). We need some data to train our Rasa NLU component. Any suggestions?

    submitted by /u/EmptiologyEngineer
    [link] [comments]

  • 5 Ways To Bring Customers To Your WhatsApp Chatbot

    Unlike other channels, WhatsApp has fewer ways to easily bring users to your WhatsApp chatbot.

    For example, with Instagram, we can automatically reply with our chatbot when somebody leaves a comment. But with Whatsapp, this is not possible.

    So in this video, I will show you 5 ways how you can bring customers to your WhatsApp Chatbot.

    You can watch it here: https://www.youtube.com/watch?v=TSXqG97I0XY

    Please let me know what you think in the comments 👇

    submitted by /u/jorenwouters
    [link] [comments]

  • Integrate IBM Watson with Whatsapp

    IBM Watson Assistant is a chatbot that employs artificial intelligence. It comprehends customers queries and responds quickly, consistently, and accurately across any application, device, or channel. And mainly Watson Assistant is a service that allows you to integrate conversational interfaces into any website or app.

    In this tutorial, I will show how to use Kommunicate to link a Watson Assistant chatbot to WhatsApp, extending its capabilities. Assuming you’re familiar with Watson Assistant and how it works. We’ll be concentrating solely on integrating the Watson chatbot with WhatsApp using Kommunicate. However, if this is your first time using Watson, you can get started here.

    Integrating IBM Watson chatbot with Kommunicate

    To begin, you will require a platform that will assist you in integrating the chatbot and will provide the services to render your bot responses on WhatsApp. Kommunicate is a platform that can assist you in integrating the chatbot into your website and mobile applications.

    Sign up for Kommunicate here. Once you’ve completed the signup process, go to the Bot integration section and select IBM Watson to integrate the bot. When you tap on IBM Watson, a modal will appear with instructions for integrating the IBM Watson Chatbot with Kommunicate.

    Get the IBM Watson Chatbot Credentials

    To query the chatbot on behalf of the user, Kommunicate requires the following information. This data is accessible via the IBM Cloud console.

    NOTE: Do not use the URL mentioned under Assistant Settings, the URL must be from the Manage section of the Assistant.

    Trending Bot Articles:

    1. How Conversational AI can Automate Customer Service

    2. Automated vs Live Chats: What will the Future of Customer Service Look Like?

    3. Chatbots As Medical Assistants In COVID-19 Pandemic

    4. Chatbot Vs. Intelligent Virtual Assistant — What’s the difference & Why Care?

    Complete the Bot setup with Kommunicate

    1. Copy and paste all the details on the Kommunicate chatbot integration page, click SAVE and Proceed.
    2. Give the bot a name. This name will be visible to all the users who interact with the bot.
    3. Enable/Disable the auto Handoff setting if you want your bot to assign the conversation to a human agent in your team when the conversation is hung up by the bot.
    4. Select Let this bot handle all-new conversations and all-new Conversations started after the integration will be assigned to this bot, and the bot will begin responding to them.

    Integrating Kommunicate with WhatsApp

    Kommunicate allows you to connect your WhatsApp business account and handle inquiries through the Kommunicate chatbot. In this case, it will be the IBM Watson chatbot and also assisted by human agents if needed.

    Kommunicate offers two options for integrating the chatbot with WhatsApp: TWILIO and Dialog 360. Because the integration process with Twilio is time-consuming, I’ll be using Dialog 360 in this tutorial because it provides a direct API connection to Kommunicate. However, if you already have Twilio’s Whatsapp business API installed, you can refer to this documentation and follow the instructions to complete the integration process.

    Fill out the form in the link below and send an email to support@kommunicate.io with the requested information to connect your Whatsapp number to Kommunicate.

    Steps for creating WhatsApp API

    • Fill the form: https://hub.360dialog.com/lp/whatsapp/rKRgFhPA
    • Share the following details with us at support@kommunicate.io
    • Whatsapp Number (whatsappSender)
    • DIALOG360 API KEY (d360ApiKey)
    • Account Namespace (d360Namespace)
    • Your Kommunicate account APP_ID, Click here for APP_ID

    When the information is received by the Kommunicate support team, they will assist you in connecting your WhatsApp number to your account.

    Messages sent to your 360Dialog WhatsApp Number will now be received in your Kommunicate dashboard once the setup is complete.

    Now that your chatbot is integrated with WhatsApp, it is ready to assist your users with their inquiries.

    Disclaimer: Originally Published on Kommunicate.io

    Don’t forget to give us your 👏 !


    Integrate IBM Watson with Whatsapp was originally published in Chatbots Life on Medium, where people are continuing the conversation by highlighting and responding to this story.

  • Made a chatbot !

    Hi everyone,

    Took a stab at creating a chatbot using Smojo, which is webapp based: https://app.smojo.org/kyyeo/dinodeal

    Would love to hear everyone’s opinion about it. Does the platform make sense?

    Thank you!

    submitted by /u/learnerone
    [link] [comments]