Year: 2021
-
Why Keyword Detection Is a Key Feature in Speech Recognition for Kids
VP of Speech Technology, Dr. Amelia Kelly, brings you the sixth installment of our “Lessons from Our Voice Engine” series, featuring high-level insights from our Engineering and Speech Tech teams on how our voice engine works.
What is keyword detection?
Keyword detection is a feature of the SoapBox engine that allows users to search for a word or phrase (even multiple examples simultaneously) within an audio file.
Why is it important for our voice engine and kids’ speech recognition?
In kids’ speech applications, we may only be interested in a particular word or phrase that is spoken by the child. For example, this word or phrase may be the response to a multiple choice question or a password that triggers an action within the platform, game, or application.
Keyword and keyphrase detection allow the client to focus only on the voice information they’re interested in, without requiring them to overstructure the question or limit the child to a one-word answer.
Trending Bot Articles:
2. Automated vs Live Chats: What will the Future of Customer Service Look Like?
4. Chatbot Vs. Intelligent Virtual Assistant — What’s the difference & Why Care?
What else should people know about keyword detection?
Keyword detection is a great feature for any voice-enabled product or service as it encourages kids to interact freely using their voice, while not overburdening the client with too many unnecessary data points. It also delivers incredibly high accuracy for the keywords and phrases in question and works off-the-shelf.
Catch up on our previous “Lessons from Our Voice Engine”:
- #1: Natural Language Processing (NLP)
- #2: Custom Language Models (CLMs)
- #3: Deep Learning
- #4: Debiasing
- #5: Acoustic Models (AMs)
Don’t forget to give us your 👏 !


Why Keyword Detection Is a Key Feature in Speech Recognition for Kids was originally published in Chatbots Life on Medium, where people are continuing the conversation by highlighting and responding to this story.
-
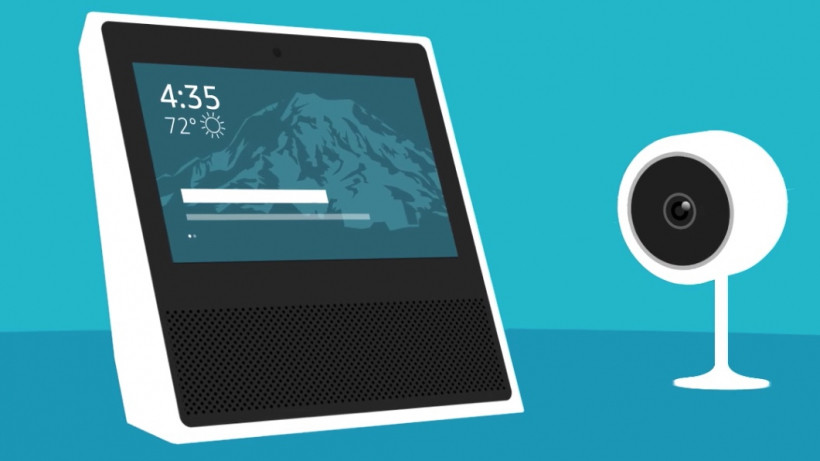
Guide to How you can view security camera footage on your Amazon Echo devices
if you want your security system to reach another smart level then here is how you can view your security camera footage on Amazon Echo…
-
HOW TO DELETE AMAZON ALEXA VOICE RECORDING HISTORY
You might not notice that every day what you command or request Alexa, gets stored on Amazon’s server which they use to analyze and…
-
Best Chatbot
I’m new here, wondered what everyone thought the best chatbot is currently. I menathe one that is most human, can talk about any subject and respond properly in English?
thanks
submitted by /u/AIchatbotss
[link] [comments] -
More Than A Chatbot — A Money-making Machine
A Chatbot Software… And An Online Money Magnet
Conversiobot is a chatbot software that can let you earn good money.
Photo by Joshua Mayo on Unsplash Do you have an online business?… Or maybe, you wish to start a one?… If it’s the case, this blog post is for you.
Conversiobot. It’s an AI-based chatbot software that can make your life easier and happier. It’s not typical software, it’s a money-making machine (Keep reading to know more about this).
And even a newbie can get started right away. No special skills or knowledge are required… You don’t need to know a thing about coding to start creating chatbots.
So let’s dive into the important part: Who is it for? And how can you benefit from it?
Who is Conversiobot for?… How can anyone benefit from it?
1. Bloggers
Are you struggling to get your visitors to engage with your content?… What if you might take advantage of an Artificial Intelligence Technology to engage with your Visitors instantly?
Conversiobot is something that makes your content incredibly interactive. And helps to automatically convert your visitors into Leads & Sales.
You can start with ConversioBot right now, by copying-pasting a line of “Automated Bot Code” to your Blog.
>> Watch this short video to find out how <<
Pause!…
Do you want to learn about some strategies to Generate FREE Traffic to your Blog or Website?… If YES, grab your FREE copy of the “5 Ways to Generate Free Traffic” eBook, here.
2. eCommerce website owners
So many eComm Marketers struggle to convert their Visitors into Leads & Sales. If it’s the case for you, Conversiobot is what you need.
It’s the best solution to engage with your visitors instantly and convert them into Leads & Sales. And you will avoid spending THOUSANDS of dollars on Live Chat Agents. And without hiring expensive coders.
In fact, all you need to do to activate this “AI” Website Tech is to copy & paste a single line of “Website Code”.
>> You can access Conversiobot here <<
Trending Bot Articles:
2. Automated vs Live Chats: What will the Future of Customer Service Look Like?
4. Chatbot Vs. Intelligent Virtual Assistant — What’s the difference & Why Care?
3. People who want to build an Email list
Building an email list from your Website is getting harder with each passing year. Your Website visitors have probably seen squeeze pages and opt-in forms a million times across the Web. And here is where Conversiobot comes in.
It’s incredible Software for list-building. ConversioBot is an automated Chatbot that engages with your visitors in a really fun and interactive way. It uses sophisticated “Artificial Intelligence” to persuade them to opt-in to your list.
ConversioBot comes with a range of “DONE-FOR-YOU” Chatbots designed to build your list. It’s also fully integrated with major Email marketing services like Aweber, Getresponse, Mailchimp, and Sendlane.
>> You can access Conversiobot here <<
4. Freelancers
Conversiobot is useful for freelancers too. If you’re a freelancer and you struggle to convert your Website Visitors into Clients, this amazing software is all you need.
You could use a Live Chat app on your Website and hire Chat Agents. But only if you’ve got deep pockets and you’re happy to fork out THOUSANDS of dollars for the quality you need. But what if you could save your money? What if you could engage with your visitors instantly, and automatically convert them into Clients? All you need to do to activate this game-changer software is to copy & paste a single line of “Website Code”.
>> take action and access Conversiobot here <<
5. Affiliate marketers
Are you struggling to generate Affiliate Sales? Don’t have a Website? Maybe you do your Affiliate Marketing entirely through Social Media or Videos?
>> Find out how to explode your followers or Subscribers <<
Photo by Alex Knight on Unsplash 6. Anyone who wants to make money online
How can you make money from Chatbots? Well, most businesses can’t afford to develop their own Chatbots. It’s highly sophisticated technology and it can cost THOUSANDS of dollars to Develop. So they’re looking for a ready-made solution.
ConversioBot is the Internet’s #1 Chatbot for Business Website Owners. It comes with a FULL Commercial License allowing you to sell Bots to hungry businesses. Their highly experienced team will show you exactly where there’s HOT demand for Chatbots.
You can sell their Done-For-You Bots directly to businesses. Think about how many businesses out there have a Website and DON’T have a Chatbot. It’s very common to sell them for $200 to $500 each! Sometimes even more!
They’ll also give you “pitch templates” you can copy and paste. These will do the selling for you. They pitch the benefits of Chatbots as an idea to the business you’re selling them to. So you DON’T need any special skills or experience to build Bots, and you don’t need any selling skills.
>> Watch this short presentation to find out more <<
Plans, Pricing & Money-back Guarantee
Conversiobot offers two plans: Conversiobot LITE and Conversiobot PRO. The PRO version includes some additional features, compared to the LITE one. Some of these PRO features are Unlimited Chatbots, Multi-Site License (which means you can install chatbots on unlimited websites), and FULL Commercial License (You can sell the bots).
The LITE version is for 27$, while the PRO version is for 37$. And it’s a ONE-TIME payment!
You get a full 30 days to put this to the test and make sure this is for you. If for any reason you’re not 100% satisfied, you’ll get a full refund.
If you enjoyed reading this story, then you might find the related below stories worth your time.
- How To Start An Online Business — An Option Explained
- Chatbots to Increase your Conversions and Sales
Disclosure: I will earn an affiliate commission for purchases made through links in this post, with no additional cost to you. Thank you!
Don’t forget to give us your 👏 !
More Than A Chatbot — A Money-making Machine was originally published in Chatbots Life on Medium, where people are continuing the conversation by highlighting and responding to this story.
-
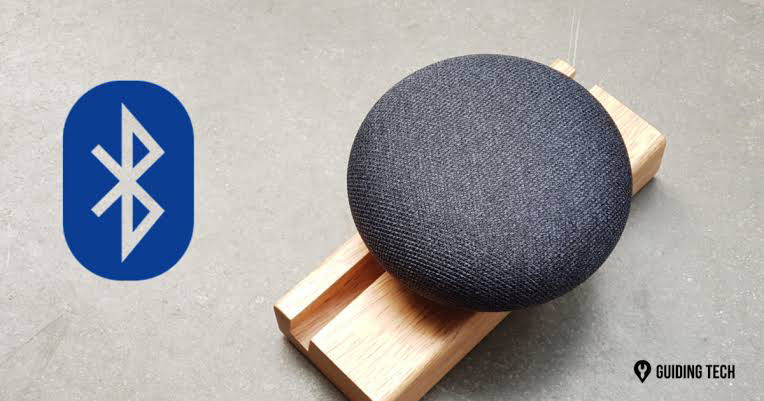
Guide to How you can connect and pair your Google Home to a Bluetooth speaker
Here is a quick and easy guide about how you can connect and pair your Google home with Bluetooth speaker. Step 1. Open the Google Home…
-
How to build a chatbot using Rasa and Python
Today we’ll be talking about how to make an AI-powered chatbot using Rasa and Python. It doesn’t matter if you have deep knowledge of python or are just a beginner in the world of coding!
Software to be installed:
This article mainly focuses on the AI framework, Rasa, and a little bit of python. Before getting started, let me tell you the required software to be installed for the project.
- Visual Studio 2019 C++ Build Tools
- Anaconda (Conda Package)
I am assuming that you already have Python 3.8 installed in your PC since Python 3.9 version doesn’t work with rasa, it has some issue so I’ll suggest you download version 3.8 if you don’t have it. Here’s the link: https://www.python.org/downloads/. Thank me later 😛
You can download the following two softwares from the link provided below (if you don’t already have them on your PC, or you can continue with the article if you do).
Anaconda installation: https://docs.anaconda.com/anaconda/install/windows/
Visual Studio C++ Build Tools: https://visualstudio.microsoft.com/downloads/
A small piece of advice: While downloading Visual Studio C++ Build Tools, go to the download menu and then scroll to the All Downloads section.
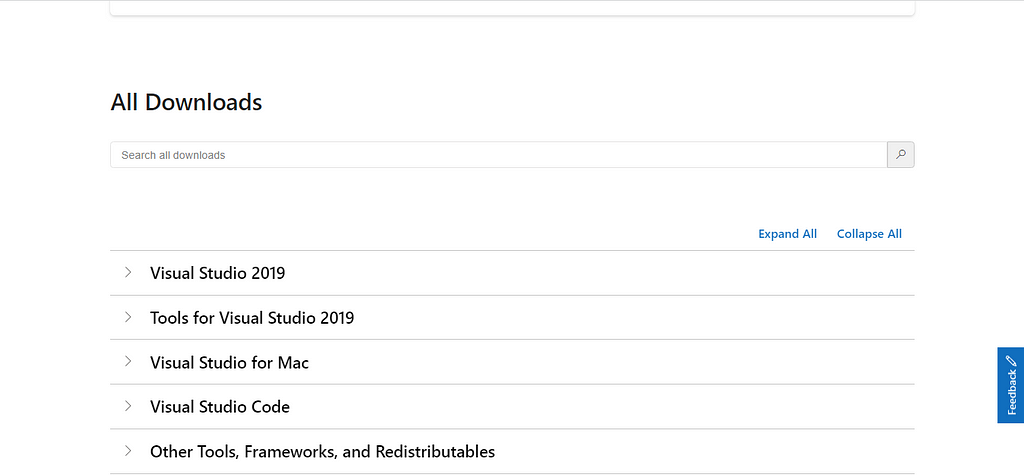
From there you’ll find the Tools for Visual Studio 2019, click on the tab
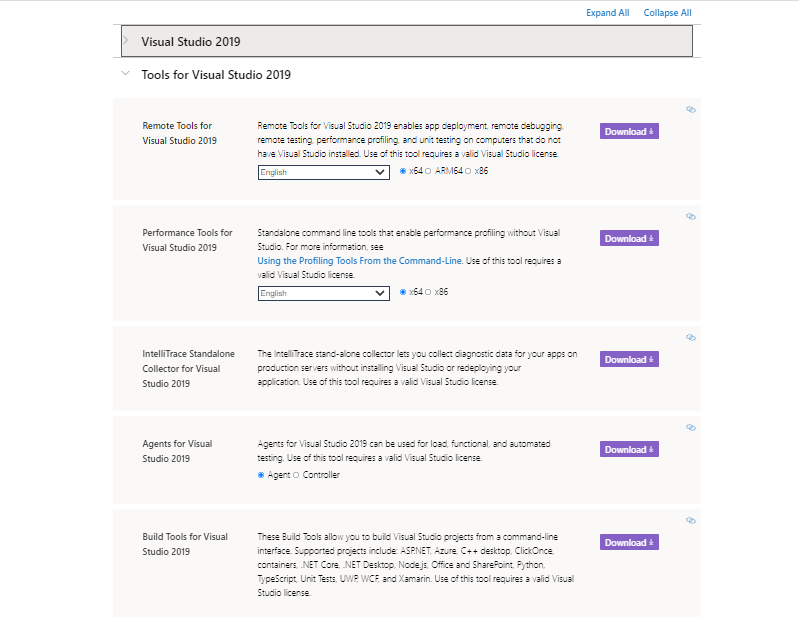
And there it is! You have to download the last one, Build Tools for Visual Studio 2019. Easy-peasy.
If you are still facing some issue downloading the required tools you can follow up on this video to get it done right:
Rasa Installation on Windows | setup RASA on Windows with Demo | RASA — 2: https://www.youtube.com/watch?v=qmMaGicSFCU
Trending Bot Articles:
2. Automated vs Live Chats: What will the Future of Customer Service Look Like?
4. Chatbot Vs. Intelligent Virtual Assistant — What’s the difference & Why Care?
Getting started with the chatbot:
Now that you have installed the required software, you are ready to go!
Create a folder on your desktop named “chatbot”, since we are making a time-zone bot. Although you can name it whatever you want but I’ll go with a simple name.
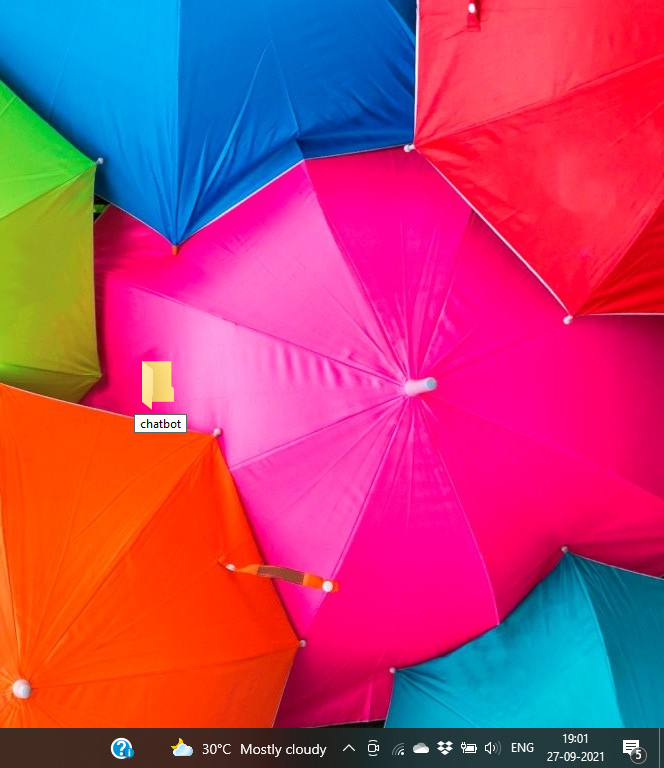
After opening the folder, click on chatbot, it will show C:Users<your username>OneDriveDesktopchatbot, type cmd here and press Enter as shown below.
Now that your command prompt is open, type in the following code to install rasa framework:
pip install rasa
and press Enter, it’ll take a while to install rasa on your PC. After the framework is installed, type in
rasa init
if the above code shows error saying ‘rasa’ is not recognized as an internal or external command, operable program or batch file. Type this
py -m rasa init
Now that the framework is up and running, the Command Prompt will ask you to specify a directory, just tap Enter since you have directly opened the Command Prompt using the directory on which you want to build your chatbot, so you don’t need any specification. It will be created as a default at the same location. Let’s check if you are going by the steps uptil now.
Just like in the above gif, type y for yes, when the bot says Do you want to train an initial model?
It will automatically start training the initial model. Now you just have to wait for the bot to train itself. After sometime, the bot will be loaded and display a green message reading: Bot loaded. Type a message and press enter (use ‘/stop’ to exit):
From here on you can talk to the bot, below is a gif showing a conversation with the bot, you can stop the conversation by typing /stop. It will abort the chat immediately.
You can type a “hi” and “I’m good” to check if the mood bot is working fine or not. The bot you are talking to right now is called a mood bot, it greets and checks your mood, if the reply is good and positive it says “bye” (pretty blunt, huh) and if it’s sad, it shares a picture and says “here’s an image to lighten your mood” or something like that and shares a url of an image.
Well, not getting into the intricacies of how a mood bot should understand one’s emotions, all I want to tell you here is that now you have trained your basic rasa mood bot. From here on you have to go to your file again, if you open your chatbot again you’ll find files names “nlu”, “stories”, “domain” etc stored. Open them in your Visual Studio Code. From here on you can make changes to these files as per your requirement and run the bot again using the code
py -m rasa train
After every change you make in your file’s code, try running this code, and with time you’ll understand that the bot is able to answer different questions as per your code adjustment. Make sure to always update your domain file as and when you update your other files. It is like a mother of all the other files.
What about the code, pal? Yeah the code. I’m sharing that too. Don’t worry. I’m not leaving you all astray.
Here’s the link to all the source codes used. This is my GitHub repository, from here on you can easily download all the codes and paste them in your Visual Studio Code as per the requirement. Since, this is a basic chatbot creation code, I suggest you try adding some more features and make your own unique bots!
GitHub Repository for Chatbot Source Code:
I’m sharing my LinkedIn profile and GitHub profile. Hope we can connect there too!
Link to my LinkedIn Profile:
Arya Pandey – Student Fellow – GirlUp DTU | LinkedIn
Link to my GitHub Repository:
Don’t forget to give us your 👏 !
How to build a chatbot using Rasa and Python was originally published in Chatbots Life on Medium, where people are continuing the conversation by highlighting and responding to this story.
-
Hiring Dialogflow engineers US and remote
Hi, we are a customer service software platform and are hiring a few Google Dialogflow developers. Message me if interested.
submitted by /u/Sklifosovsky20
[link] [comments] -
How to set up the fundamentals of your Chatbot Testing in 2 minutes
With the emergence of chatbots, many workplace roles have changed and in many cases new ones have been born. As sad as it is, but a conversational AI tester is not one of them (yet). Of course there can be several reasons behind this:
- Lack of resources (human, financial)
- Lack of expertise (knowledge in Test Automation)
- The general belief that Testing only comes in the picture after deployment (wrong)
- Management does not recognize the importance of QA
Therefore, Testing remains still in the background, as the “necessary evil”, which consumes resources and money.
It almost does not matter what technical or role background we had, Chatbot Testing will force us to leave our comfort zone, build up extra knowledge and to learn new expressions and methods.
We, at Botium, have decided to make things easier for companies that have already recognized the huge benefit of Testing Conversational AI, but have not yet had the opportunity to appoint a person for this task, or to gather the required expertise.
Although we believe that using Botium is already as easy as possible, (as there is no need to use Selenium or Appium), we have tried to facilitate the initial steps with maximum automation. Our new Go, Botium, Go feature gives you a huge advantage until you really have the necessary information to successfully set up your first test set.
A Quickstart, true to its name
The new Quickstart will not only give you simplicity and speed to get you started, but it will also help you to see what Test Types are possible for your chosen Chatbot Technology. Not all Chatbot engines forward the necessary information to run certain tests. For some, NLP testing is not possible as the Chatbot does not disclose the required information to run these tests, whereas in other cases E2E Testing is disabled, because the Botium connection to the user interface (web widget, mobile app or voice-controlled application) is done with dedicated Botium E2E Connectors.
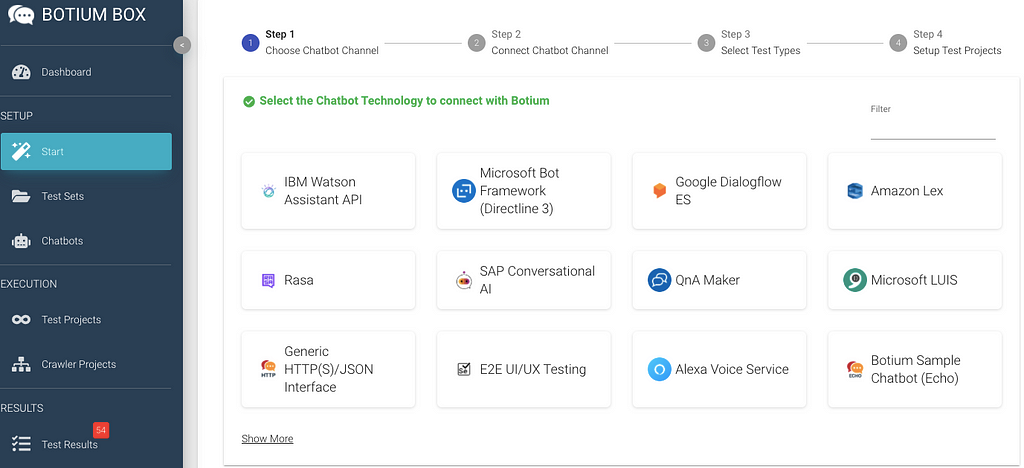
Once connected to your Chatbot, Botium Box will automatically assign which Test Types are possible, tailored to the selected technology. The first steps remained largely the same. To kick things off you must select the Chatbot technology in the usual way and check the connectivity.
Trending Bot Articles:
2. Automated vs Live Chats: What will the Future of Customer Service Look Like?
4. Chatbot Vs. Intelligent Virtual Assistant — What’s the difference & Why Care?
The biggest difference follows in the third step, where Botium Box automatically offers the Test Types that can be performed.
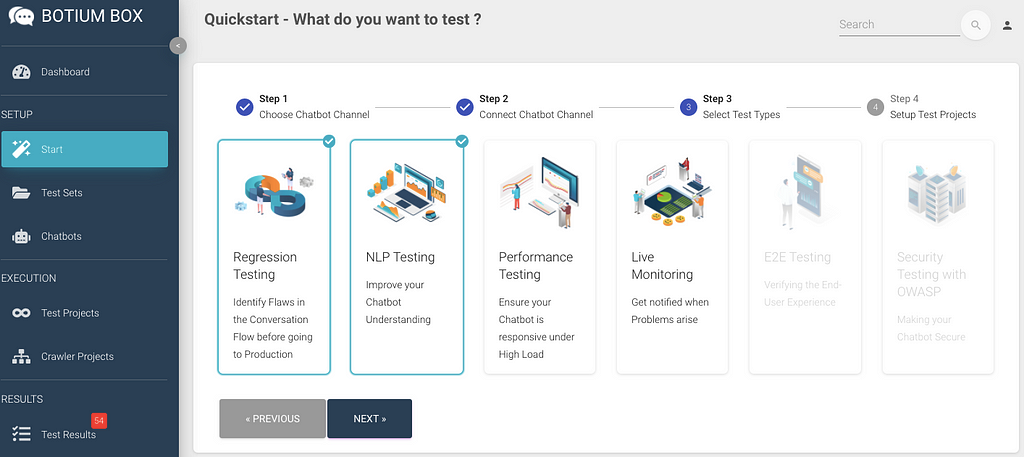
NLP and Regression Testing will be checked and run by default, unless you intentionally skip it. These Test Types are the starting points for testing Conversational AI. When a Chatbot performs well in those disciplines, you do the next step and add Performance Testing, End-to-End Testing, Security Testing and Monitoring.
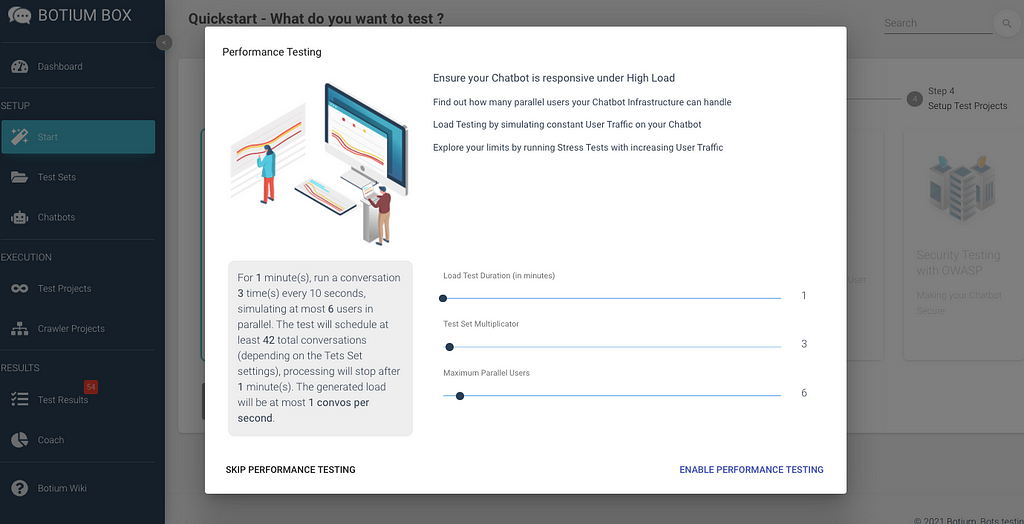
The executable Test Types are shown in color, and those that are not supported by the selected Chatbot Technology are shown in gray. For certain Test Types that require some adjustment, Botium Box initially works with predefined values. These can of course be changed at any time with one click. As an example, we can see Performance Testing here, which can be changed to the desired values using the sliders.
Live Monitoring also works similarly. In case you enable this feature, you must enter the corresponding person’s or team’s email address(es) (who will be notified in case of complications) and the frequency of the live Monitoring to be executed.
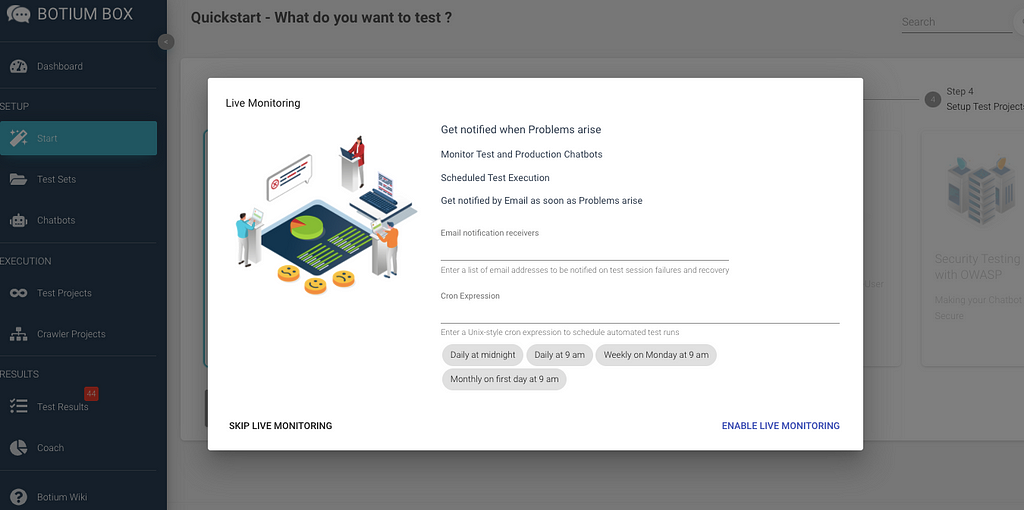
Once you’re done with the settings, you get an overview of everything that Botium will execute for you. In case you are not happy with the results, you can easily go back to the previous page and change the settings accordingly.
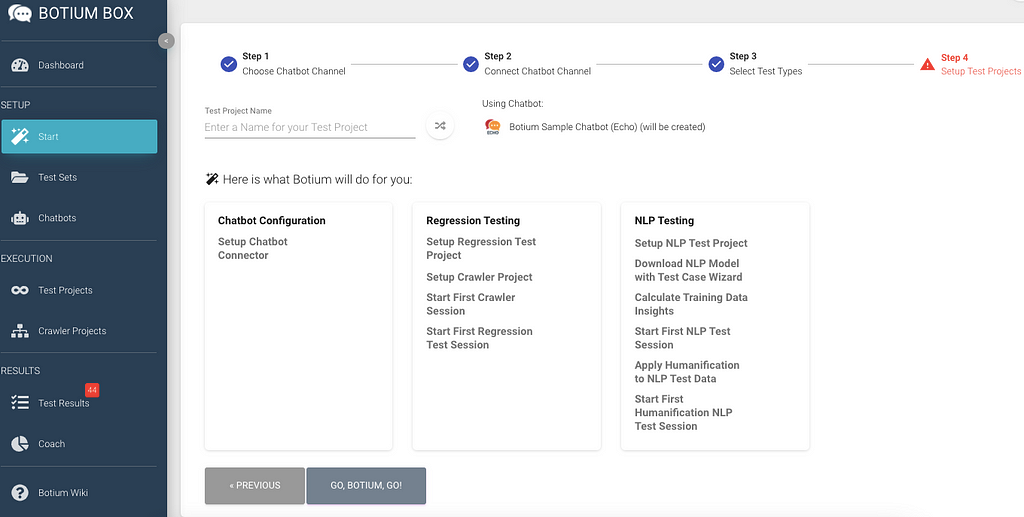
And now, it’s time to make Botium work for you! Press the Go, Botium, Go button, take a sip in your coffee and enjoy the instant results and gratification. The running tests are indicated with a spinning circle and the successfully executed tests are marked with a green checkmark.

By going on the question marks with your cursor, you get a cool tooltip to the executed test to have some deeper insights. In case you come across some unknown expressions, our Wiki is always there to give you a helping hand!
Congratulations, in 2 mins you’ve set up your first Test Suite and run it successfully!
Conclusion
Our latest feature, Go, Botium, Go simplifies the initial steps of Chatbot Test Automation and allows everyone to get some first insights about their Chatbot efficiency. In 4 easy steps everyone will be capable of running tests and interpreting the results.
Please note that this can not replace continuous testing in an organized form, but it offers a huge advantage in terms of simplifying the start of your Chatbot Test Automation journey. The game changer is no longer the ability, but the willingness!
Don’t forget to give us your 👏 !
How to set up the fundamentals of your Chatbot Testing in 2 minutes was originally published in Chatbots Life on Medium, where people are continuing the conversation by highlighting and responding to this story.