Today we’ll be talking about how to make an AI-powered chatbot using Rasa and Python. It doesn’t matter if you have deep knowledge of python or are just a beginner in the world of coding!
Software to be installed:
This article mainly focuses on the AI framework, Rasa, and a little bit of python. Before getting started, let me tell you the required software to be installed for the project.
- Visual Studio 2019 C++ Build Tools
- Anaconda (Conda Package)
I am assuming that you already have Python 3.8 installed in your PC since Python 3.9 version doesn’t work with rasa, it has some issue so I’ll suggest you download version 3.8 if you don’t have it. Here’s the link: https://www.python.org/downloads/. Thank me later 😛
You can download the following two softwares from the link provided below (if you don’t already have them on your PC, or you can continue with the article if you do).
Anaconda installation: https://docs.anaconda.com/anaconda/install/windows/
Visual Studio C++ Build Tools: https://visualstudio.microsoft.com/downloads/
A small piece of advice: While downloading Visual Studio C++ Build Tools, go to the download menu and then scroll to the All Downloads section.
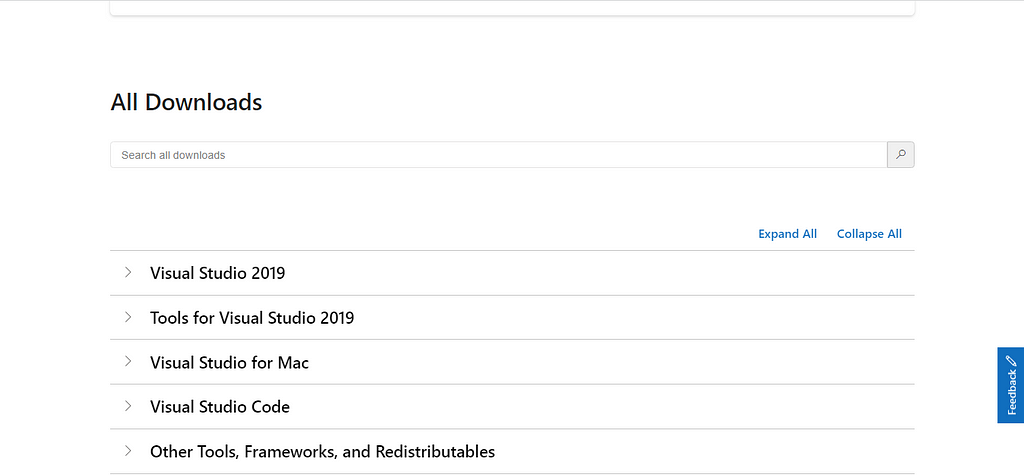
From there you’ll find the Tools for Visual Studio 2019, click on the tab
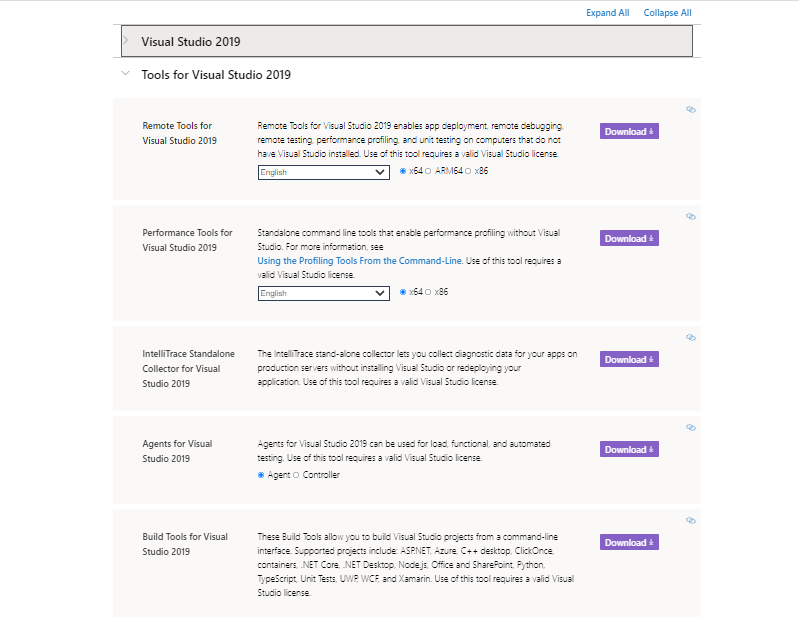
And there it is! You have to download the last one, Build Tools for Visual Studio 2019. Easy-peasy.
If you are still facing some issue downloading the required tools you can follow up on this video to get it done right:
Rasa Installation on Windows | setup RASA on Windows with Demo | RASA — 2: https://www.youtube.com/watch?v=qmMaGicSFCU
Trending Bot Articles:
2. Automated vs Live Chats: What will the Future of Customer Service Look Like?
4. Chatbot Vs. Intelligent Virtual Assistant — What’s the difference & Why Care?
Getting started with the chatbot:
Now that you have installed the required software, you are ready to go!
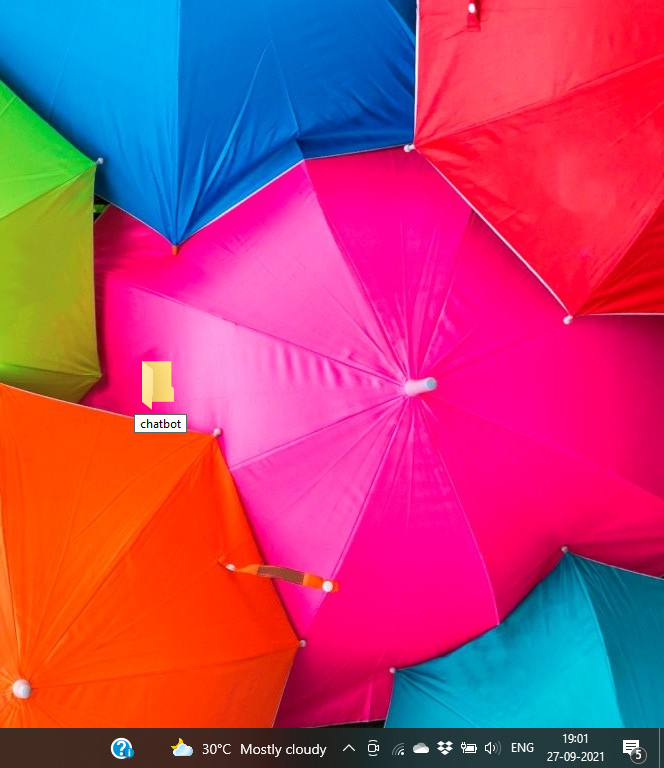
Create a folder on your desktop named “chatbot”, since we are making a time-zone bot. Although you can name it whatever you want but I’ll go with a simple name.
After opening the folder, click on chatbot, it will show C:Users<your username>OneDriveDesktopchatbot, type cmd here and press Enter as shown below.
Now that your command prompt is open, type in the following code to install rasa framework:
pip install rasa
and press Enter, it’ll take a while to install rasa on your PC. After the framework is installed, type in
rasa init
if the above code shows error saying ‘rasa’ is not recognized as an internal or external command, operable program or batch file. Type this
py -m rasa init
Now that the framework is up and running, the Command Prompt will ask you to specify a directory, just tap Enter since you have directly opened the Command Prompt using the directory on which you want to build your chatbot, so you don’t need any specification. It will be created as a default at the same location. Let’s check if you are going by the steps uptil now.
Just like in the above gif, type y for yes, when the bot says Do you want to train an initial model?
It will automatically start training the initial model. Now you just have to wait for the bot to train itself. After sometime, the bot will be loaded and display a green message reading: Bot loaded. Type a message and press enter (use ‘/stop’ to exit):
From here on you can talk to the bot, below is a gif showing a conversation with the bot, you can stop the conversation by typing /stop. It will abort the chat immediately.
You can type a “hi” and “I’m good” to check if the mood bot is working fine or not. The bot you are talking to right now is called a mood bot, it greets and checks your mood, if the reply is good and positive it says “bye” (pretty blunt, huh) and if it’s sad, it shares a picture and says “here’s an image to lighten your mood” or something like that and shares a url of an image.
Well, not getting into the intricacies of how a mood bot should understand one’s emotions, all I want to tell you here is that now you have trained your basic rasa mood bot. From here on you have to go to your file again, if you open your chatbot again you’ll find files names “nlu”, “stories”, “domain” etc stored. Open them in your Visual Studio Code. From here on you can make changes to these files as per your requirement and run the bot again using the code
py -m rasa train
After every change you make in your file’s code, try running this code, and with time you’ll understand that the bot is able to answer different questions as per your code adjustment. Make sure to always update your domain file as and when you update your other files. It is like a mother of all the other files.
What about the code, pal? Yeah the code. I’m sharing that too. Don’t worry. I’m not leaving you all astray.
Here’s the link to all the source codes used. This is my GitHub repository, from here on you can easily download all the codes and paste them in your Visual Studio Code as per the requirement. Since, this is a basic chatbot creation code, I suggest you try adding some more features and make your own unique bots!
GitHub Repository for Chatbot Source Code:
I’m sharing my LinkedIn profile and GitHub profile. Hope we can connect there too!
Link to my LinkedIn Profile:
Arya Pandey – Student Fellow – GirlUp DTU | LinkedIn
Link to my GitHub Repository:
Don’t forget to give us your 👏 !


How to build a chatbot using Rasa and Python was originally published in Chatbots Life on Medium, where people are continuing the conversation by highlighting and responding to this story.