React JS is a popular web framework for creating user interfaces. The Facebook-owned framework is becoming hugely popular among developers. The reason being — Great documentation, developer friendliness and it is faster than most of the similar frameworks such as Angular.
In this post, we will be going through step by step procedure of integrating Dialogflow bot in React JS websites.
Prerequisites
To get started, you would need a Dialogflow bot or working knowledge of Dialogflow and React JS. To integrate the chatbots with React JS, you will need a Kommunicate account. All the aforementioned tools have free to try out. Additionally, Node should be installed in your system.

Steps to integrate Dialogflow bot in React JS websites
I am going to explain how I connected Dialogflow and React JS with the help of Kommunicate.
Note: To keep it very simple and straight this tutorial explains with really basic and plain code development. Also to mention, this project can be found on my Github.
Step 1: Create your Dialogflow bot
To get started, you can easily create a chatbot in Dialogflow. It is a very intuitive yet powerful chatbot building tool. Here’s a sample available to help you get started with your Dialogflow bot. To go further, you can create your own Intents & Entities.
Trending Bot Articles:
1. 3 Tips for your Voice and Chatbot Program from Gartner’s Customer Service Hype Cycle 2020
2. Deploying Watson Assistant Web Chat in Salesforce Lightning Console
3. Are Chatbots Vulnerable? Best Practices to Ensure Chatbots Security
Step 2: Integrate Dialogflow chatbot with Kommunicate
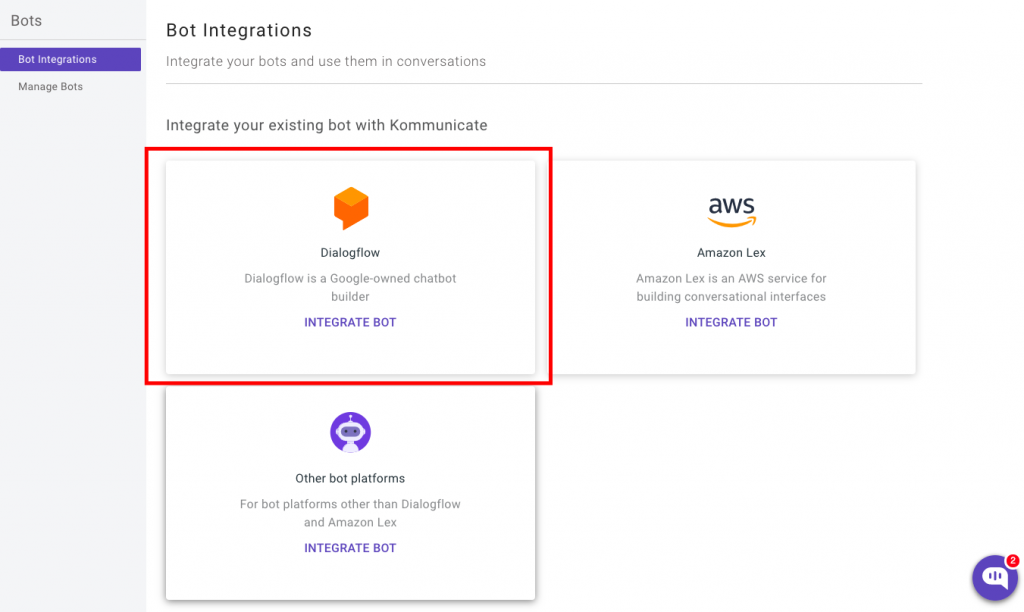
To integrate your Dialogflow bot in Kommunicate, log in to your Kommunicate dashboard and navigate to the Bot section. If you do not have an account, you can create one here. Locate the Dialogflow section and click on Integrate Bot.
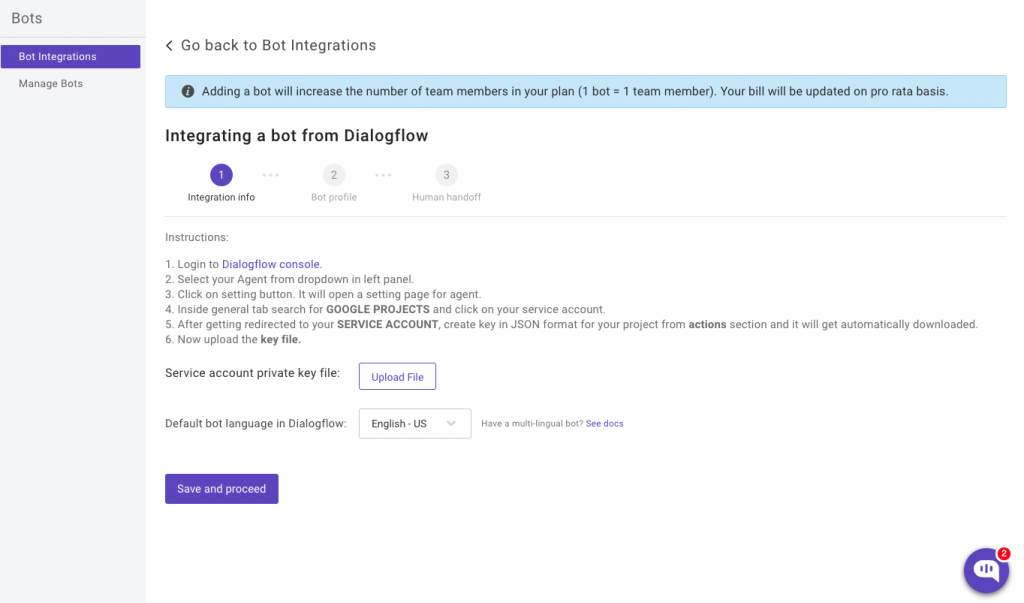
Now, navigate to your Dialogflow console and download the service account key file. Here are the steps to locate the file:
- Select your Agent from the dropdown in the left panel.
- Click on the Settings button. It will open a setting page for the agent.
- Inside the General tab search for GOOGLE PROJECTS and click on your service account.
- After getting redirected to your SERVICE ACCOUNT, create a key in JSON format for your project from the Actions section and it will get automatically downloaded.
- Now upload the Key file.
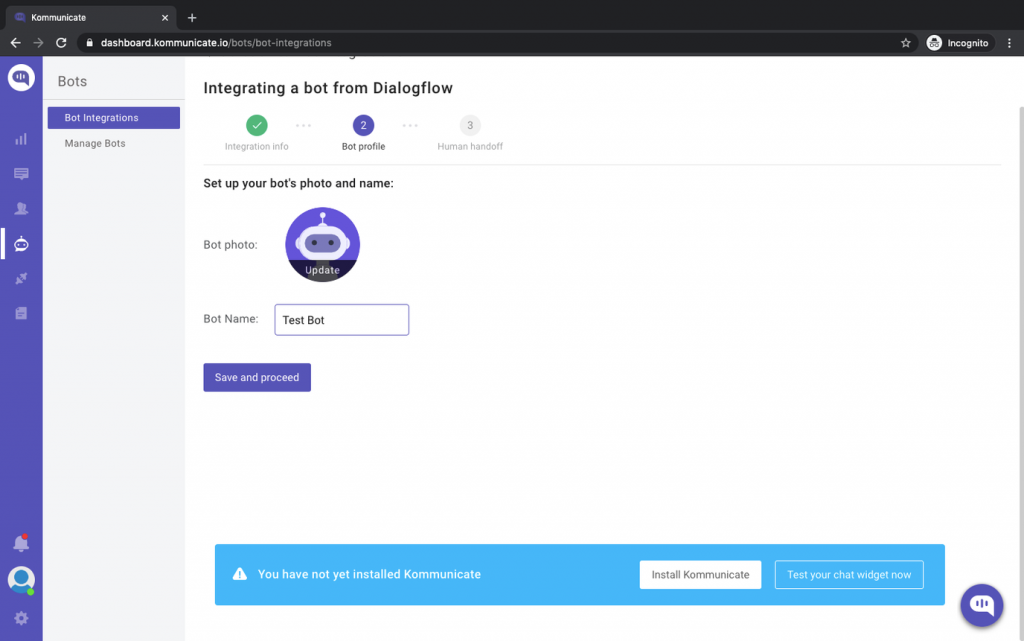
In the bot profile section, you will be able to give your bot a name. This name will be visible to the users whenever they interact with the bot. Process further and fill the details.
In the last step, you will be asked to enable or disable the chatbot to human handoff. If enabled, the conversation will be passed on to a human in case the chatbot is not able to answer the question.
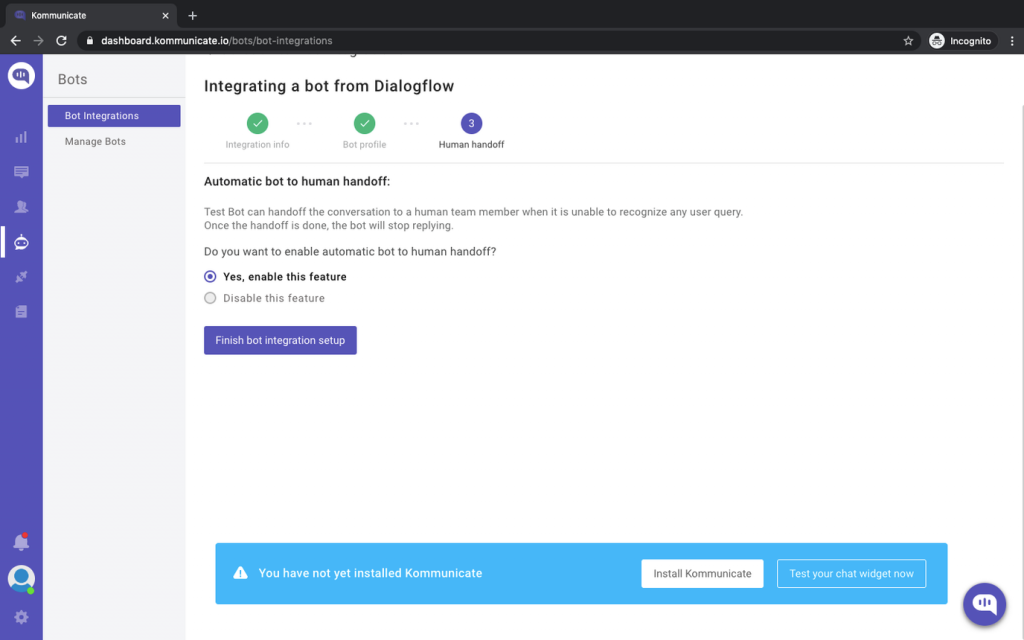
Complete the setup and then you can check and test your newly created bot in two places:
- Dashboard →Bot Integration → Manage Bots: You can check all your integrated bots here
- Dashboard → Bot Integration: Your Dialogflow icon should be green with the number of bots are you have successfully integrated. You will also have the option of testing your newly created bot here. (See image below)

Step 3: Create a React app
Create a new React app (my-app) by using the command:
npx create-react-app my-app
Step 4: Now, navigate to the my-app folder
cd my-app
Step 5: Create new file chat.js inside src folder
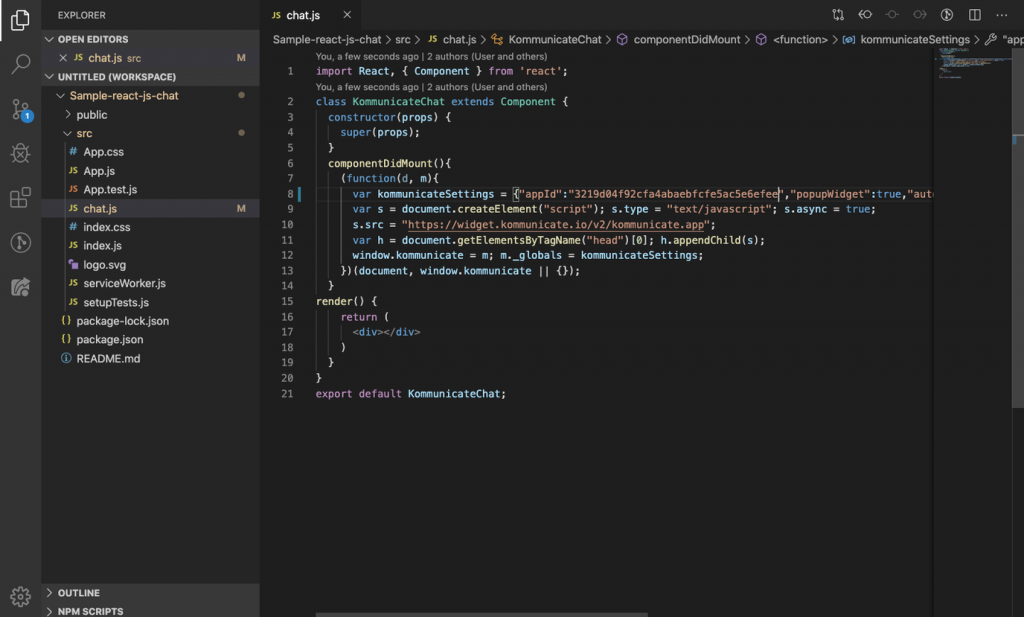
Once you create the chat.js, add the below code in componentDidMount. The below code will launch a chat widget on your website with the integrated Dialogflow bot. Make sure to replace <YOUR_APP_ID> with your Kommunicate application ID.
You can get this code in the install section of Kommunicate as well.
(function(d, m){
        var kommunicateSettings = {"appId":"<YOUR APP_ID>","popupWidget":true,"automaticChatOpenOnNavigation":true};
        var s = document.createElement("script"); s.type = "text/javascript"; s.async = true;
        s.src = "https://widget.kommunicate.io/v2/kommunicate.app";
        var h = document.getElementsByTagName("head")[0]; h.appendChild(s);
        window.kommunicate = m; m._globals = kommunicateSettings;
      })(document, window.kommunicate || {});
Here’s a screenshot of my code editor for the same:
Step 6: Import KommunicateChat component in App.js
Import the KommunicateChat component in your App.js file. Here’s the screenshot of my code editor:

Step 7: Start your app locally
Use the following command to start your newly created website with the installed Dialogflow bot.
npm start
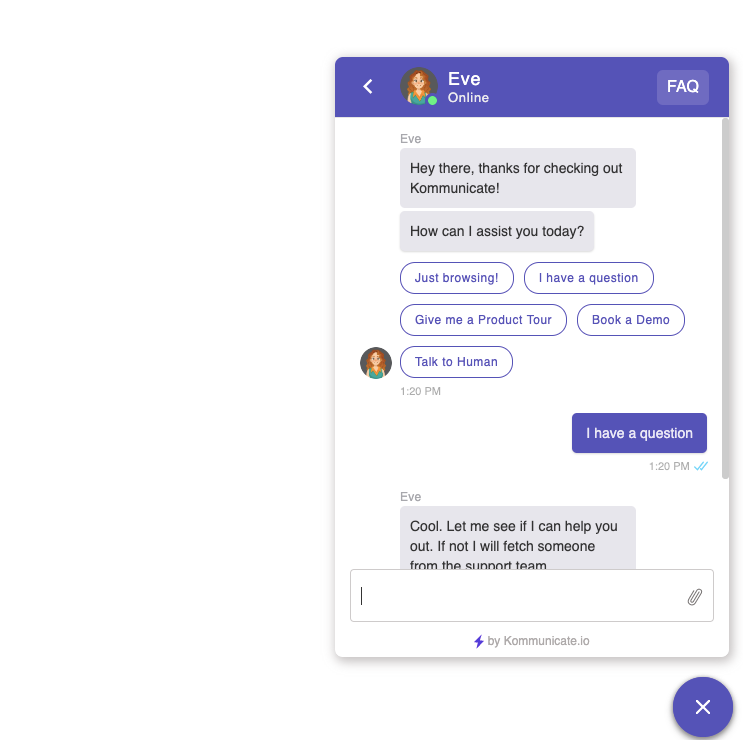
Voila! How simple was that? In these few simple steps, you could integrate Dialogflow bot in React JS websites. This is how the chat widget looks on a website:
Wrapping Up
It is fairly simple to have a rich text enable chat widget with Dialogflow bot in your React JS websites. You can further customize the chat widget to match your website colors and theme.
Don’t forget to give us your 👏 !


Integrate Dialogflow Bot in React JS Websites was originally published in Chatbots Life on Medium, where people are continuing the conversation by highlighting and responding to this story.