A Smartloop Conversation Platform Step-by-Step Tutorial

Chatbots are not only great at chatting with humans, but they can also help you collect user data, such as the user’s name and email. This data can be very useful for profiling your users, for re-targeting, and for creating tailored conversation flows for specific types of users.
In this tutorial you will learn how to:
- Set up your first Smartloop chatbot (and account)
- Collect the User’s Name
- Get and Validate the User’s Email
Notes:
- This tutorial is level 101, i.e. it is for everyone. It doesn’t require previous programming knowledge
- All screenshots and flows explained in this article are done with the Smartloop chatbot platform
- Everything in this article is valid for all channels that Smartloop supports for publishing chatbots on: website, Facebook Messenger, Viber, etc.
Set Up Your Smartloop Chatbot (and Account)
(if you already have a Smartloop account, please move on to the next section)
1. Head to the Smartloop website
2. Click SIGN UP at the top of the screen

3. Follow the instructions to setup your account. This step takes less than a minute.
4. Log in your new Smartloop account (feel free to go through the onboarding tutorial).
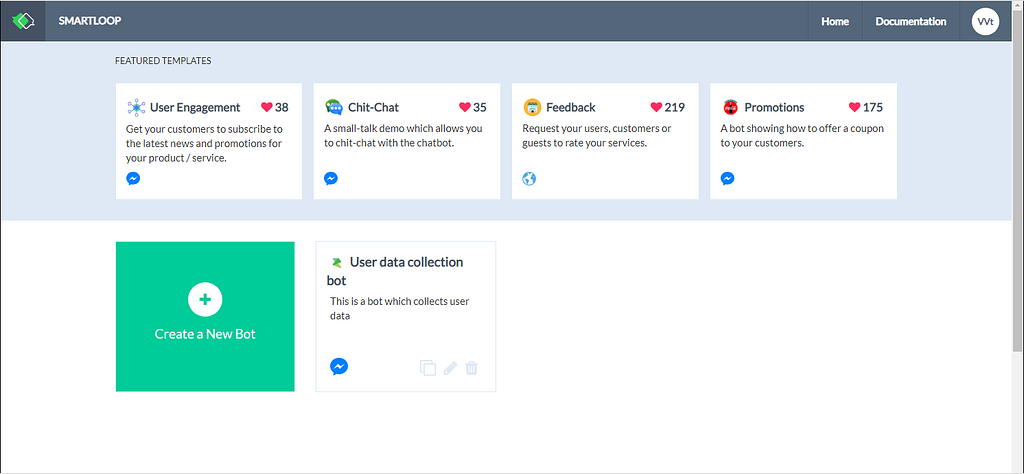
5. Once you are in the Smartloop dashboard, click on “+” and enter the required info. In my case, I’ve entered “User Data Collection Bot” as the title and description, my channel is Facebook, and the bot language is English:
Feel free to go through the new onboarding tutorial.
Collecting the User’s Name
1. For this example, let’s open your chatbot and create a new conversation block, which will ask the user what his/her name (in my case, this is the Start block). Add a TEXT card to the block:
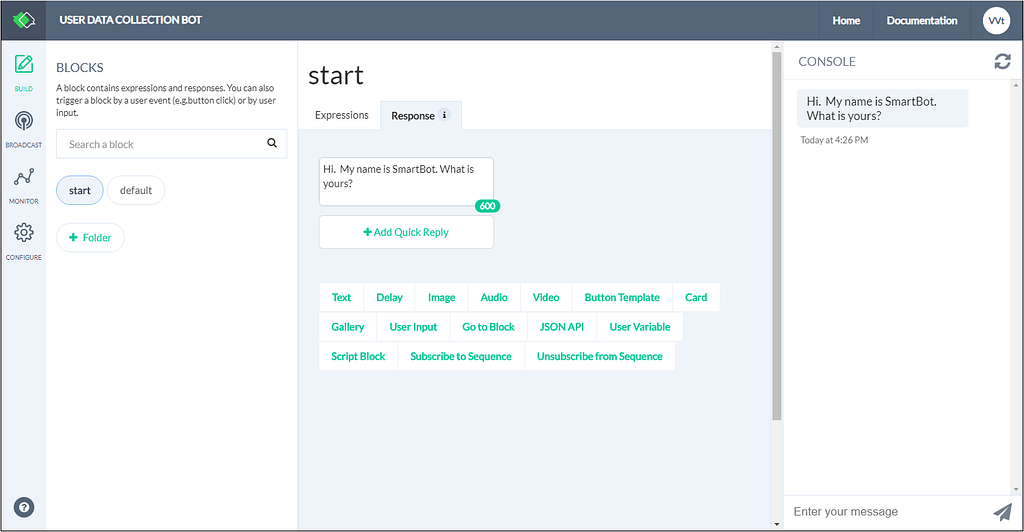
2. We want the user to input his/her name in the chatbot. The way to do this is to add a User Input card to the block:
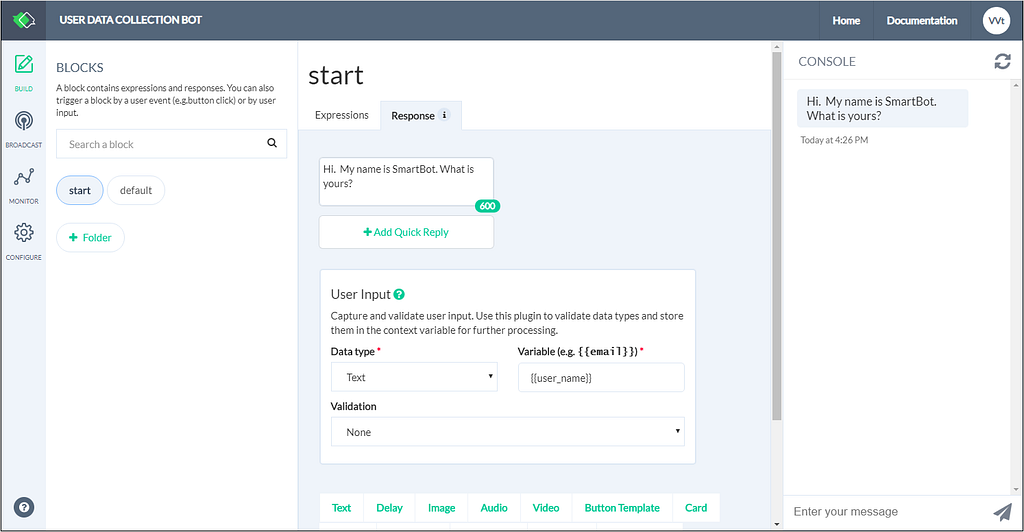
3. Since a person’s name is usually plain text, set the Data Type of the User Input card to Text, as in the screenshot above.
4. Enter a name for this variable. The variable name should be descriptive enough to explain what data is stored under it (think of this as a label). In my case, I will use {{user_name}} — see screenshot above.
5. It is fairly hard to validate how names are spelled out, so let’s keep Validation to none.
6. Let’s add a new TEXT card which will thank the user for his/her input. Let’s also make the conversation a bit more personal, by using the variable we’ve just created:
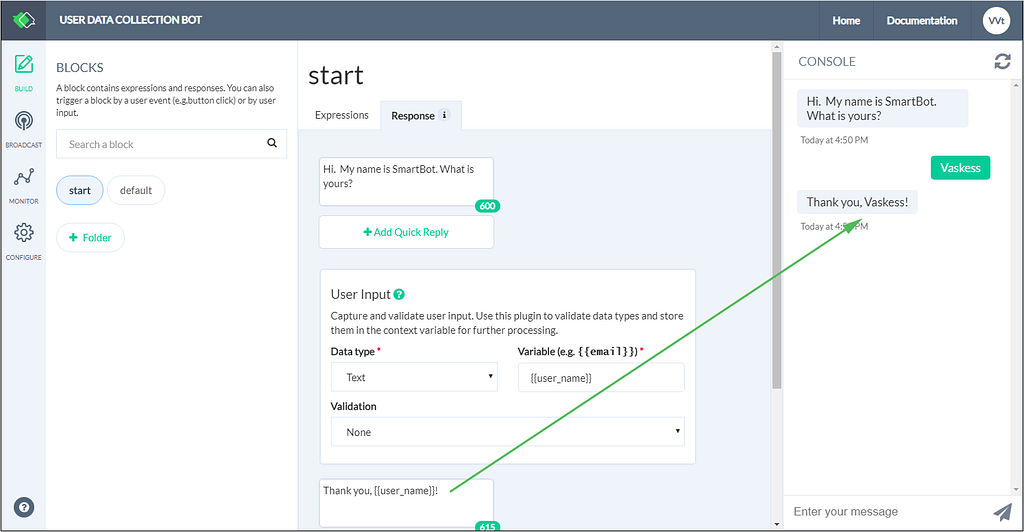
Congrats! We have just programmed the Smartloop chatbot to collect the name of the user! This also means that the platform will store the name of this user for future use.
NOTE: When the User Input card is used, the chatbot will expect input from the user. If you type a command in the chatbot when it is expecting an input, the chatbot will interpret it as input, and not as a command.
Getting and Validating the User’s Email
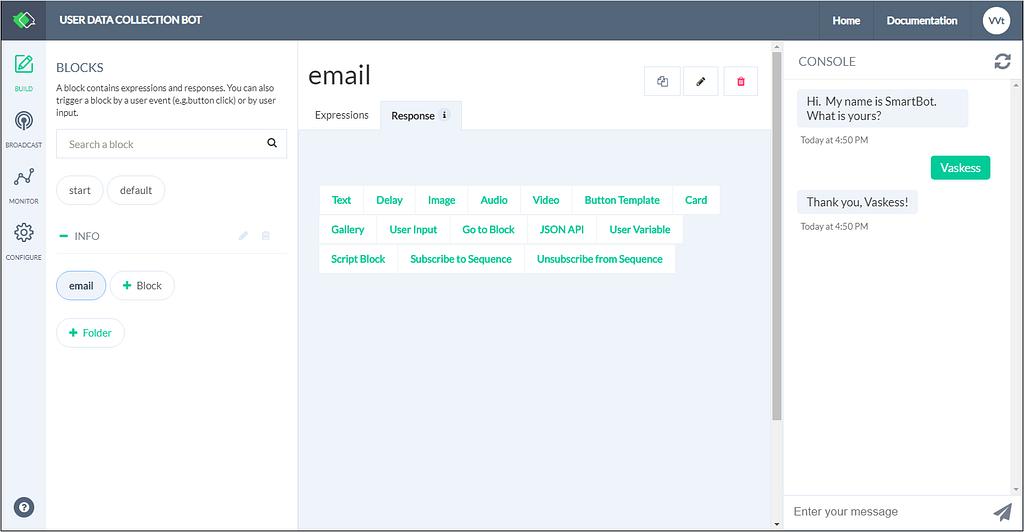
1. Let’s create a new conversation block, which will ask the user for his email. I will call this block email:
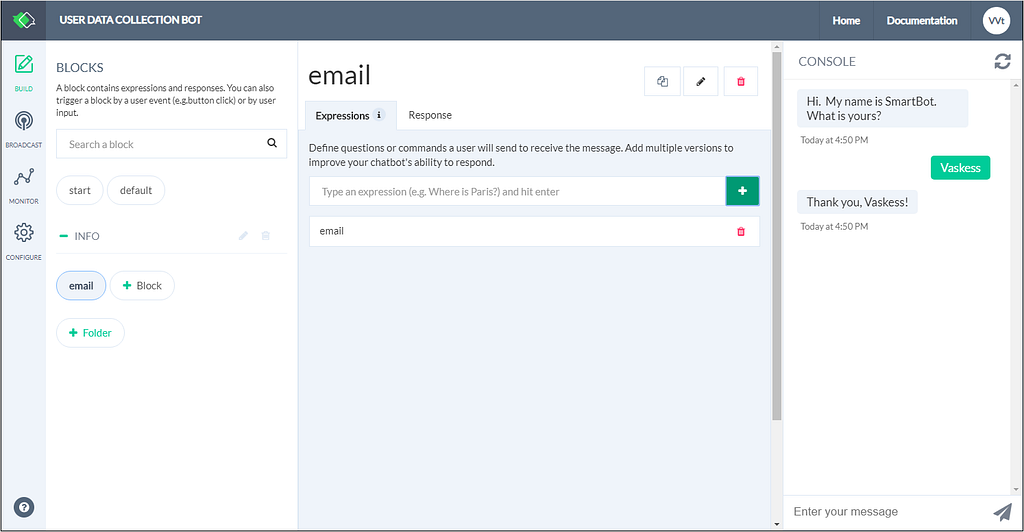
2. Since this block is not the ‘start’ block which the bot will start the conversation with, we need to add a keyword which will later allow us to call this block from the chatbot. Go to the Expressions tab and enter email as a keyword:
3. Go back to the Response tab of the block, and add a TEXT card which to prompt the user to enter his/her email.
4. Since we want the user to type his/her email, let’s add the User Input card to the block:

5. Since the email is text-only, set the Data Type of the User Input card to Text.
6. Let’s enter a name for this variable. I will use {{email}} — see image above.
7. Smartloop can automatically validate the email addresses for you, so let’s set Validation to email. Once we do this, the platform will give us the option to enter a Message in case the email that is entered is invalid:
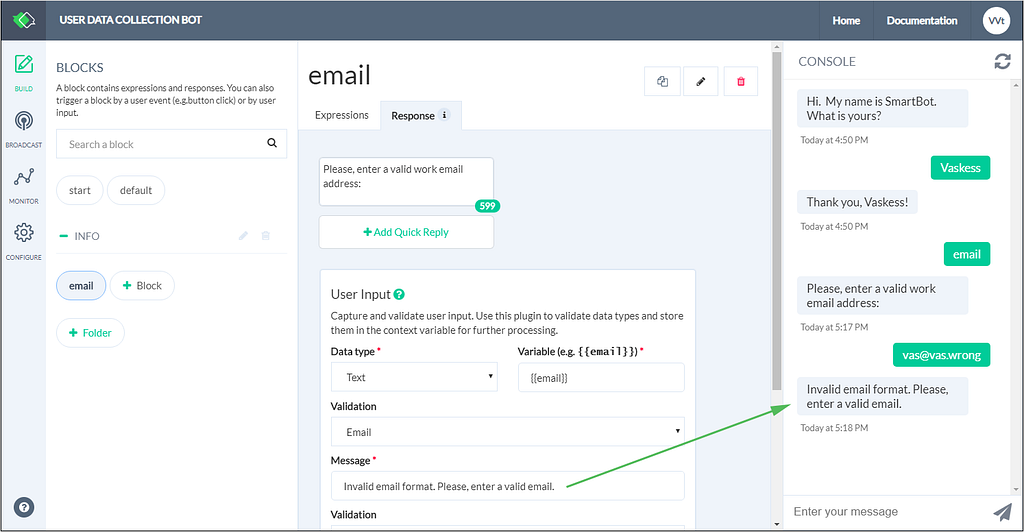
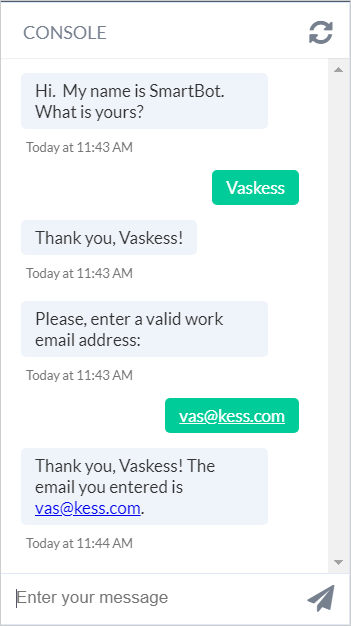
8. Let’s test the flow by typing the email keyword in the chatbot and hitting Enter (you may need to refresh the test console). If you type a wrong email address, the bot will give you the invalid message (see image above).
9. Let’s add a new TEXT card to the flow which will thank the user for his/her input (refresh the chatbot if you want to test the new flow):
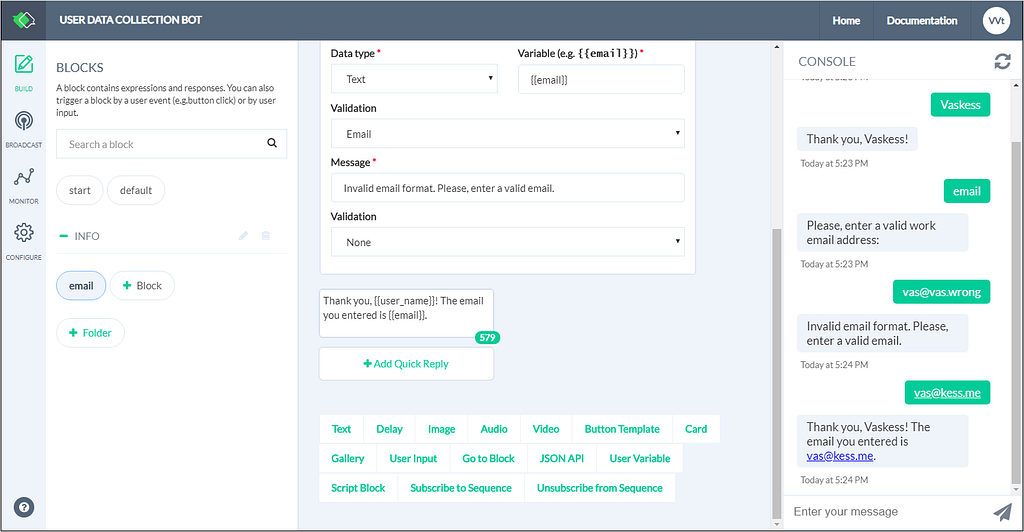
Well done! Your Smartloop chatbot will now store the user’s email.
Putting It All Together
It is easy to connect the two flows described in this article in one seamless chat flow. Go to your initial block (in my case it was the Start block) and add a Go To Block card, which to point to our email collection block:
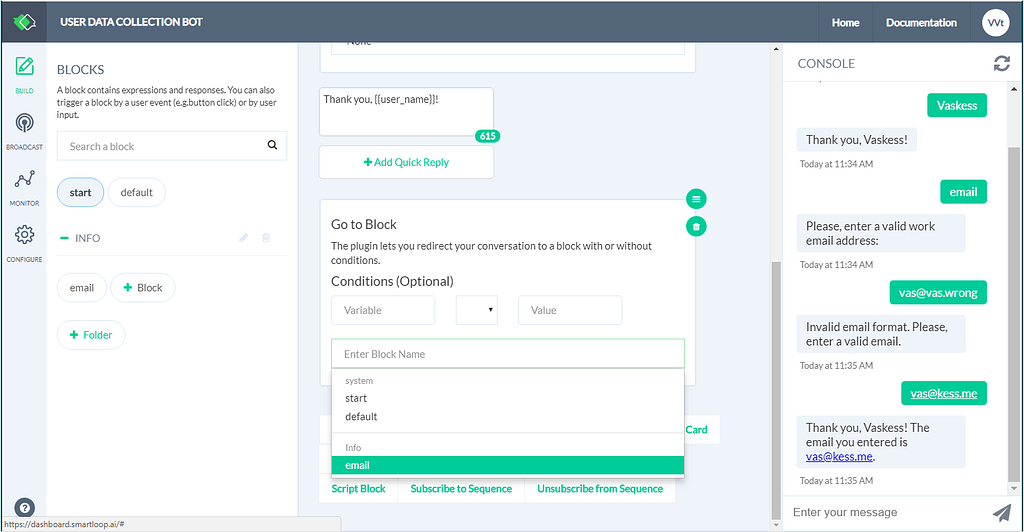
The Go To Block card instructs the bot to go to the email block once it completes the name collection process.
Hit refresh in the test console and go through the flow — you’ll see that don’t need to use any keywords anymore:
HINT: The Go To Block card allows you to design more complicated flows, based on conditions that are triggered by a user inputs or events. We discuss some of these scenarios in this blog article: Customizing a Conversation Flow Based on User Input
Questions? Comments? Let me know in the comments below.
Enjoy using the Smartloop chatbot platform! Please feel to reach out to us if you have any questions.
How to Collect User Data with a Chatbot was originally published in Smartloop on Medium, where people are continuing the conversation by highlighting and responding to this story.