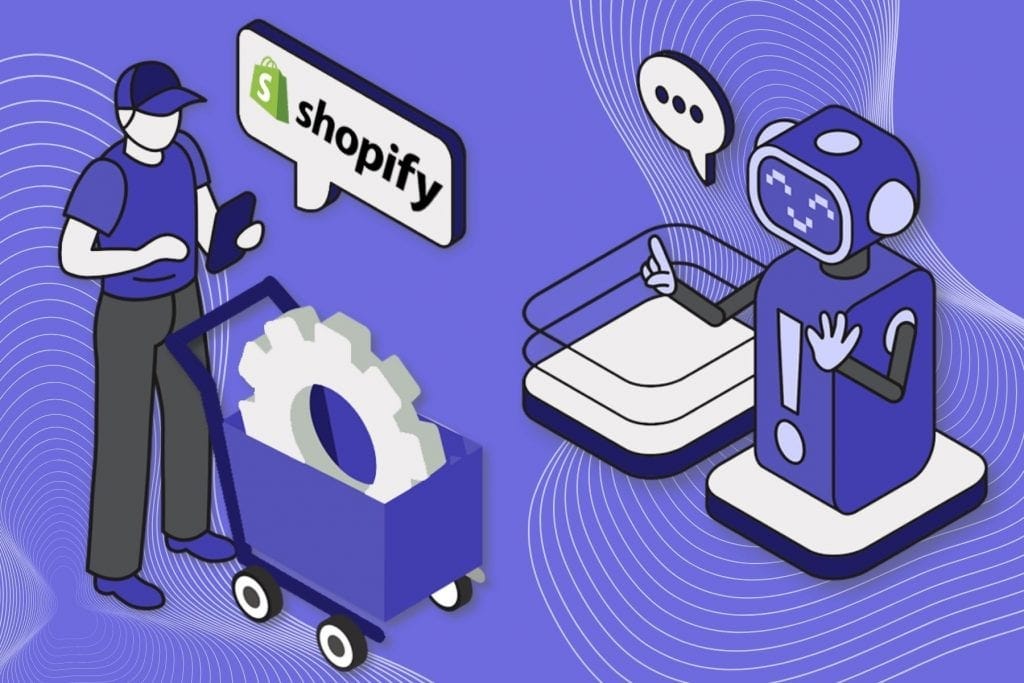
Shopify is one of the most widely used e-commerce platforms that have helped many businesses globally to go online by building their marketplace. It’s used by more than 800,000 vendors worldwide. While the customer is the pivot around which the eCommerce business works, it is essential to have effective customer engagement to enhance their experience and improve overall sales. This is where the Shopify bot comes in handy.
Bots have played an instrumental role in addressing the customer’s queries and converting them into active sales. Due to limited person power and the ever-increasing volume of customers on e-commerce stores, it is impossible to keep up without automation, AI and chatbots.
Benefits of Shopify ChatBot
In the e-commerce world, bots are bringing out a transformation. They are recreating the user experience with businesses and replacing it with an experience they have with friends. Some of the benefits of Shopify chatbots include,
- 24×7X365 support, they do not go on holidays
- Resolving queries
- Personalization
- Reduced costs
- Product guidance and onboarding
- Generating leads
- Driving sales
Now that we have concluded e-commerce stores need chatbots, let’s jump into making AI bots and deploying them on Shopify websites.
Trending Bot Articles:
2. Automated vs Live Chats: What will the Future of Customer Service Look Like?
4. Chatbot Vs. Intelligent Virtual Assistant — What’s the difference & Why Care?
Setup & Activate Shopify ChatBot
Step 1: Setup an account in Kommunicate
We will be using Kommunicate’s bot builder and chat UI plugin for this example. First, login to your Kommunicate dashboard and navigate to the Bot Integration section.
If you do not have an account, you can create one here for free.
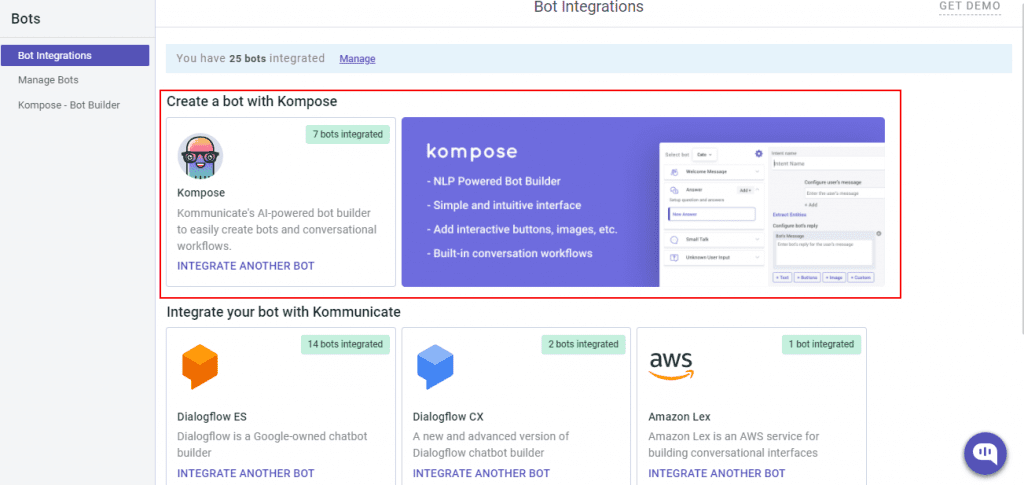
Locate the Kompose section and click on Integrate Bot. Kompose is Kommunicate’s AI-powered bot builder.
Now, set up your bot by providing bot name, bot language, human handoff setting, and finish the bot setup.
Additionally, Kompose has an in-built e-commerce bot template that you can use. It has multiple intents related to Shopify store operations such as order status, product catalogs, recommendations, FAQs, etc.
You can check your newly created bot in the below section:
- Dashboard →Bot Integration → Manage Bots.
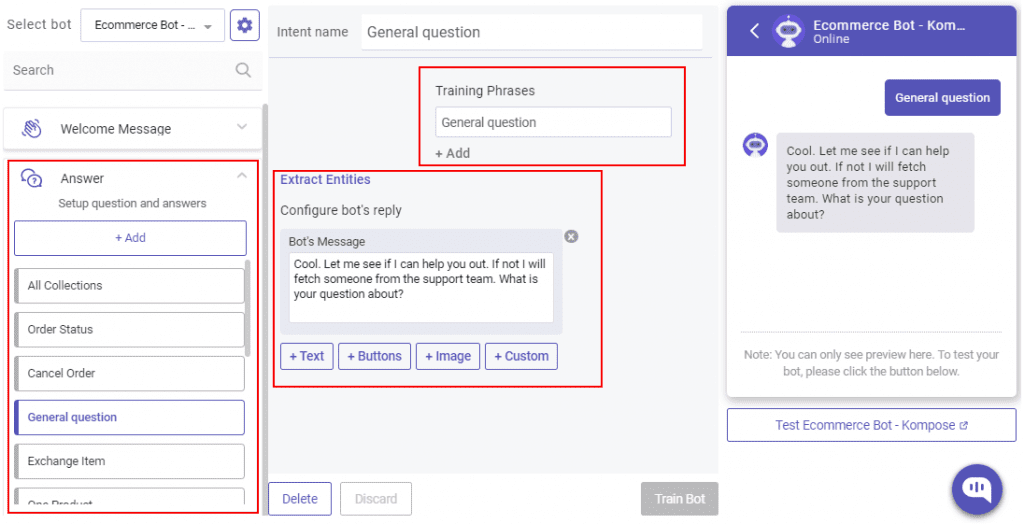
Step 2: Create welcome messages & answers for your Shopify Chatbot
Go to the ‘Kompose — Bot Builder’ section and select the bot you created.
First, set the welcome message for your bot. The welcome message is the first message that the bot sends to the user who initiates a chat.
- Click the “Welcome Message” section. In the “Enter Welcome message — Bot’s Message” box, provide the message your bot should be shown to the users when they open the chat and then save the welcome intent.
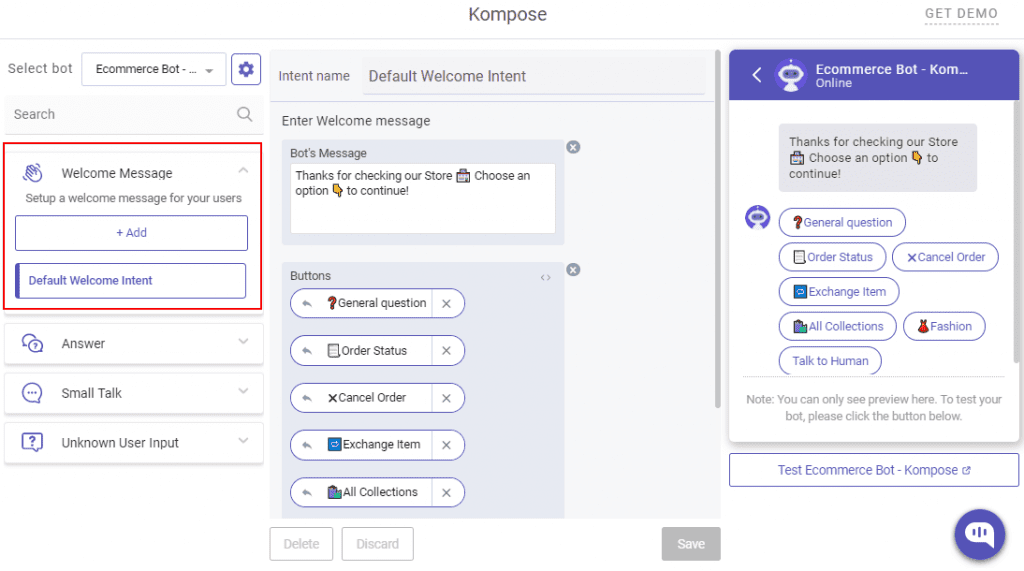
- If you are using the template, feel free to edit the intents as you wish.
After creating the welcome message, the next step is to create possible questions and answers for your Shopify bot.
The answers section is where you’ve to add all the user’s messages and the bot responses.
- Go to the “Answer” section, click +Add. Give a name to your Intent.
In the Configure user’s message section — you need to mention the phrases that you expect from the users that will trigger.
Configure bot’s reply section — you need to mention the responses (Text or as Rich messages) the bot will deliver to the users for the particular user’s message. You can add any number of answers and follow-up responses for the bot.
You can also refer to this blog or the video below for Kompose bot integration with Kommunicate.
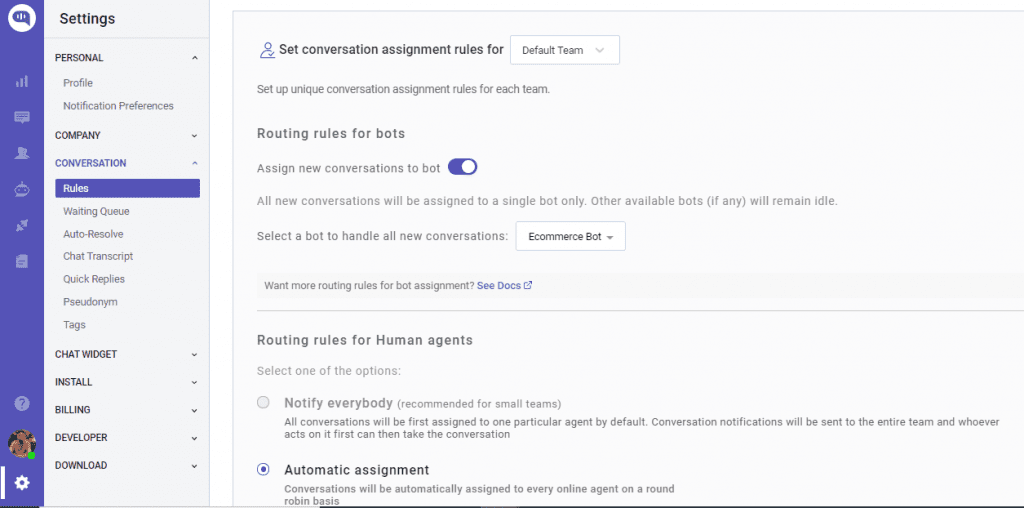
Step 3: How to activate the chatbot?
Once you create a bot, then you can set it as a default bot in the conversation routing rules section, as shown below.
- Click on ⚙️Settings >> Conversation rules >> Routing rules for bots >> Then click on bot like below and select your bot.
We have completed the bot setup. Now, this bot will reply in all the conversations. Next, let’s jump into deploying the bit on your Shopify store.
Add ChatBot to Shopify Websites
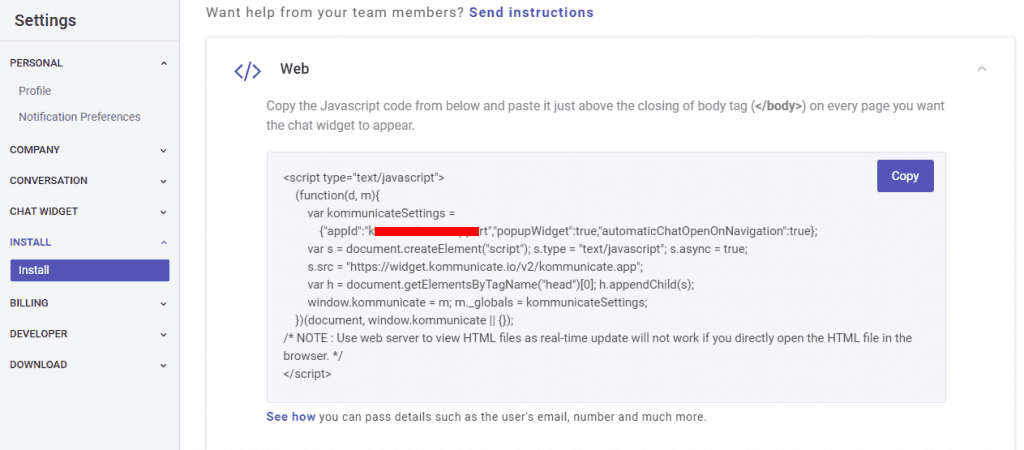
Step 4: Install Kompose bot into Shopify
Login to the Kommunicate dashboard. Navigate to the Install section under ⚙️Settings, where you will get the live chat plugin script. Copy the script.
Step 5: Log in to Shopify
Log in to your Shopify account. Click on Online Store.
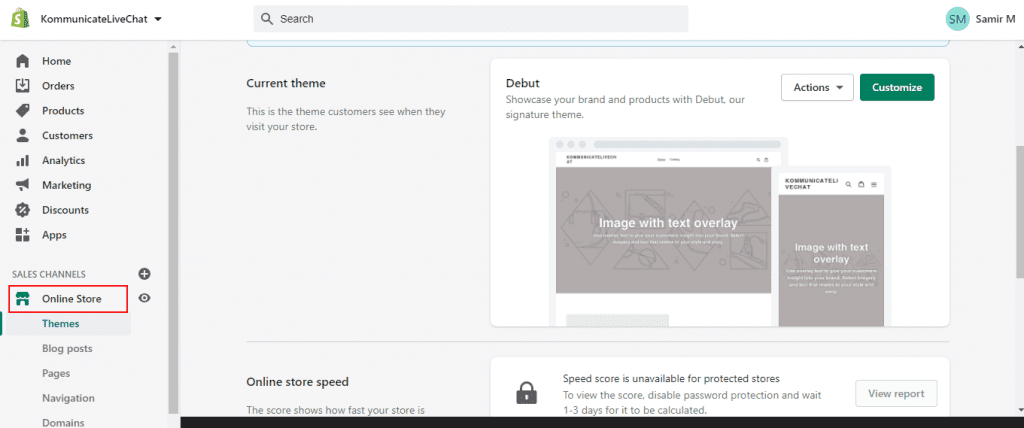
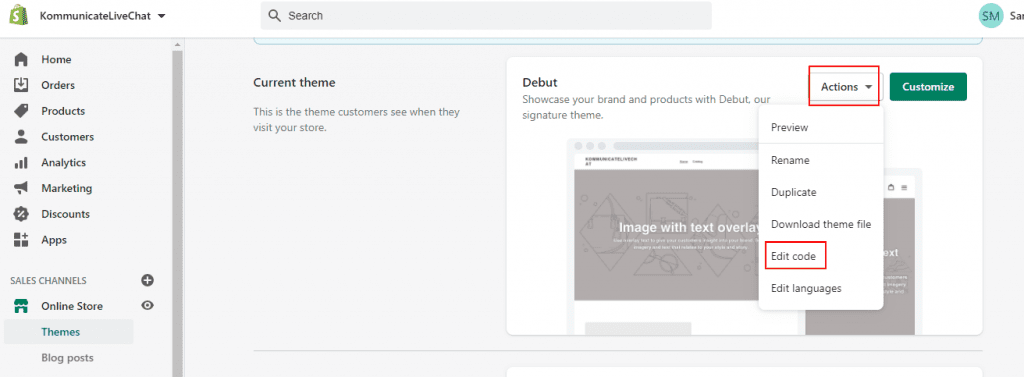
Step 6: Edit code
Navigate to the Themes section. Click on the Actions button and then click the Edit Code option.
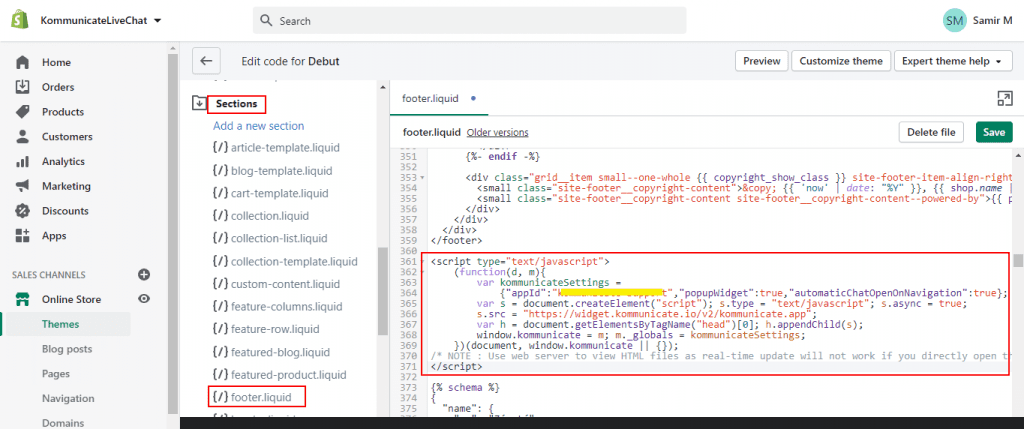
Step 7: Add Live-chat script
In the Edit Code section, go to the left side Edit Code for Debut panel and click on Sections.
Open the footer.liquid section and paste the copied live-chat plugin script just below </footer> tag. Click on Save.
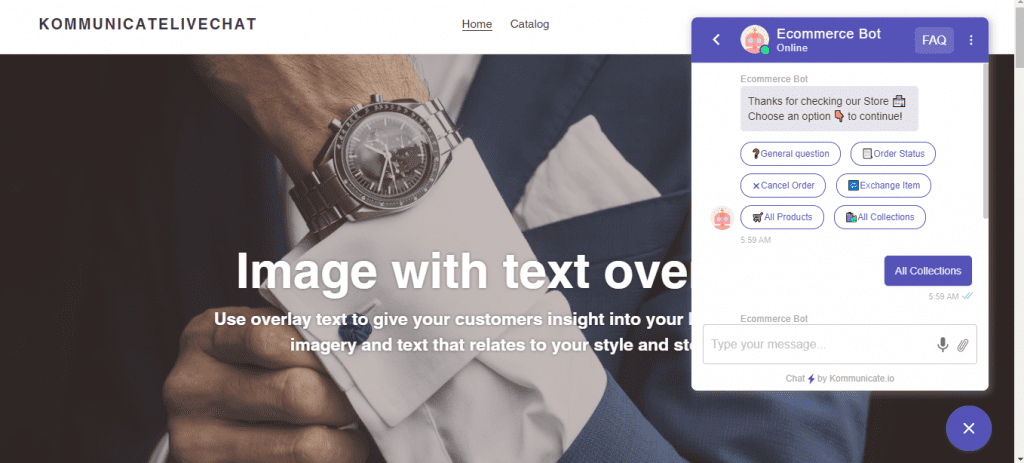
Step 8: Preview & Publish
After saving, click on Preview to see the changes. You will see the chat widget on the bottom right corner of the Shopify website.
Here’s a video to walk you through the Shopify integration with Kommunicate:
Wrapping Up
That’s all! In these easy steps, you can install the chatbot on your Shopify website. You can use your newly created Shopify chatbot to improve customer support, customer experience, and lead generation.
This article was originally published here.
Don’t forget to give us your 👏 !


Shopify Chatbot: How to Create & Automate Your Customer Support? was originally published in Chatbots Life on Medium, where people are continuing the conversation by highlighting and responding to this story.