A multi-tenant chatbot with Dialogflow — Part 2 ( Implementation)
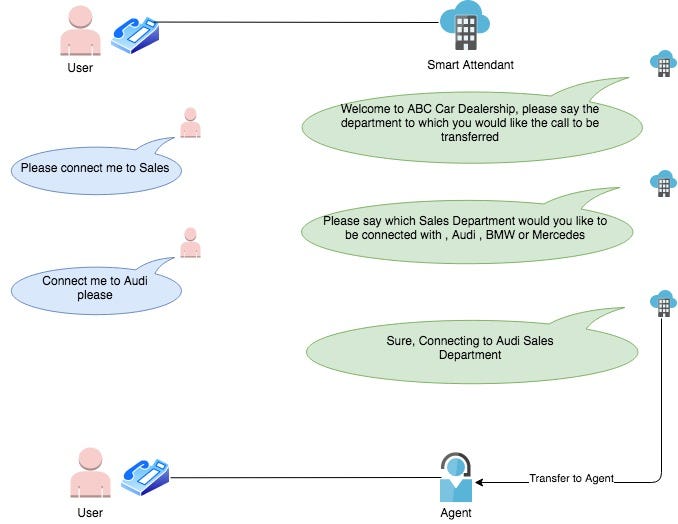
This article is a follow-up on my previous article on multi-tenant-chatbot with Dialogflow. Here, I am going to describe a step-by-step implementation of a multi-tenant Smart Attendant using Dialogflow described in my previous article.
Step 0: Clone my Github repo
maheshmahadevan/multi-tenant-chatbot
git clone https://github.com/maheshmahadevan/multi-tenant-chatbot
Step 1: Get a Dialogflow account
Go and sign up for Dialogflow ES services which offer basic Dialogflow features for free. Details on different offerings, pricing, and link to sign up are present here.
Step 2: Setup Agent and Intents
Once you have an account, you will need to set up an Agent, Intents, and Fulfillment webhook to get this working. In this step, we will cover the creation of the Agent and different Intents required for Smart Attendant.
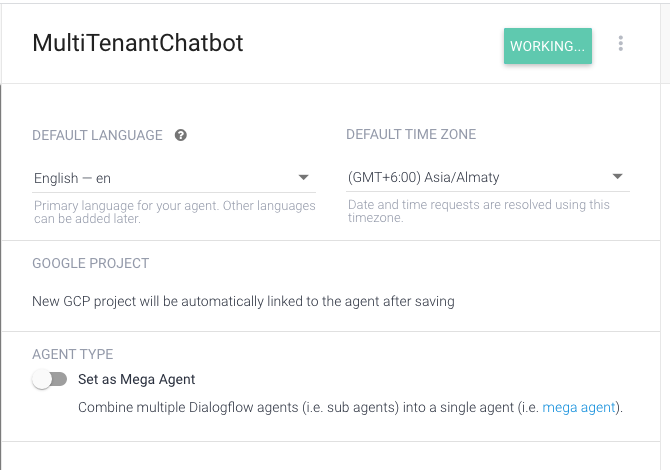
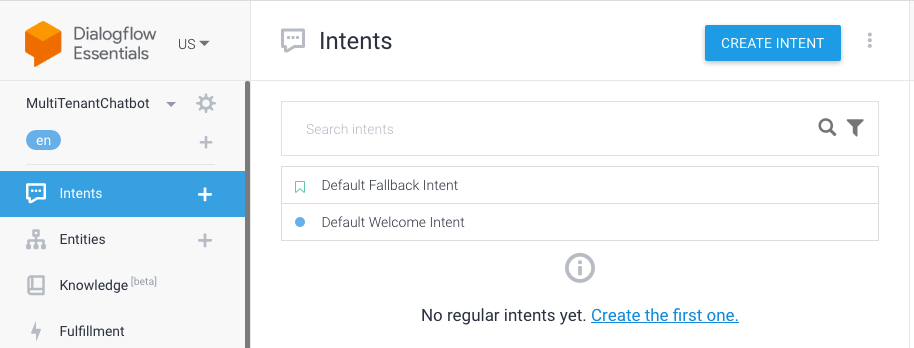
Create a new agent and name it. This will also create a new GCP project for you which we will need to use in the future to call our agent via API
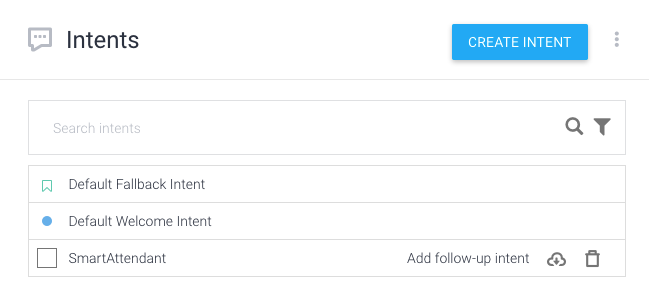
Create a New Intent and name it “SmartAttendant”
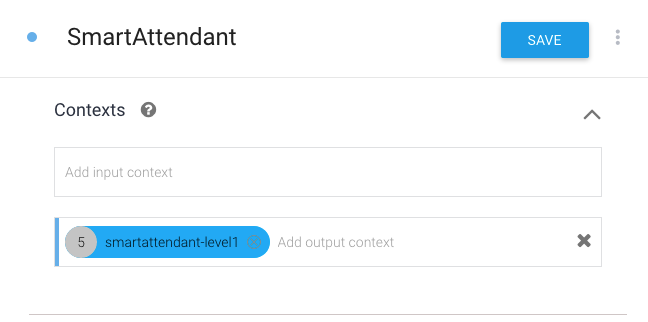
Add an outgoing context to this called “smartattendant-level1”. This context will help initiate our follow up intent.
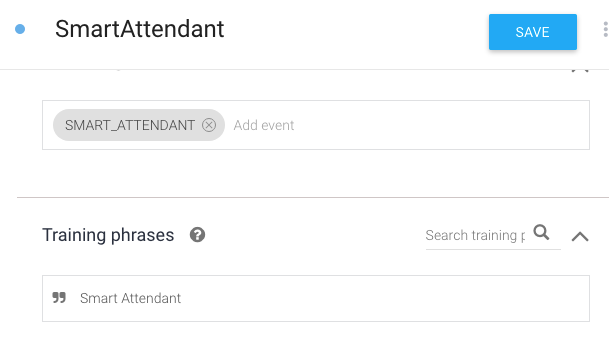
Fill in an event and training phrase to trigger this Intent. You only need one of them, but for the purposes of this exercise and testing we will add both.
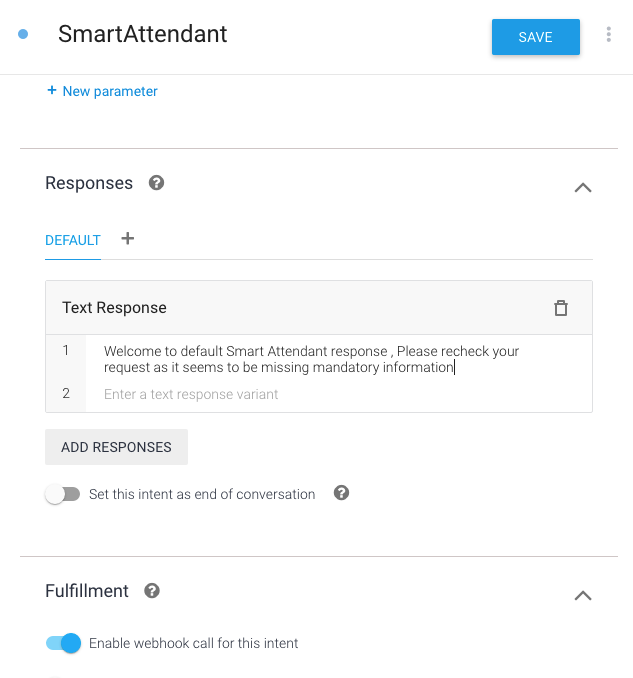
Add a default response to the Intent, ideally if we pass the right data this response should never be returned. Enable webhook call which will invoke the fulfillment API to add the tenant-specific response to this Intent. Details on how to setup fulfillment API are below.
Save the Intent. We need to add two more follow-up Intents. This Intent will serve as an entry point for the caller.
Before creating additional follow-up Intents, let’s create an Entity for Department. Entities are types in Dialogflow that help us extract Parameters from user inputs. In this scenario, we are looking to extract department names such as Sales, Service, etc from user input.

Next, create another Intent and update the input and output context as shown. Please note the input context for this Intent is same as output context from previous Intent.

Create two parameters called level1_dept and level2_dept and link them to the entity department we created previously. You can also mark level1_dept as a required field and add a default prompt in case it is not provided by user

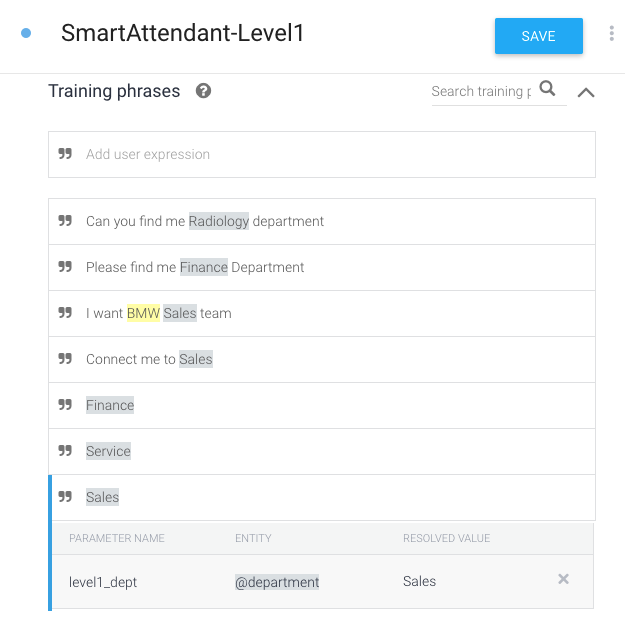
Add few training phrases for this Intent and suggest what the department names could be in those phrases. Also, Enable fulfillment webhook for this Intent
Create the next Intent to capture second-level departments when needed. Update the input context accordingly. There is no need for an output context here as this is supposedly our final Intent

Add the Training phrase and parameters. Please note, in order to carry forward the parameters from previous contexts, Dialogflow expects a “special syntax” in the value field as seen in the screenshot below. You can read in detail about this syntax here. Just like previous two Intenets, Enable fulfillment webhook on this Intent as well.

Trending Bot Articles:
3. Concierge Bot: Handle Multiple Chatbots from One Chat Screen
Step 3: Set up Authentication
Please follow the steps mentioned in this article to setup GCP authentication for the project. This is required to call Dialogflow agent via REST API from your local machine. You can get the name of the project from the Dialogflow agent dashboard.
Step 4: Set up Fulfillment Webhook
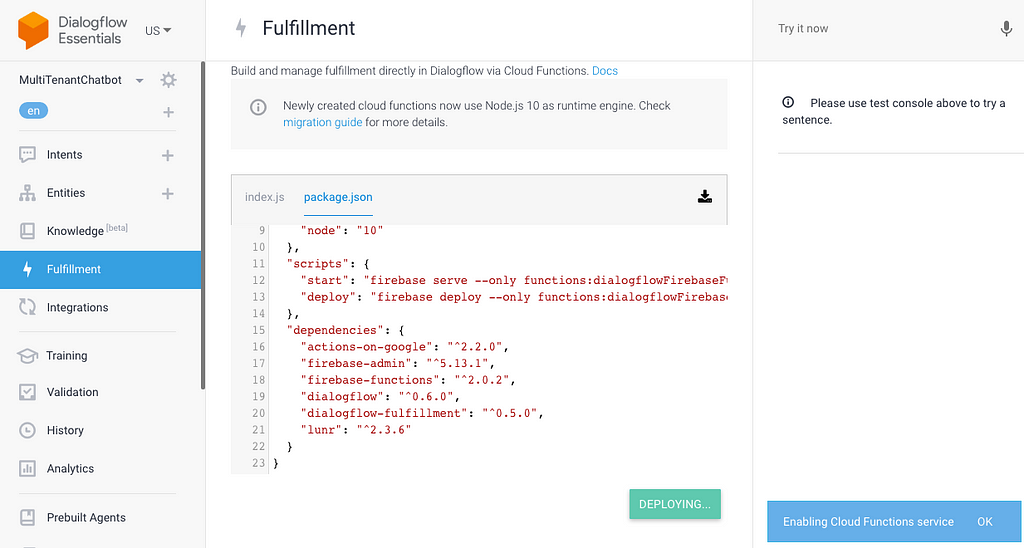
Enable fulfillment webhook by using the Inline editor checkbox. You can also create a webhook outside of Dialogflow, but this is outside the scope of this article.
As soon as you enable the Inline Editor on Fulfillment, you will notice a pop-up as illustrated below. What this means is that you will have to set up your billing on the corresponding google cloud project in order to use this functionality. If you only intend to use this project for learning/development purposes, the first 2 million invocations of cloud functions every month are free ( as of 26th March 2021), so you should be covered unless you decide to go beyond that number of invocations. Please refer to their official pricing information page for more details.
Once the billing is enabled, copy the fulfillment-index.js and package.json from multi-tenant-chatbot/fulfillment-api folder of the cloned repository.
Press Deploy and wait for it to finish the deployment on the GCP.
Step 5: Invoke Intent Detection Rest API
Go to the cloned repository of multi-tenant-chatbot and run npm install command
Start the server once the npm install command is finished
> npm install
... ** Wait for the install to finish **
> node server.js
Started listening at port - 3000
Call the rest end-point to initiate conversation with SmartAttendant.
The first call will invoke the Smart Attendant using the event. In addition, you will need to also pass a couple of custom payload information for customer identification and the time of the day when this call is initiated. These payload data are in turn forwarded to fulfillment-api webhook which uses them to identify the correct response to be sent back to the user as per the configuration.
---First call to initiate Smart Attendant for customer abc_car during the afternoon time. Feel free to change the time to evening to see the response---
curl -X POST -H 'Content-Type: application/json' http://localhost:3000/intent/detectintent -d '{ "projectId": "<YOUR_GCP_PROJECT>", "event": "SMART_ATTENDANT", "languageCode" : "en-US", "payload" : { "fields" : { "customer" : { "stringValue": "abc_car", "kind": "stringValue" }, "time" : { "stringValue": "afternoon", "kind": "stringValue" } } } }'
---Response---
{
    "sessionId": "dfeaacwf-6d7f-4a05-ab3e-da2b98f72c2b",
    "responseText": "Welcome to ABC Car Dealership, please say in words where you want to redirect your call , for example , say Sales or Connect me to Service"
}
I am sure you might be wondering what is the relevance of sessionId in the response. SessionId field in the Intent Detection API manages and binds the contexts of Intents over multiple calls. In short, we will need to pass this context in our subsequent call for Dialogflow to bind the query to this session. Any contexts and their parameters stored in the session will be available for fulfillment of the query bound with that specific session.
---Second call.User wishes to speak to a Sales agent, use the sessionId from first response in the input json. ---
curl -X POST -H 'Content-Type: application/json' http://localhost:3000/intent/detectintent -d '{ "sessionId": "<SESSION_ID_FROM_PREVIOUS_RESPONSE>", "projectId": "<YOUR_GCP_PROJECT>", "query": "Sales please", "languageCode" : "en-US", "payload" : { "fields" : { "customer" : { "stringValue": "abc_car", "kind": "stringValue" }, "time" : { "stringValue": "afternoon", "kind": "stringValue" } } } }'
--Response. Since this particular Departments has sub-departments, the intent responds back asking to which specific Sales department does User wish to speak---
{"sessionId":"<SESSION_ID_FROM_PREVIOUS_RESPONSE>",
"responseText":"BMW , Audi or Mercedes"}
---Third Call ... User wishes to speak to a Mercedes agent.---
curl -X POST -H 'Content-Type: application/json' http://localhost:3000/intent/detectintent -d '{ "sessionId": "<SESSION_ID_FROM_PREVIOUS_RESPONSE>", "projectId": "<YOUR_GCP_PROJECT>", "query": "Mercedes", "languageCode" : "en-US", "payload" : { "fields" : { "customer" : { "stringValue": "abc_car", "kind": "stringValue" }, "time" : { "stringValue": "afternoon", "kind": "stringValue" } } } }'
--- Final Response and completion of Intent, User will be redirected to Mercedes Sales agent. As you can notice, Dialogflow made use of the session data to fill in the level1_dept i.e "Sales" passed in the previous query, in its response. ---
{"sessionId":"<SESSION_ID_FROM_PREVIOUS_RESPONSE>",
"responseText":"Trying to contact someone from Sales in Mercedes"
That’s all folks. I hope you liked the above implementation and can find some good use-cases for it. Drop me a note or create a GitHub issue if you see any problems or bugs with the above setup. Enjoy !!
Don’t forget to give us your 👏 !


A multi-tenant chatbot with Dialogflow — Part 2 ( Implementation) was originally published in Chatbots Life on Medium, where people are continuing the conversation by highlighting and responding to this story.