A Smartloop Conversation Platform Step-by-Step Tutorial

In this tutorial you will learn how to:
- Set up your Smartloop chatbot to send an email with information collected from the chatbot by using Zapier. Zapier is an automation tool (or “glue”) for integrations — in this case an integration between a Smartloop chatbot, Zapier and sending an email to a particular mailbox.
Notes:
- This tutorial uses the data collected from a Smartloop chatbot, as described in How to Collect User Data with a Chatbot
- This tutorial is level 101, i.e. it is for everyone. It doesn’t require previous programming knowledge
- Everything in this article is valid for all channels that Smartloop supports for publishing chat bots on: website, Messenger, Viber, WeChat, etc.
Create Your Zapier Account
(if you have one, go to step 3)
1. Go to https://zapier.com/ and enter the details, needed to create your account.
2. If you see the “Find Smart Ways to Save Time” popup, choose any app (say Google Sheets) and click Finish Setup. This step is not important for this tutorial and you can edit this information later.
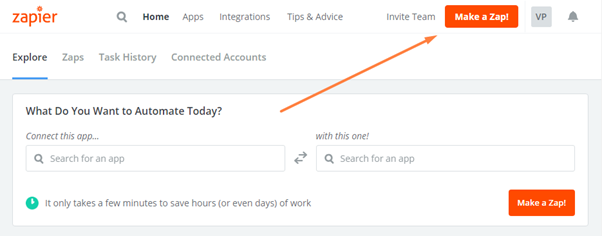
3. Click on “Make a Zap!”:
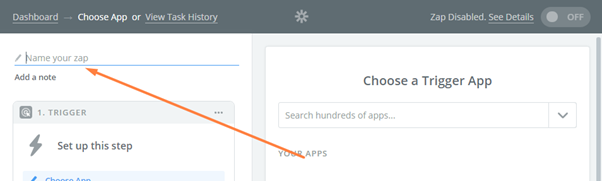
4. Name your ZAP with a descriptive name:
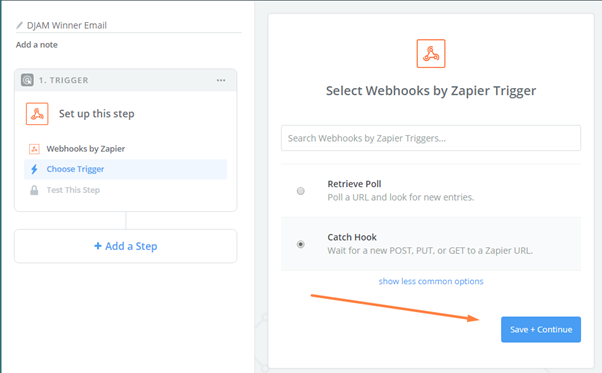
5. Scroll down, locate and select the built-in app, called Webhooks:

6. Once you select Webhooks, Zapier will ask whether this is a “Catch Hook”. The Catch Hook will wait for a new “message” to be sent to a Zapier URL (from your Smartloop chatbot). The URL will be created in following steps. Confirm the catch hook by pressing Save + Continue:
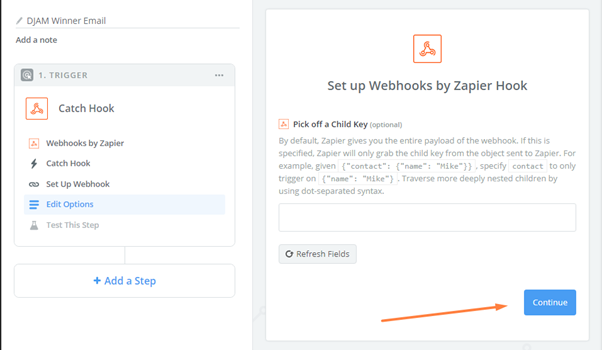
7. The next screen a set up screen which we will skip, because it is not needed for this tutorial. Press Continue:
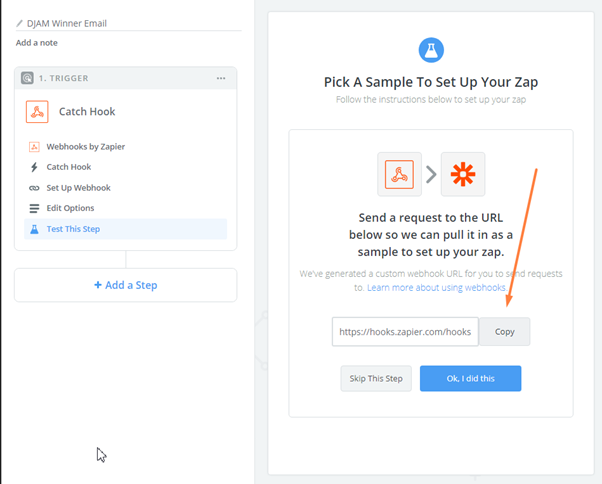
8. On the next screen, which is “Test This Step”, Zapier will give you a custom unique URL for you to send your chatbot requests to. Copy the URL — we will need it in your Smartloop chatbot:
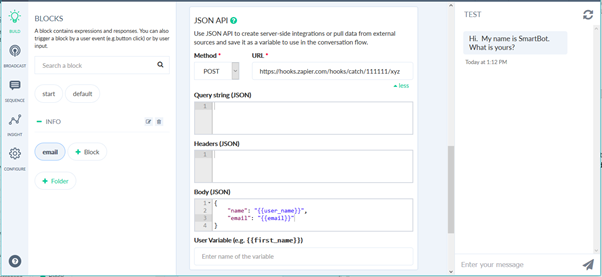
9. Leave Zapier as is for now, and let’s go to your Smartloop chatbot (in a new browser tab). Locate the block where you collect the last bit of information about your user. In my case I will use the bot described in How to Collect User Data with a Chatbot and I will open the email block:
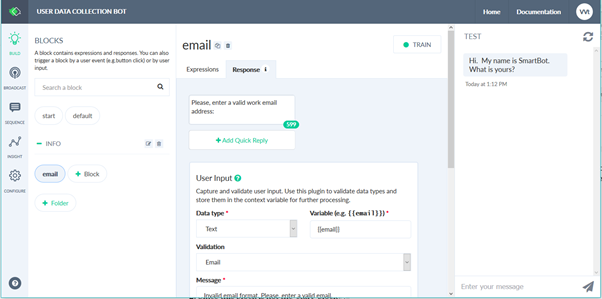
In this bot, I collect two types of data points (also called variables):
- {{user_name}} which stores the name that user has entered and
- {{email}} which stores the email that the user has entered
10. In the block where you collect the last bit of information about your user, add a JSON API card:
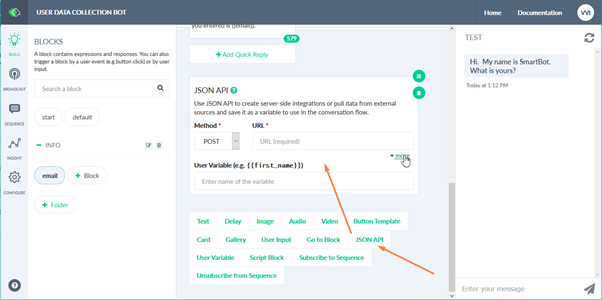
We will use this card to integrate with Zapier. Since Zapier is set to “catch” the data, we need to set Smartoop to “post” the data, so we’ll leave the Method to post, as shown above.
11. Paste the URL which Zapier provided you in the URL field. Also, click on “more” to expand the card:
Once you expand the card, you will see different sections. The Query section can be used to filter, sort and aggregate the data you send to Zapier (which we will not do here). The Header section will not be used either for the current example. We will only use the Body section.
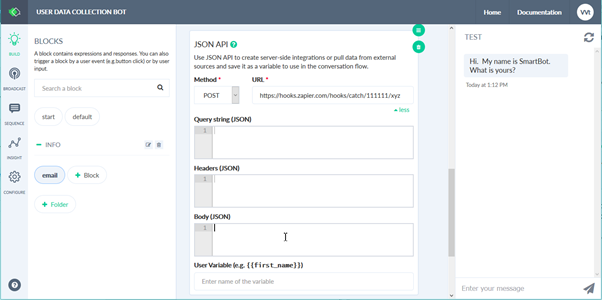
12. In the Body section we will enter the information which we want to send to Zapier (and ultimately to our email) in the following format (don’t forget to add the curly brackets — they are important for the JSON API to work properly):
{
“name”: “{{user_name}}”,
“email”: “{{email}}”
}
With this we give names to our variables and instruct Zapier what to handle and how:
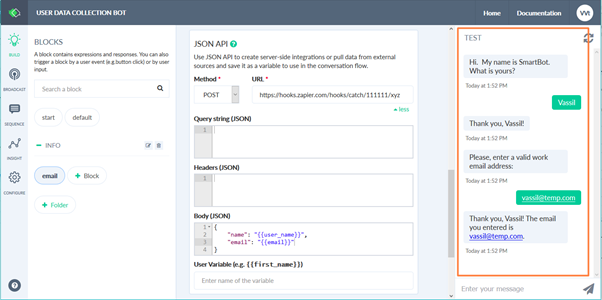
13. If you recall, in step 8, Zapier is still “waiting” for the test to go through, so let’s go through the bot flow and collect the needed user information (you can do it in the Test console as well) — once this is done, Zapier will receive the name and email of the user and will have finished the test:
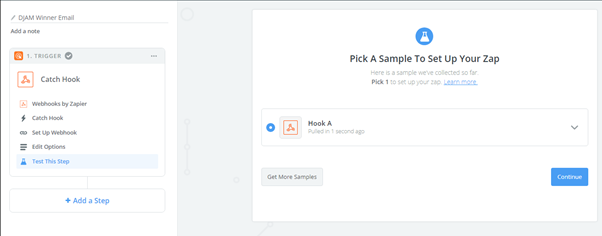
14. Once you finish entering the data, go back to Zapier and click on “Ok, I did this”. This will bring you to a screen, which will confirm that the zap worked (if you don’t see that screen, check the URL you entered in Smartloop for completeness, and also check the body in the JSON API card for errors):
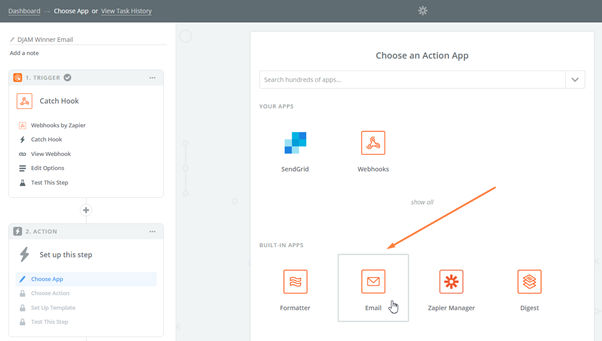
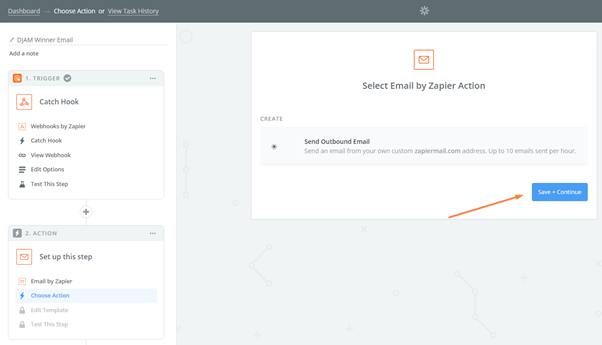
15. In Zapier, click Continue to add an Action step. This is the step where we will define what Zapier needs to do with the data it is receiving from your bot, i.e. to send it an email. Scroll down, locate and select the built-in app, called Email:
16. Since we will be sending an email, click on Save + Continue on the next screen:
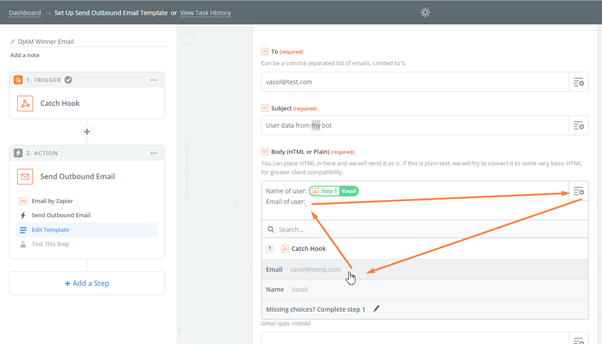
17. On this screen we will “compose” our message. In the TO field enter the email address where the user data will be sent to; in the SUBJECT field enter the subject of the email and in the email BODY enter the text you would like to be sent in the email. Use the “Insert a field” button to add the fields which Zapier is getting from the bot:
18. Click Continue and feel free to send a test email. Of course, you can always go back and edit the email contents to suit your needs, so feel free to play around.
19. Once you test the whole process, click FINISH and turn on your ZAP:
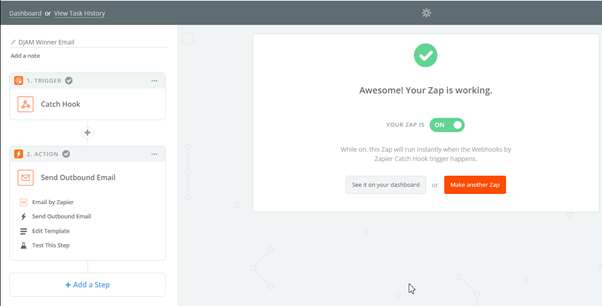
You can test a few more times and play around before going live. Note that Zapier turns the zap off when you make changes, so make sure that your zap is on (green) and working before going live.
That’s it! Enjoy!
How to Send an Email from a Smartloop Chatbot using Zapier was originally published in Smartloop on Medium, where people are continuing the conversation by highlighting and responding to this story.